Inclined plane assembly – PASCO ME-9502 Statics System User Manual
Page 10
S t a t i c s S y s t e m
C o m p o n e n t s P a c k a g e ( M E - 9 5 0 5 )
®
6
012-12876B
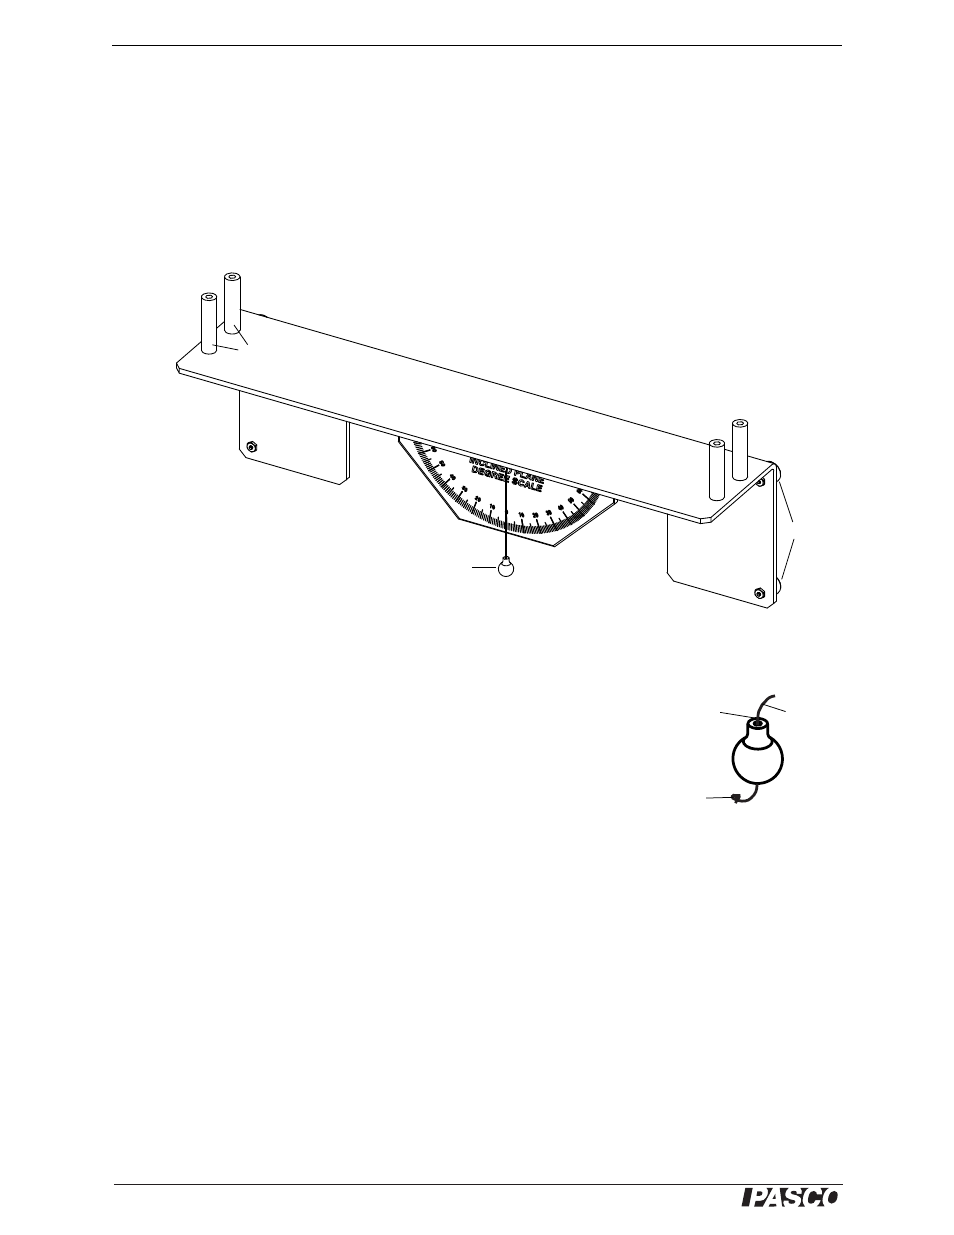
Inclined Plane Assembly
The Inclined Plane Assembly has four strong magnets on its back side that hold it in position on the Statics Board.
CAUTION: The magnets on the Inclined Plane Assembly are not covered with protective material.
Be careful to firmly hold the inclined plane when placing it on the board so that the magnets are
not damaged by “snapping” against the board.
The inclined plane has end stops at each end of the plane and a degree scale with a brass plumb bob for determin-
ing the angle of the incline.
Replacing the Plumb Bob
The ME-9504 Spares package includes a spare plumb bob (brass weight). To
replace the plumb bob, use a Phillips head (“crosshead”) screwdriver to loosen
the screw on the back of the degree scale. Remove the piece of thread and get a
new piece approximately 10 cm (4”) long. Put one end of the thread through the
hole in the brass weight and tie a double knot in that end of the thread so it will
not slip back through the hole. Put the other end of the thread through the small
hole near the top of the degree scale. Adjust the length of the thread so the plumb
bob can swing freely and then wind the end of the thread around the screw on the
back. Tighten the screw to hold the thread in place.
Inclined Plane Assembly
End stops
Plumb bob
Brass Weight
Put thread
through
the hole.
Tie a
knot.
Thread
Magnets