Printhead assembly removal and replacement – CognitiveTPG CRx User Manual
Page 76
72
Chapter 11: Cleaning and Preventive Maintenance
2) Clean the printhead (A), platen (B), and the index sensors (C and D) with a soft, lint-
free cloth saturated with 99 percent isopropyl alcohol.
3) Turn the printer on and press the FEED button to clean all sides of the roller.
CAUTION! INCORRECTLY CLEANING THE PRINTER WILL CAUSE PERMANENT DAMAGE
AND VOID THE PRINTER’S WARRANTY. CognitiveTPG RECOMMENDS USING A CERTIFIED
CLEANING PEN FOR ALL THE PRINTER’S CLEANING REQUIREMENTS.
Please refer to Chapter 12 for technical support contact information and to find an
authorized repair center near you.
Printhead Assembly Removal and Replacement
NOTE: IF THE C SERIES PRINTER IS WITHIN THE WARRANTY PERIOD, THE USER MUST
SEND THE PRINTER IN TO AN AUTHORIZED REPAIR CENTER. ALL USERS MUST NOT
REPLACE THE PRINTHEAD ASSEMBLY OR PLATEN ASSEMBLY IF THE PRINTER IN UNDER
WARRANTY.
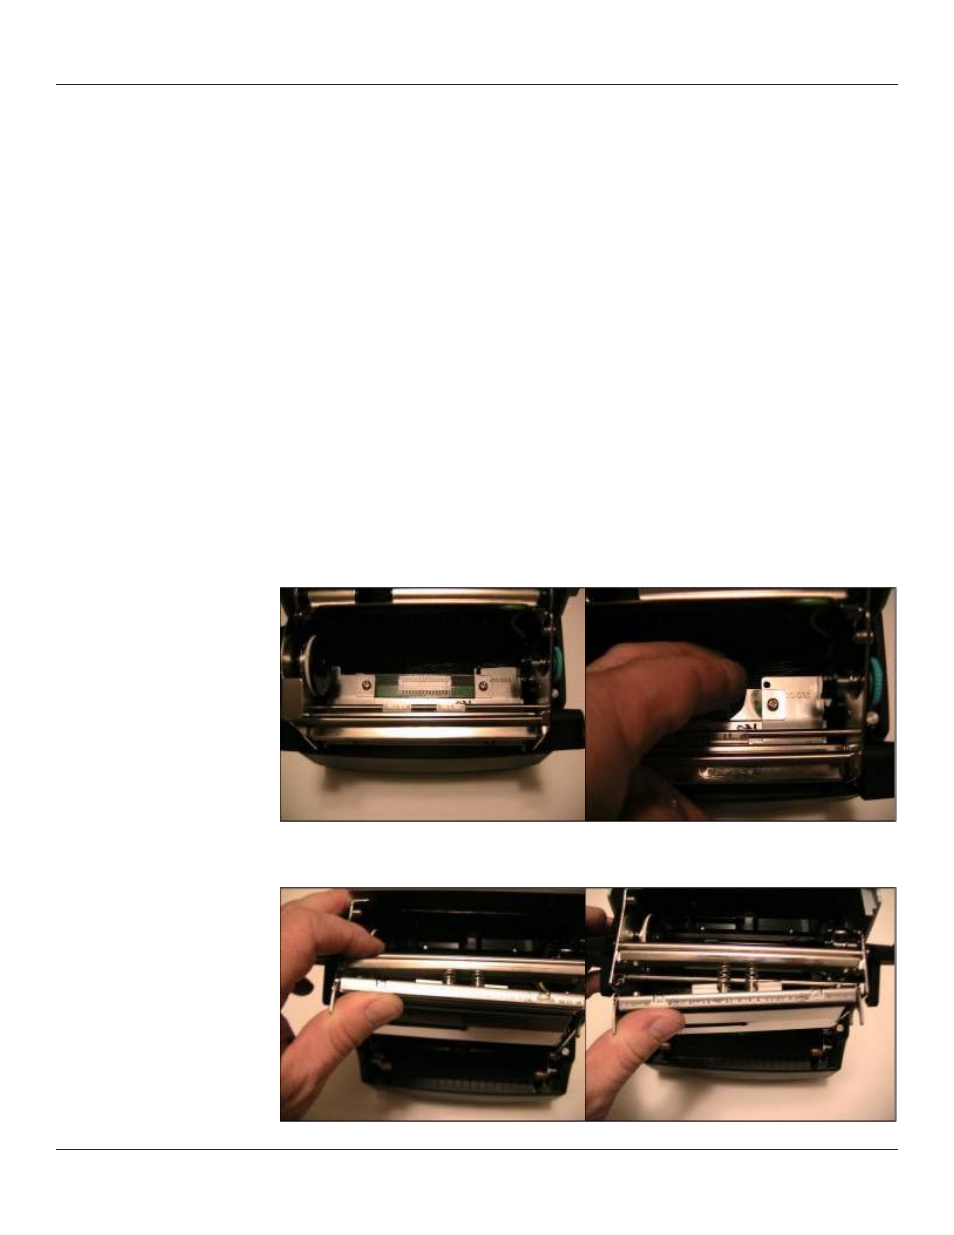
Printhead Assembly Removal
1) Open the User Interface Cover and carefully cut the cable tie located on the right-
hand side of the printhead bracket.
2) Remove the printhead assembly from the mechanism by lifting the left side
printhead bracket tab off of the mechanism platform as shown.