3 configuring alarms – Alpha Technologies Cordex Controller Ver.3.1x User Manual
Page 60
0700015-J0 Rev B
58
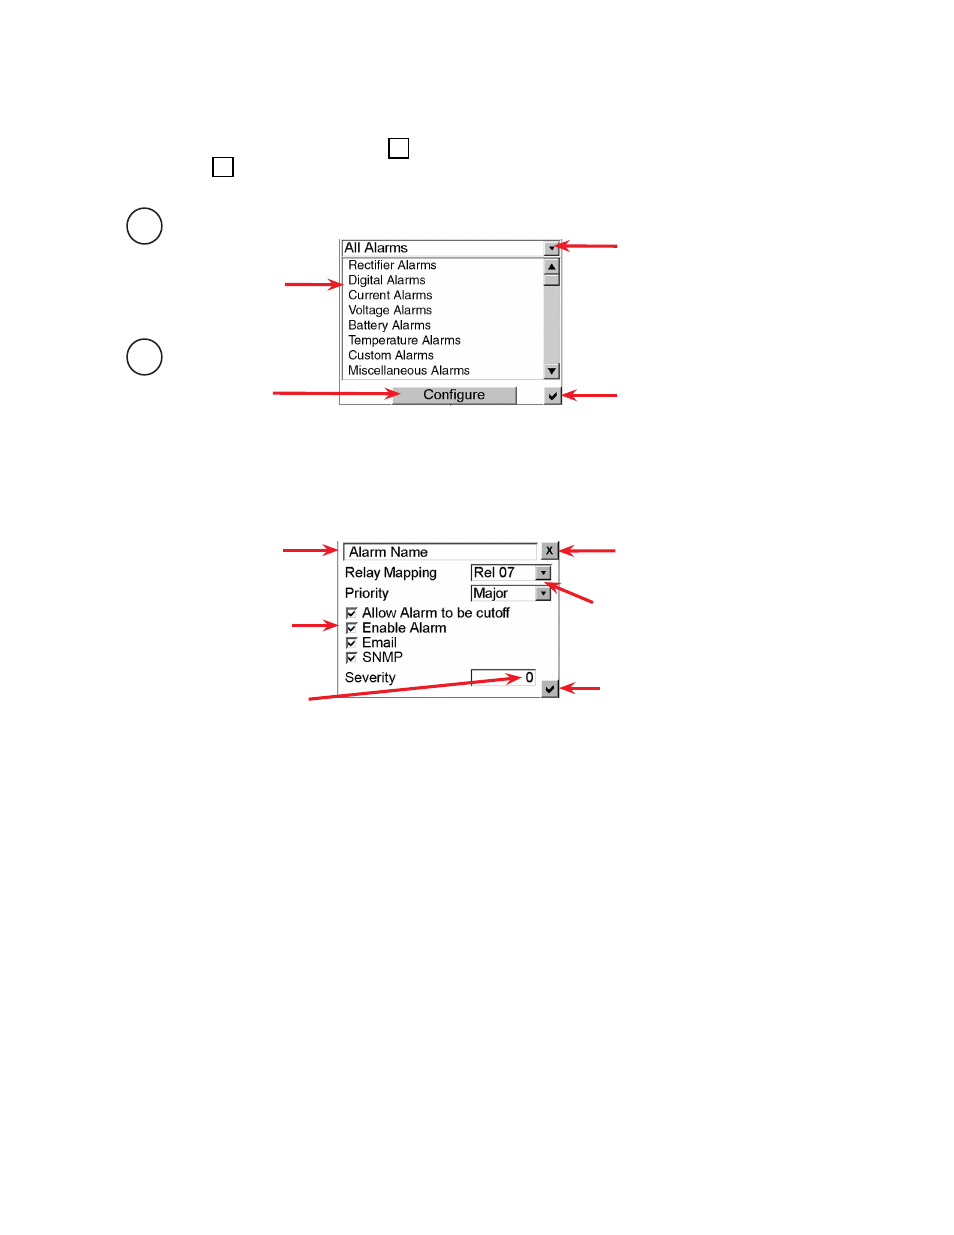
A new window appears with the folllowing parameters:
Alarms cannot be mapped to a relay unless the alarm is enabled. Disabling an alarm that is mapped to a
relay will free up that relay.
In the LCD screen, relays already in use have a tilde “~” character beside the relay number.
Some parameters are factory set and are not displayed under the Configure window for all alarms. Here
are some of the additional parameters the Supervisor can expect to encounter:
Activation
— Select from the pull-down menu; e.g., High or Low.
Activation Value
— Tap on the number to edit via a virtual numeric keypad.
Equation
— Tap Customize to edit (via Custom Alarms window).
Source
— Select from the pull-down menu; e.g., Dig1 through Dig8.
Figure 62 — Alarms > Configure Alarms
Figure 63 — Edit Alarm Parameters (Example
Name of alarm being edited
Toggle the check box to select.
When selecting SNMP, the severity
level (numeric) can also be set.
Discard changes and return to
previous screen
Select from the pull-down menus:
Relay Mapping – N/A or relay 1 through 16.
Priority – Major, Minor or Message.
Accept changes and return to
previous screen
6.6.3 Configuring Alarms
LCD Interface
From the the MAIN MENU screen (2.1 ) tap Alarms. The pull-down menu lists the alarm categories
shown in 2.1 as well as ADIO and Converter Alarms.
Select alarm category to
list associated parameters.
Tap Configure to edit
selected alarm category
Pull-down menu for alarm categories
Accept changes and return to
previous screen
2
1