Serial communication, cont’d, Firmware upgrade through the extron web site – Extron Electronics VTG 400D_400 DVI User Guide User Manual
Page 64
Serial Communication, cont’d
VTG 400D/400 DVI • Serial Communication
3-28
Firmware Upgrade Through the Extron Web Site
The VTG’s firmware is upgraded by going to the Extron Web site, downloading
the latest firmware to the PC, then uploading and installing the new firmware
from the PC to the VTG via the video test generator’s RS-232 port.
Downloading the latest firmware to the PC
1.
Go to the Extron Web site (www.extron.com) and select the product category
(VTG 400/400D/400 DVI).
2.
Select the Support files tab and click on the Firmware link.
3.
Download the firmware install package to your PC. It will have a filename
ending in .exe, such as VTG400_FW1x01.exe.
4.
Save the file to your PC, and run the executable file. By default, the program
will extract the firmware file and its release notes to
C:\Program Files\Extron\Firmware\VTG400
.
Uploading the firmware from the PC to the VTG
1.
Connect the PC to the VTG via the video test generator’s RS-232 port.
2.
Start the control program (see Using the control program earlier in this
chapter).
3.
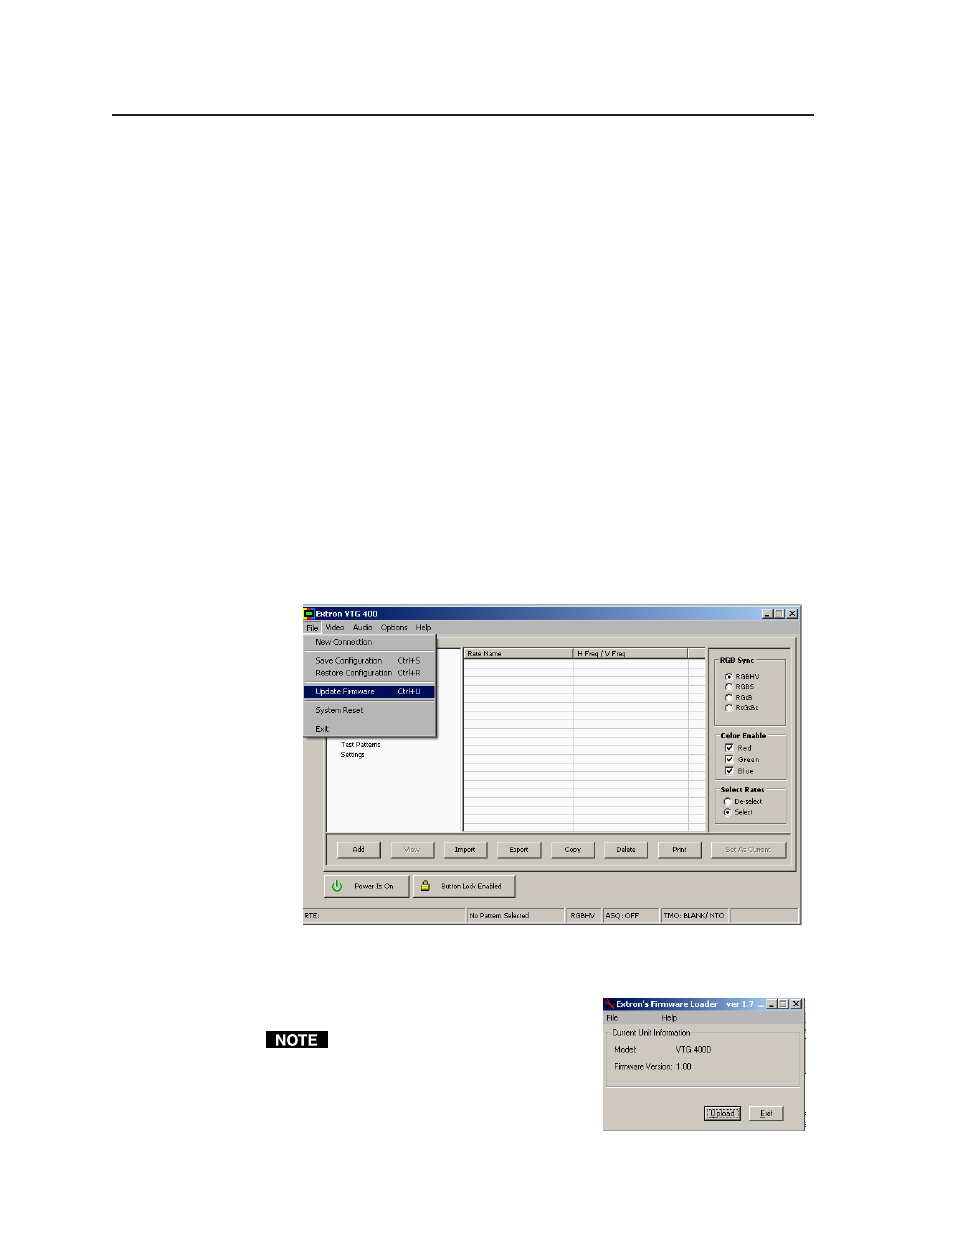
Select Update Firmware from the Control Program window and follow the
on-screen instructions.
4.
Select Upload from the Firmware Loader window, as shown at right.
5.
Select the desired firmware file. The uploading of the firmware to the VTG
will take a few minutes.
The original factory-installed
firmware is permanently available on
the VTG. If an attempted upload of
new firmware fails for any reason, the
VTG reverts to the factory-installed
firmware.