Configuring a group master – Extron Electronics DMP 64 User Guide User Manual
Page 77
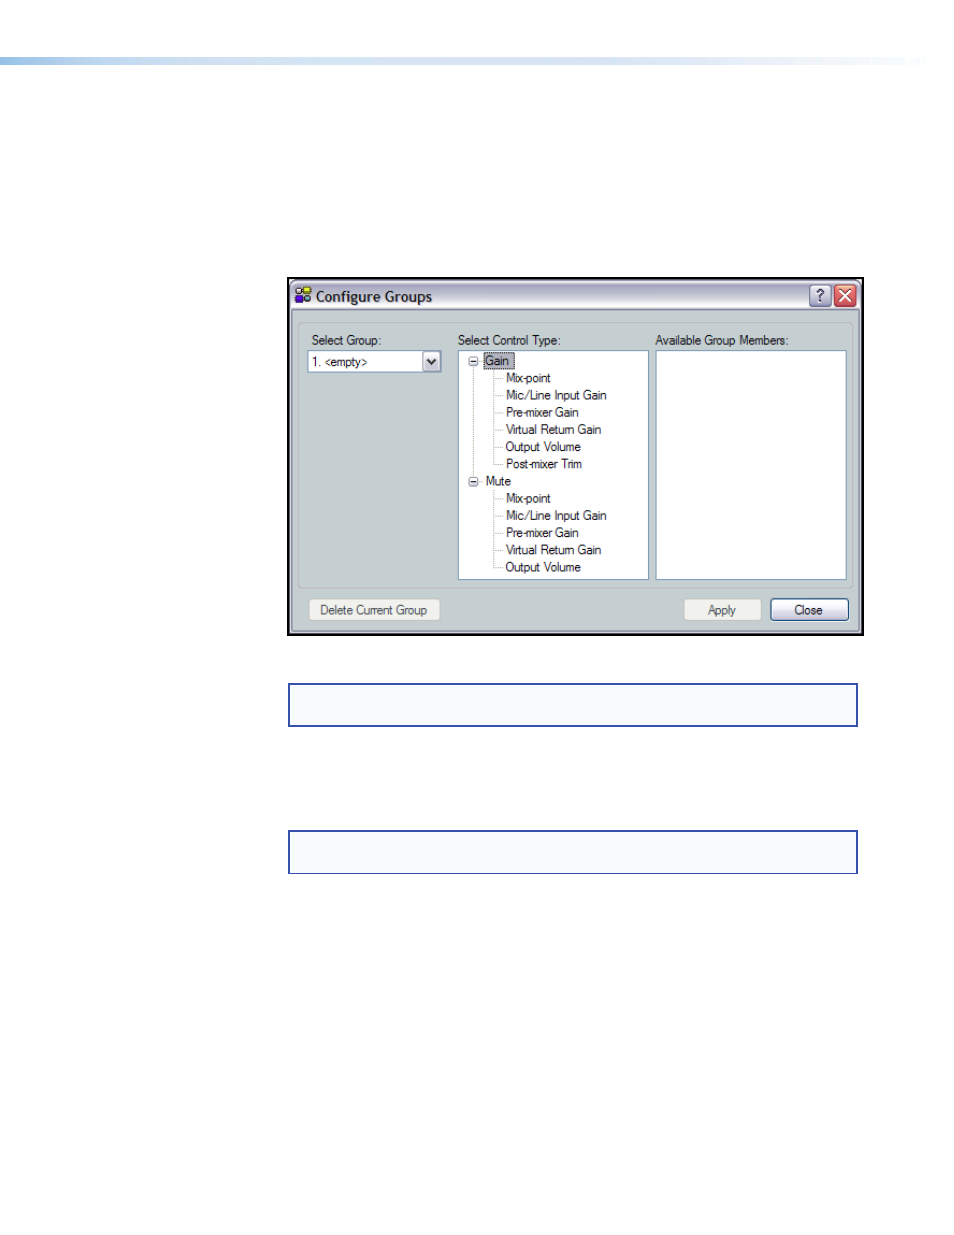
Configuring a Group Master
Configure a group as follows:
1.
Click
Tools > Configure Groups
to open the Configure Groups dialog box,
or click
View > Group Controls
and then click the
Add a Group
menu selection.
2.
In the
Select Group
drop-down box, click a group to select it (see figure 48). The
list defaults to the first empty group. Select an empty group to begin a new group, or
select an existing group to modify.
Figure 48.
Configure Groups Add Group Dialog Box
NOTE:
groups have no group members assigned. Numbered groups
(such as
) have controls assigned that can be overwritten if selected.
3.
In the
Select Control Type
section, expand the tree for the type of control,
Gain
or
Mute
, then select the desired control type. When a selection is made in the
Select
Control Types
section, the
Available Group Members
section populates with all
possible members for the selected control type.
NOTE: Potential group members in step 3 that are assigned to a different group
are displayed in
blue
.
4.
In the
Available Group Members
section, make appropriate selections by clicking
the checkbox. When a + sign exists, click to expand the tree and select individual
controls. Up to 16 group members can be added.
5.
Click the
Apply
button to create or configure the group.
6.
Repeat steps
2 through 5 to create or configure up to 32 groups.
7.
Click the
Close
button to exit the configure groups dialog box.
DMP 64 • Software Control
71