Starting front panel emulation – Paradyne ACCULINK 317x E1 User Manual
Page 152
ACCULINK 317x E1 DSU/CSU
G-2
December 1996
3170-A2-GB20-20
Starting Front Panel
Emulation
If the E1 DSU/CSU selected is not locally attached to
the PC, you must first dial to the remote E1 DSU/CSU
before starting front panel emulation. The modem
attached to the PC must support AT commands for the
Front Panel Emulation software to successfully place the
call.
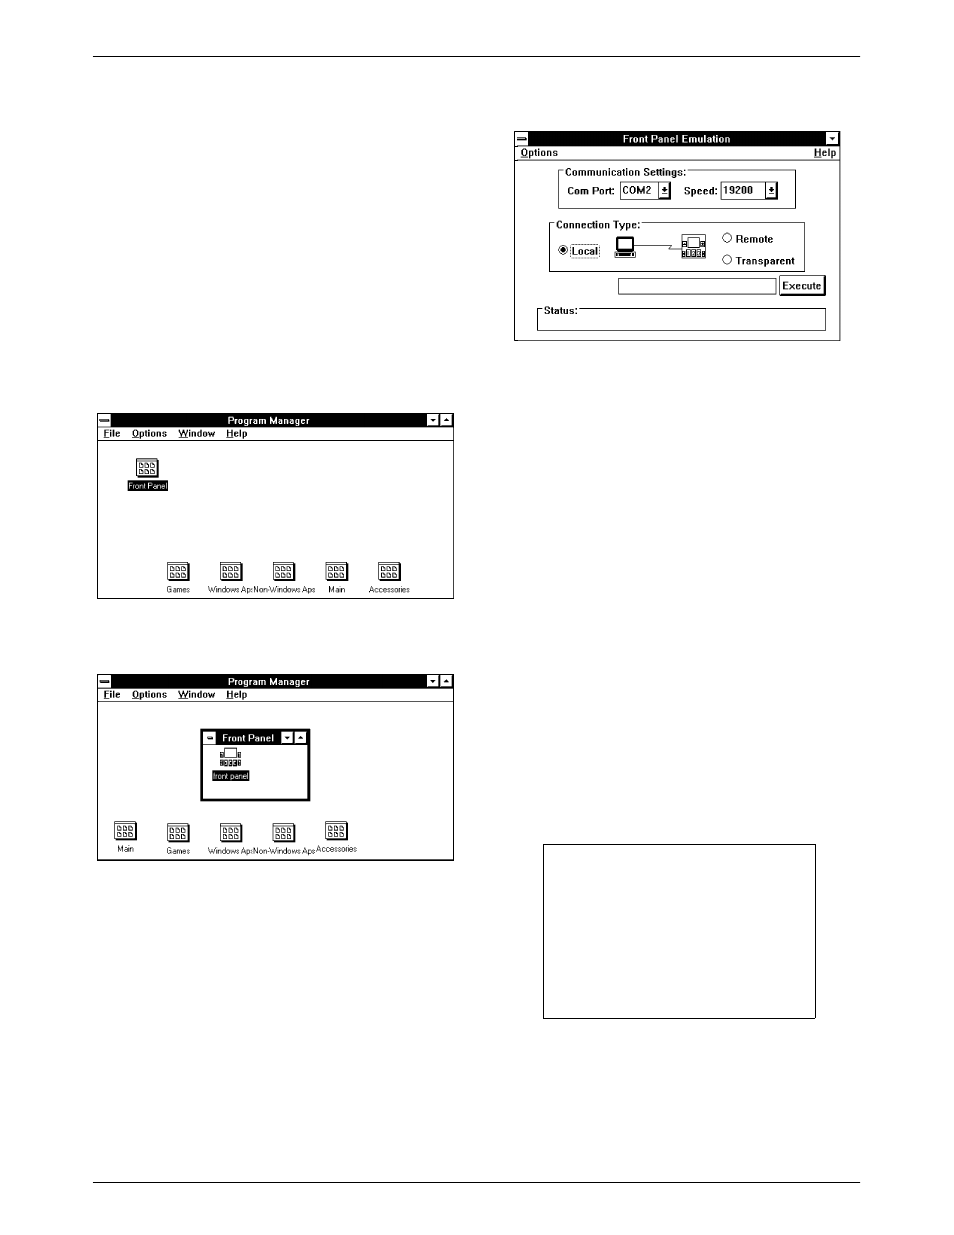
To start front panel emulation,
1. From the PC, open Program Manager from
Windows.
2. The Front Panel Window opens.
3. Double click on the Front Panel icon that appears
after the Front Panel Emulation program is
installed on the PC. The Front Panel Emulation
screen appears.
4. Enter the Com Port and Speed from the
drop-down selection list boxes.
The Com Port field needs to contain the actual
communications port name as recorded in the
Windows information file (INI).
The Speed field needs to contain one of the
following communications speeds: 1200, 2400,
4800, 9600, 14400, 19200, or 38400 and should
match the DSU/CSU COM port configuration.
5. Choose either a Local (for near-end E1
DSU/CSU) or Remote (for far-end E1 DSU/CSU)
destination.
6. If you chose a Local destination, click on the
Execute button. If you chose a Remote
destination, enter the telephone number of the
external modem connected to the far-end E1
DSU/CSU in the Phone Number field, then click
on the Dial button.
7. The front panel of the selected E1 DSU/CSU
appears on the PC.
NOTE
When using Front Panel
Emulation, no LEDs are shown on
the PC’s screen; you must use
the Stat command procedure to
get LED information (see the
Displaying LED Conditions
section in Chapter 3,
Operation).