Timer recording using, The video plus, Timer recording using the video plus – Philips HDR3700 User Manual
Page 35: System, Overwriting from the beginning of the title
35
EN
Timer Recording Using the
VIDEO Plus+
®
System
You can program the timer using the VIDEO Plus+
programming numbers that are printed in your local
TV guide magazine (analogue channel only).
1
In stop mode, press
[the VIDEO Plus+ button].
VIDEO Plus+ Programming window will appear.
• If you have not set the clock, the clock setting
window will appear instead. In such a case,
continue from step
4
on page 89 before programming the timer
recording.
• If the “Timer Programming” list is full, the “Timer
Programming” mode is activated instead of the
VIDEO Plus+ programming mode.
• Press [TIMER] in the VIDEO Plus+ programming
mode to switch to the “Timer Programming” mode.
• Press [the VIDEO Plus+ button] to exit.
2
Set the VIDEO Plus+ programming
number of the programme you want to
record using [Alphanumeric keypad],
then press [OK].
• You can clear one letter by pressing [
L] and all
the letters by pressing [CLEAR].
3
Select the desired recording frequency
using [
U \ D], then press [OK].
Once:
To record a TV programme once, as you set.
Daily:
To record a TV programme at the same time on
the same channel everyday.
Mon-Fri:
To record a TV programme at the same time on
the same channel from Monday through Friday.
Weekly:
To record a TV programme at the same time on
the same channel every week.
4
If “---” appears for recording
channel, select a recording channel
using [
U \ D], then press [P].
• If the channel linking to the VIDEO Plus+ code
is installed in the unit, its preset number will be
indicated in the menu.
• If your local channel information is not
programmed in the unit’s memory, “– – –” may
appear.
• If you select the channel number using [
U \ D],
it is stored in the unit’s memory (only analogue
channels). If not, “---” may appear.
• If necessary, correct the information as you
wish.
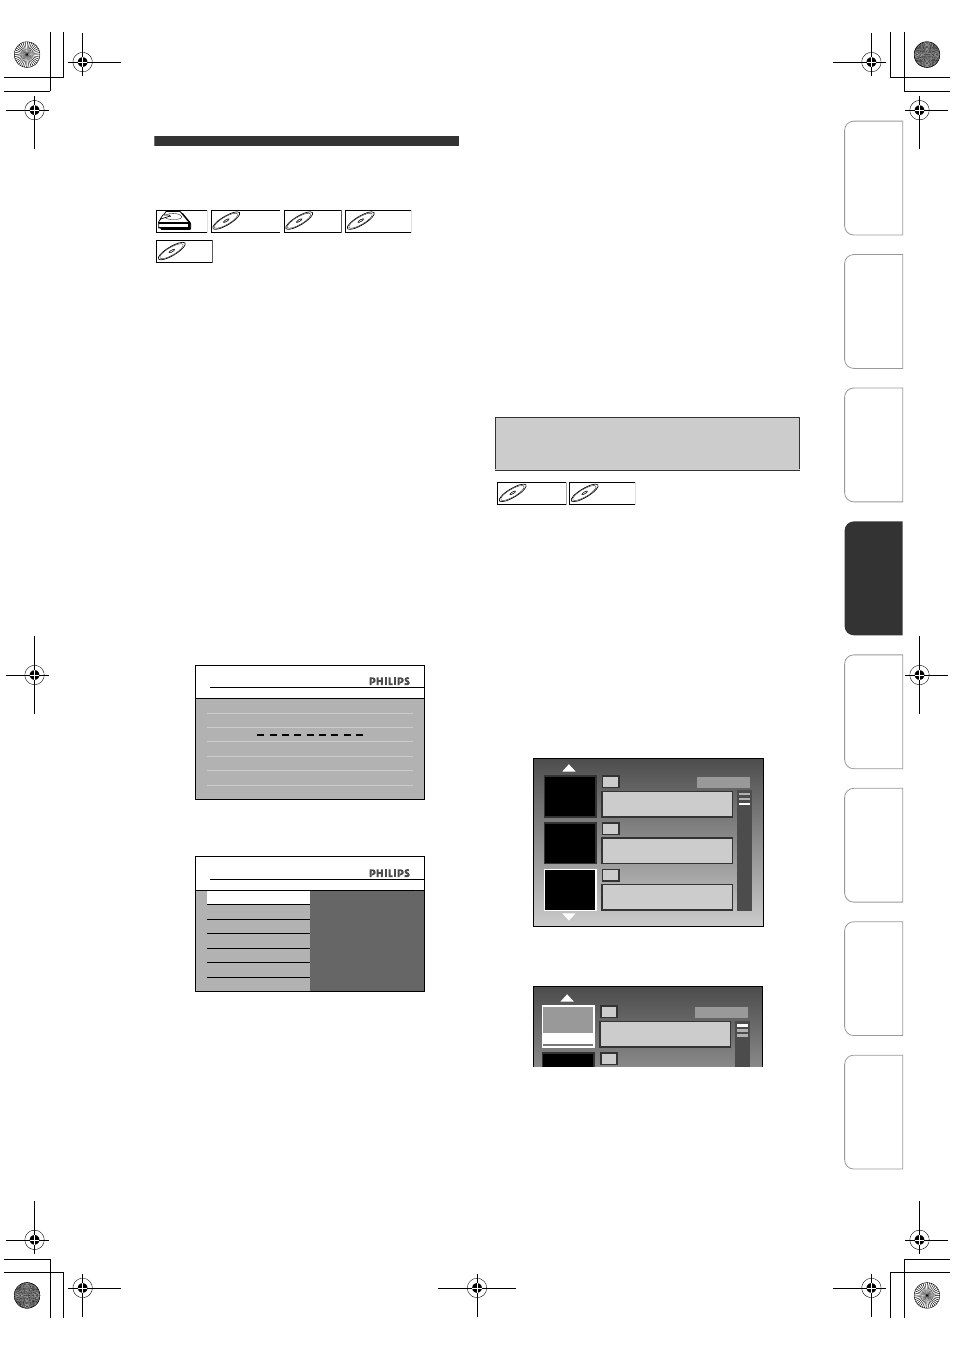
5
Press [TIMER] when all information
required is entered.
You can overwrite the existing title from the
beginning.
1
Load the disc that includes a title to
be overwritten.
Title list will appear.
If the title list does not appear, press [TITLE].
2
Press [REC MODE] to select a
recording mode.
Refer to “Recordable Discs” on page 25.
3
Use [
U \ D] to select a title to be
overwritten, then press [OK]
4
Use [
U \ D] to select “Overwrite”,
then press [OK]
5
Select the channel you want to
record.
HDD
HDD
D
DVD+R
VD+RW
W
DVD+RW
D
DVD+R
VD+R
DVD+R
D
DVD-
VD-R
RW
W
DVD-RW
D
DVD-R
VD-R
DVD-R
Timer Programming
VIDEO Plus+ System
Please enter a PlusCode No.
ALL
8
7
6
5
4
3
Change Password?
Yes
No
Timer Programming
VIDEO Plus+ System
Once
Daily
Mon-Fri
Weekly
Overwriting from the Beginning of
the Title
DVD+RW
DVD+RW
D
DVD-
VD-R
RW
W
DVD-RW
1
DVB 123 SP
0:10:00
2
01/01/08 12:00 DVB 123 SP
10/01/08 0:10:00
01/01/08 17:00 DVB 123 SP
10/01/08 0:10:00
3
SP(2Hr)
1
DVB 123 SP
0:10:00
2
SP(2Hr)
Play
Edit
Overwrite
In
tro
d
u
c
tio
n
Co
nn
ect
ion
s
Ini
tial
Setu
p
P
layb
ack
E
d
iti
ng
Ot
hers
General Settings
Reco
rdi
n
g
E2N41BN_EN.book Page 35 Wednesday, July 2, 2008 4:36 PM