Timer recording, Insert a recordable disc, Enter the date using [ u \ d ], then press [ p – Philips HDR3700 User Manual
Page 30
30
EN
Note
• In Time Shift Buffer, when you display the digital
programme information, the on-screen display will
be recorded as the part of the picture.
• When you record the contents of the Time Shift
Buffer, the recording mode is always SP.
• If there is not enough recordable space on HDD to
record from the selected point to current point, you
cannot record the content of Time Shift Buffer.
• After recording from Time shift buffer, portion that is
copy protected will not be seen on playback and
“Content is Copy Protected.” message is indicated.
• Using [LIVE TV] makes it possible to go back to the
current position of the TV programme broadcast.
• When you press [PROGRAM + / –] to change the
channel to digital Video channel, the message :
“This action will clear the Time Shift Buffer. Do you
want to continue?” will appear. Selecting “Yes”, the
Buffer is cleared and the channel will be changed.
• When you press [HOME], [TITLE] or [DISC MENU],
the message : “Time Shift Buffer will be cleared
depending on your selection. Do you want to
continue?” may appear.
• In HDD mode, you can pause the program when
you press [F (PAUSE)] during the program live on
the air. Furthermore, you can resume it by pressing
[B (PLAY)] in pause mode.
• Once it has exceeded 6 hours, the beginning of
Time Shift Buffer will be deleted accordingly, and
the elapsed time displayed will be unchanged.
Timer Recording
You can set the unit to record up to 36 programmes,
up to a month in advance. Daily or weekly programme
recordings are also available.
• Be sure to set the clock before entering a timer
programming.
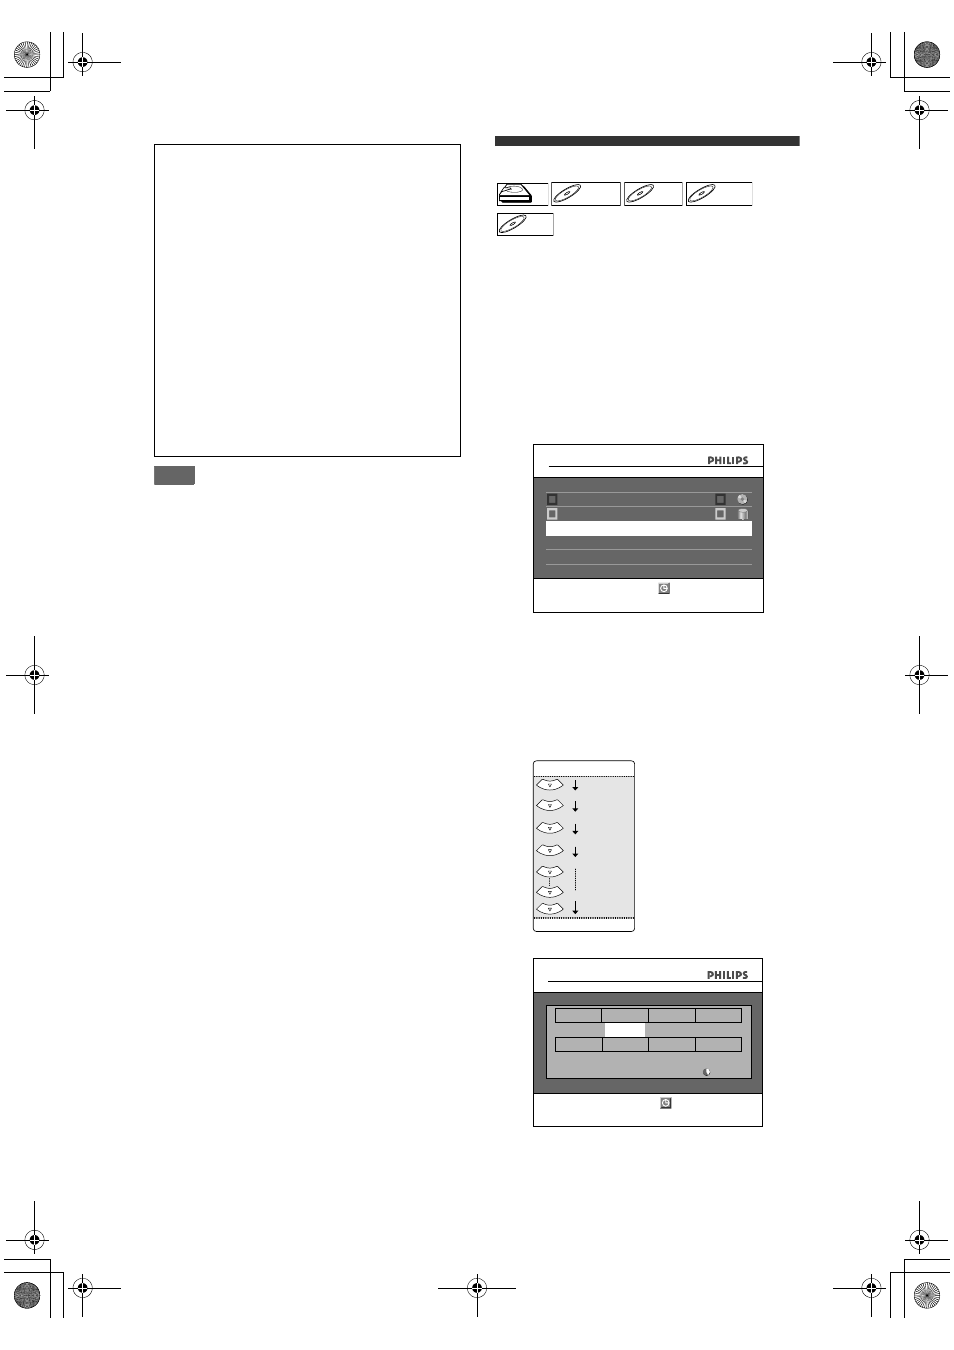
Insert a recordable disc.
1
In stop mode, press [TIMER].
“Timer Programming” list will appear.
2
Select “New Programme” using
[
U \ D], then press [OK].
• If there are 7 programmes or more, use
[
S (PREV)],/[T (NEXT)]to turn the page.
3
Enter the date using [
U \ D], then
press [
P].
Each time you press [
D] at the current date, the
timer recording date will change as follows.
e.g., 1st January
4
Enter the time to start and to end
using [
U \ D], then press [P].
The Time Shift Buffer will be stopped, cleared
in following cases:
- Turning off the power
- Start recording
- Editing titles or goes into editing menu
- Start dubbing
- Digital Video input (AV4)
- Using any functions in “Disc Editing” or “HDD
Settings”
- Selecting items in “Channel” setting:
“Digital&Analog Tuning”
“Digital Channel Setup”
J “Edit Channels”
“Digital Channel Setup”
J “Auto Tuning”
“Digital Channel Setup”
J “Manual Tuning”
“Digital Channel Setup”
J “Signal Information”
“Analog Channel Setup”
J “Auto Tuning”
“Analog Channel Setup”
J “Manual Tuning”
“Analog Channel Setup”
J “Sort Channels”
• The Time Shift Buffer will automatically resume
for new recording
HDD
HDD
D
DVD+R
VD+RW
W
DVD+RW
D
DVD+R
VD+R
DVD+R
D
DVD-
VD-R
RW
W
DVD-RW
D
DVD-R
VD-R
DVD-R
01/01
12:00
13:00
1
01/01
12:00
13:00
1
Timer Programming
New Programme
TUE
CH
End
Start
Date
01/01
12:00
Press TIMER to exit
STTL
01/01
31/01
Daily
M-F
W-SAT
W-FRI
W-SUN
(Mon.-Fri.)
01/01
12:00
13:00
1
01/01
--:--
--:--
SLP
--- 1
SLP
1h00m
Timer Programming
CH
CH
End
Start
Date
Start
End
Date
OFF
Mode
STTL
OFF
Skip
REC To
DVD
Set date
TUE
01/01
12:00
STTL
E2N41BN_EN.book Page 30 Wednesday, July 2, 2008 4:36 PM