Recording settings – Sanyo DSR-3706PA User Manual
Page 54
English
Recording settings
53
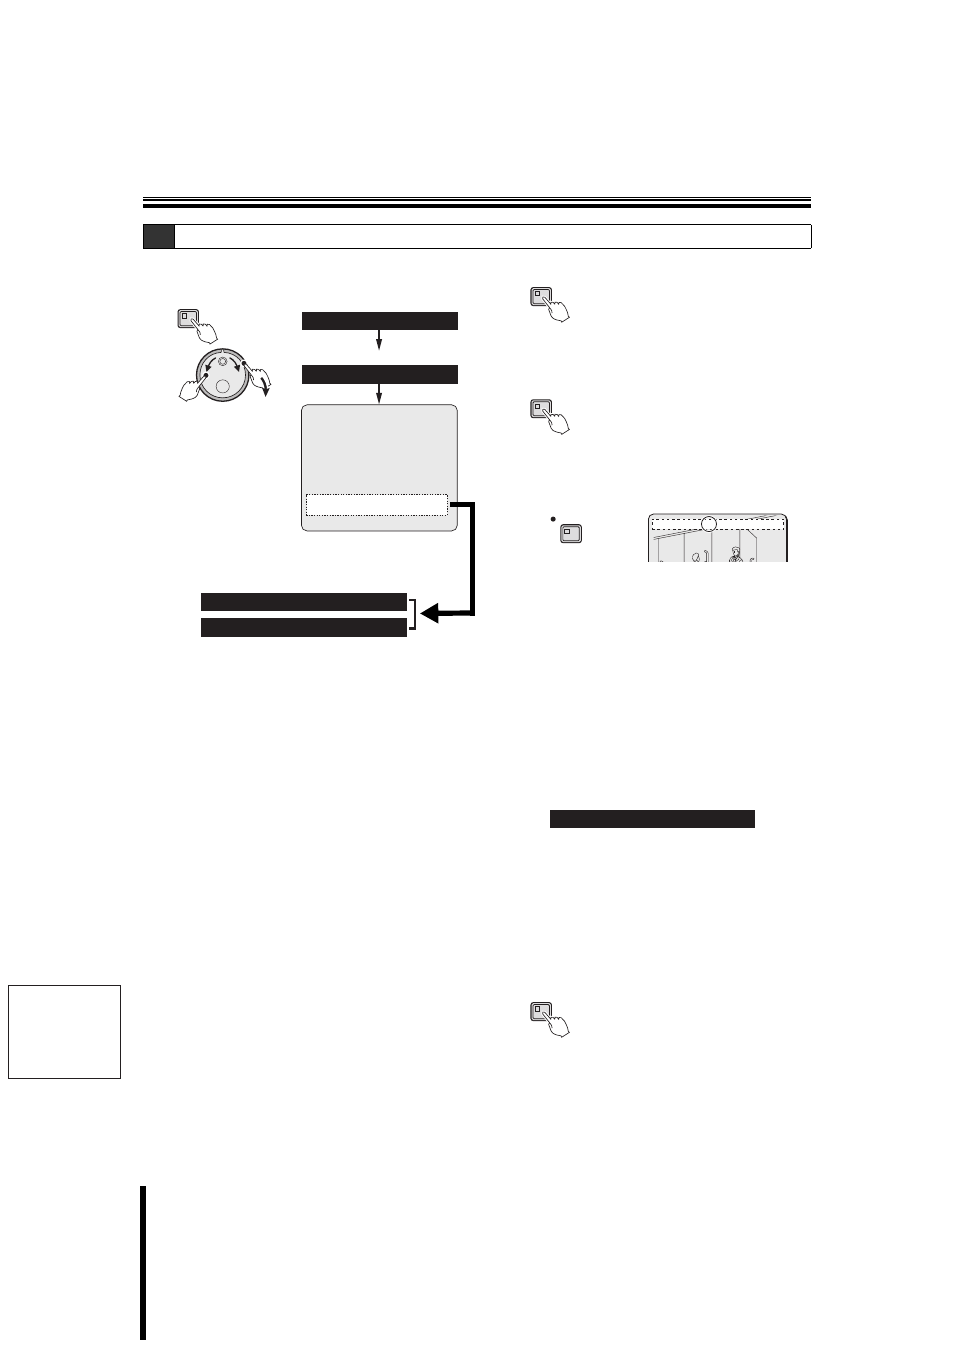
How to set
1
Display the
"Displaying the recording settings screen". (P39)
2
Set the timer-controlled recording.
Example:
• WEEK (start): Set MON.
• WEEK (stop): Set WED.
• START: Set 10:30am.
• STOP: Set 8:30pm.
• PROGRAM: Do not set.
• FPS: Set 5 FPS.
• SET: Set ON.
1
Turn the J-dial, select "SAT", and then turn the
S-dial clockwise.
2
Turn the J-dial, change "SAT" to "MON", and turn
the S-dial clockwise.
The hour indicator "– –" under START starts
blinking.
3
Turn the J-dial, select "10", and turn the S-dial
clockwise.
The minutes indicator "– –" under START starts
blinking.
4
Turn the J-dial, select "30", and turn the S-dial
clockwise.
The hour indicator "– –" under STOP starts blinking.
5
Turn the J-dial, select "**", and turn the S-dial
clockwise.
All fields after STOP will display "**", and will not
take any input.
The "DLY" line automatically switches to "TUE".
6
Turn the J-dial, select "WED", and turn the S-dial
clockwise.
The hour indicator "– –" under STOP starts blinking.
7
Turn the J-dial, select "20", and turn the S-dial
clockwise.
Repeat the same procedure to perform the
remaining settings in the example.
3
Press the EXIT/OSD button.
4
Press the TIMER button.
The TIMER indicator turns on, and the timer-controlled
recording goes into standby mode.
• When the start time set for timer-controlled
recording comes
The REC/STOP indicator turns on, "REC" appears
in the operation display, and recording starts.
• When the stop time set for timer-controlled
recording comes
The REC/STOP indicator turns off, the recording
stops.
• Stopping a timer-controlled recording in
progress
Press the TIMER button. The recording stops, the
TIMER indicator turns off.
• Playback during timer-controlled recording (P18)
b Setting a program for timer-controlled recording
Perform the following settings to set a program after setting
the timer-controlled recording.
Example:
1
Turn the J-dial to select the desired PROGRAM
(P-1), and then turn the S-dial clockwise.
Since the program settings already include the
recording rate, the FPS setting will show "****".
Selections: P-1, P-2, P-3, P-4
2
Turn the J-dial, select "ON" under SET, and turn the
S-dial clockwise.
3
Press the EXIT/OSD button.
F-2
Overlapping timer-controlled recording
MENU
(J)
(S)
WEEK START STOP PROGRAM FPS SET
SUN --:-- --:-- OFF 12.5 FPS OFF
MON --:-- --:-- OFF 12.5 FPS OFF
TUE --:-- --:-- OFF 12.5 FPS OFF
WED --:-- --:-- OFF 12.5 FPS OFF
THU --:-- --:-- OFF 12.5 FPS OFF
FRI --:-- --:-- OFF 12.5 FPS OFF
SAT --:-- --:-- OFF 12.5 FPS OFF
DLY --:-- --:-- OFF 12.5 FPS OFF
EXT ***** ***** OFF 12.5 FPS OFF
6.TIMER SET
2.RECORD SET
MON
10:30 **:** *** **** FPS ***
WED
**:** 20:30 OFF 5 FPS ON
EXIT/OSD
TIMER
01-01-06 00:00:00 REC REPEAT EN A
ARCHIV 0001
REC/STOP
TUE
**:** 20:30 P-1 **** FPS ON
EXIT/OSD