Main menu configuration, 33 how to set, English – Sanyo DSR-3706PA User Manual
Page 34
English
33
How to set
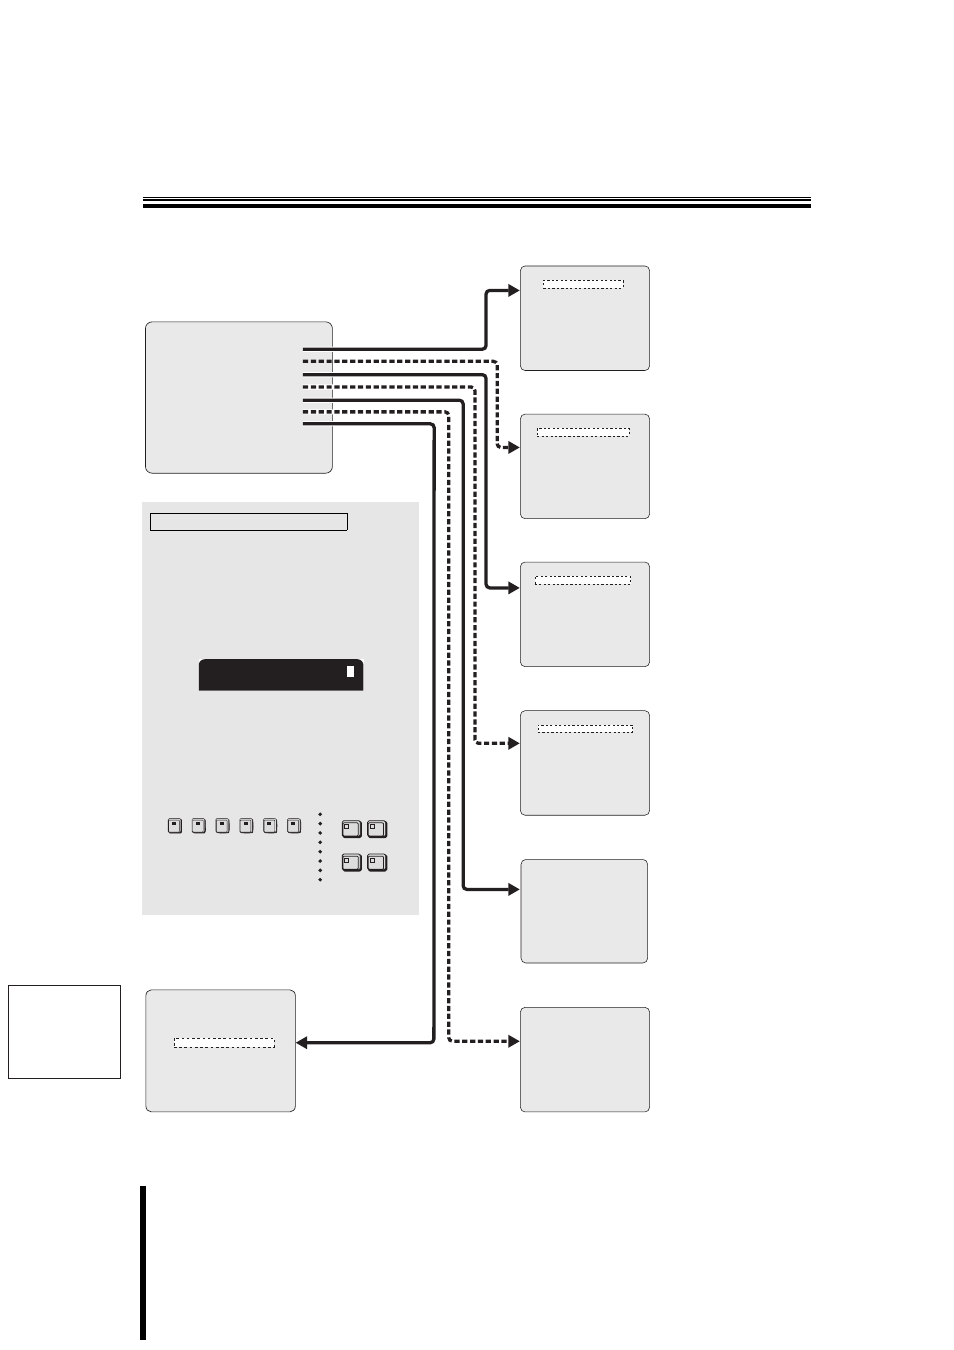
Main menu configuration
1.INITIAL SET ->
2.RECORD SET ->
3.GENERAL SET ->
4.SCREEN SET ->
5.POWER LOSS/USED TIME ->
6.INITIALIZATION LOG ->
7.COPY MENU SETTINGS ->
MOVE:JOG SELECT:SHUTTLE
1.NORMAL REC EASY SET ->
2.RECORDING AREA SET ->
3.RECORDING CONDITIONS SET ->
4.NORMAL REC MODE SET ->
5.PROGRAM REC SET ->
6.TIMER SET ->
7.ALARM REC MODE SET ->
8.ALARM OPERATION SET ->
MOVE:JOG SELECT:SHUTTLE
1.LANGUAGE/CLOCK SET ->
2.CAMERA DETECT ->
3.TITLE SET ->
4.HOLIDAY SET ->
5.TIME PERIOD SET ->
MOVE:JOG SELECT:SHUTTLE
1.MULTI SCREEN : NORMAL
QUAD POSITION SET ->
MULTI 6 POSITION SET ->
2.SEQUENCE : 1SEC
SEQUENCE SET ->
MAIN/MON.2 MONITOR SET ->
3.MASK : OFF
MASK SET ->
4.COLOR LEVEL SET ->
1.DISPLAY SET ->
2.BUZZER SET ->
3.SECURITY LOCK SET ->
4.HDD SET ->
5.NETWORK SET ->
6.RS-485 SET ->
MOVE:JOG SELECT:SHUTTLE
DATE TIME AREA
26-10 18:25 ALL AREAS (INITIALIZED)
26-10 23:18 ALL AREAS (INITIALIZED)
26-10 23:18 ARCHIVE (AREA RESET)
26-10 23:18 ALARM REC (AREA RESET)
26-10 23:18 NORMAL REC (AREA RESET)
26-10 23:16 ALL AREAS (INITIALIZED)
26-10 23:15 ALL AREAS (INITIALIZED)
----- --:-- ------ (------)
SAVE MENUS TO CF ->
DVR TYPE VER. SA06-04
LOAD MENUS FROM CF ->
COPY RECORDING AREA SETTINGS: NO
*IF YOU CHOOSE 'YES' OF THE ABOVE MENU,
HARD DISK WILL BE INITIALIZED !
POWER LOSS RECOVER
#011 14-01 19:15 14-01 09:55
05-01 21:13 14-01 09:21
03-01 18:48 05-01 08:56
01-01 09:49 03-01 10:32
USED TIME DISK1 USE : 00096H
DISK2 USE : -----H
POWER : 00096H
F/W : M 1.00-00 / S 1.00-00
Normally, numeric values and channels (camera
numbers) are set using the J-dial, but camera
selection buttons and the four buttons on the front
panel can also be used for settings.
A value can be input using the button below when
"K" is displayed on the upper right corner of the
screen.
• QUAD buttn: 7 is entered.
• MULTI buttn: 8 is entered.
• MON2 buttn: 9 is entered.
• PLUS buttn: 0 is entered.
• Camera selection buttons 1~6:
Enters the number of the button pressed.
Entering numbers using buttons
K
6
1
2
7
8
9
0
3
4
5
MULTI
QUAD
PLUS
MON2
The main menu consists of seven items, and can be
displayed by pressing the MENU button.
b Copy the contents of the menu settings of
this DVR and operate another unit of the
same model with the same setting (P79)
b Recording and alarm settings (P39)
b Generic settings (P62)
b Screen settings (display shunt, automatic
scrolling, masking, tone adjustment) (P71)
b Power outage time, hard disk's hours of use, etc.
(P77)
b Hard disk initialization log display (P78)
b Initial settings (P34)