Connecting power, Before recording (continued), Aa-p700 ac – JVC KY-F70B User Manual
Page 22: Figure 1 figure 2 figure 3
E18
VIDEO OUTPUT
TO CAMERA
S(Y/C) OUTPUT
DC 12V=OUTPUT
EITHER
OUTPUT
MAX 1.25A
SEE INST-
RUCTION
MANUAL
AA-P700
AC
SEE INSTRUCTION MANUAL
POWER
DC IN
REMOTE
MONITOR
LENS
FREEZE
PLAY
SET
DOWN
AW/SEL
SEND
SCSI
UP
MENU
MODE
REC
ON 1 2 3 4
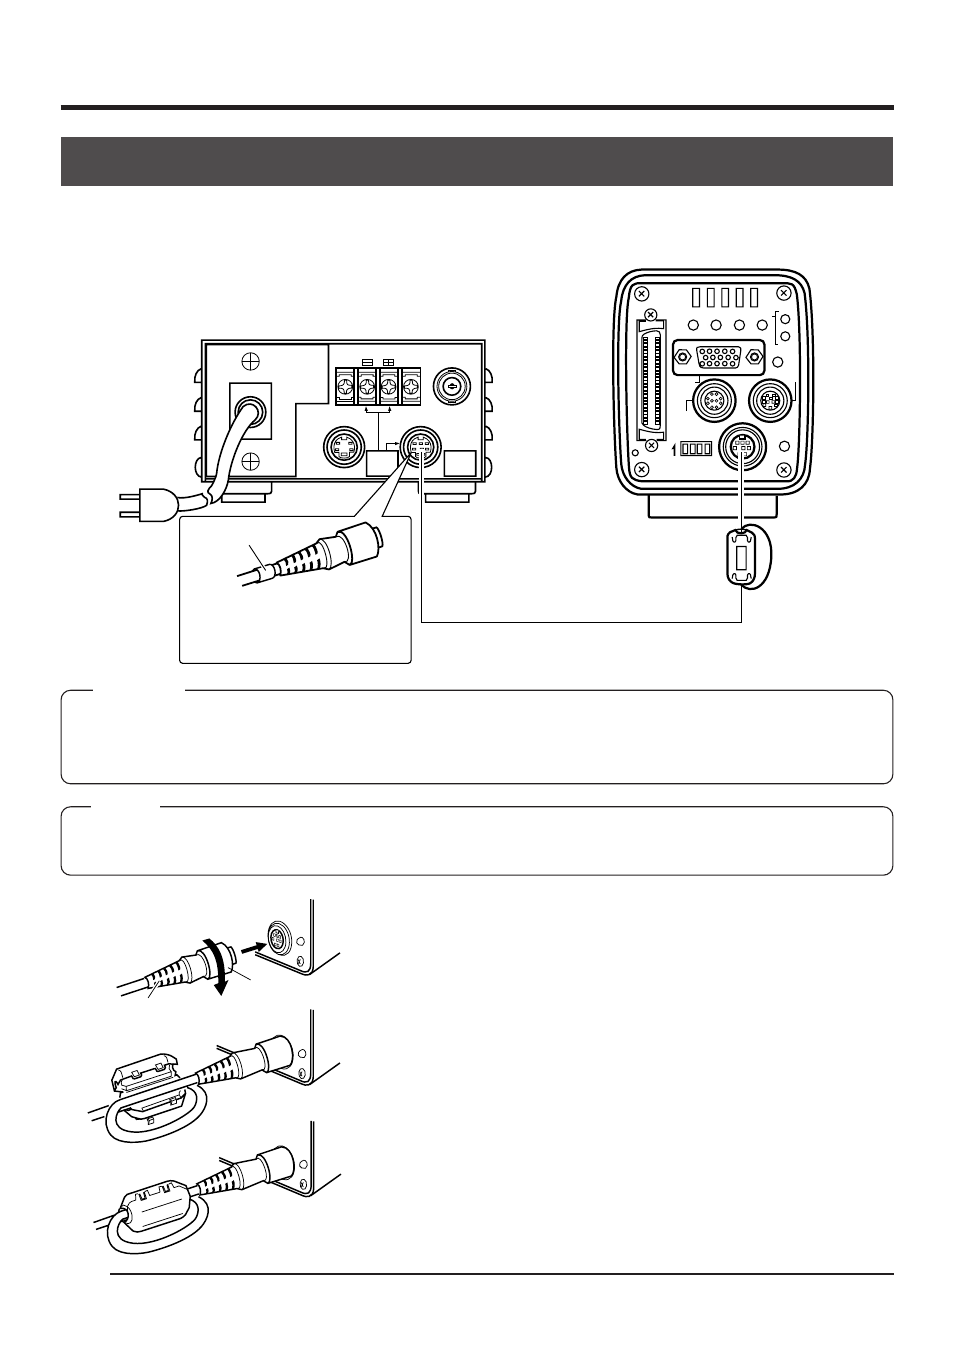
Connecting power
2. Before recording (continued)
Between the 8 pin DC IN terminal on the rear of the main unit and the 8 pin TO CAMERA
terminal of the AC adapter (AA-P700) connect the power cable (2m) which is provided.
Ⅵ
After inserting the plug completely, tighten the secur-
ing ring. (Figure 1)
Make sure white indication of power cable comes to
AA-P700 side.
Ⅵ
To minimise emission of unwanted electrical waves,
mount certainly the provided clamp filter as shown in
Figure 2 and 3 on the left.
Wind the power cable once around the clamp filter.
Ⅵ
Ensure that the clamp filter is mounted as close to
the camera as possible as shown in the diagram.
DC IN
POWER
DC IN
POWER
DC IN
POWER
AC adapter
Provided power cable
Provided
Clamp filter
Plug
Ring
Figure 1
Figure 2
Figure 3
Connect the end with the
white marking to the AC
adapter.
White marking
MEMO
• Wait at least 10 seconds before turning the power switch back on, when it has just been turned off.
• Turning the power switch on and off quickly may cause malfunctions, such as failure to boot, etc.
CAUTION
• Be sure to use the AA-P700 power supply.
• Before connecting power cable, make sure that the power switch on the AA-P700 is set to OFF.
Connecting with the power switch on may result in camera malfunction.