E.3 change from m3093dg to m3093gx/m3096g/m3099g, Change from m3093dg to m3093gx/m3096g/m3099g, E $ 5 – FUJITSU M3093DG User Manual
Page 201
E.3
Change from M3093DG to M3093GX/M3096G/M3099G
Use the following procedure to make the scanner select one of the four product IDs:
M3093DG, M3093GX, M3096G, and M3099G (the default is M3093DG).
Procedure
(1)
Open the ADF cover all the way. Turn the power on while pressing the OMR
sensor. When the scanner enters ID change mode, the lamps are turned on or off as
shown in Table E.1 for the product ID change mode. If the lamps are not turned on
or off as shown in Table E.1, repeat this step.
(2)
When you stop pressing the OMR sensor, the lamps are turned on or off as shown in
Table E.1 according to the current ID.
(3)
After confirming the lamps in step (2), press the B5>size sensor again. The condition
of the lamps listed in Table E.1 does not change, but the CHECK lamp lights. (See
table E.2)
While pressing the B5>size sensor, turn on (press) and off (release) the OMR sensor
to change the product ID in the following order:
M3093DG O M3093GX O M3096G O M3099G O M3093DG
(4)
When you release both the OMR sensor and B5>size sensor, the ID selected at this
point is written in EEPROM.
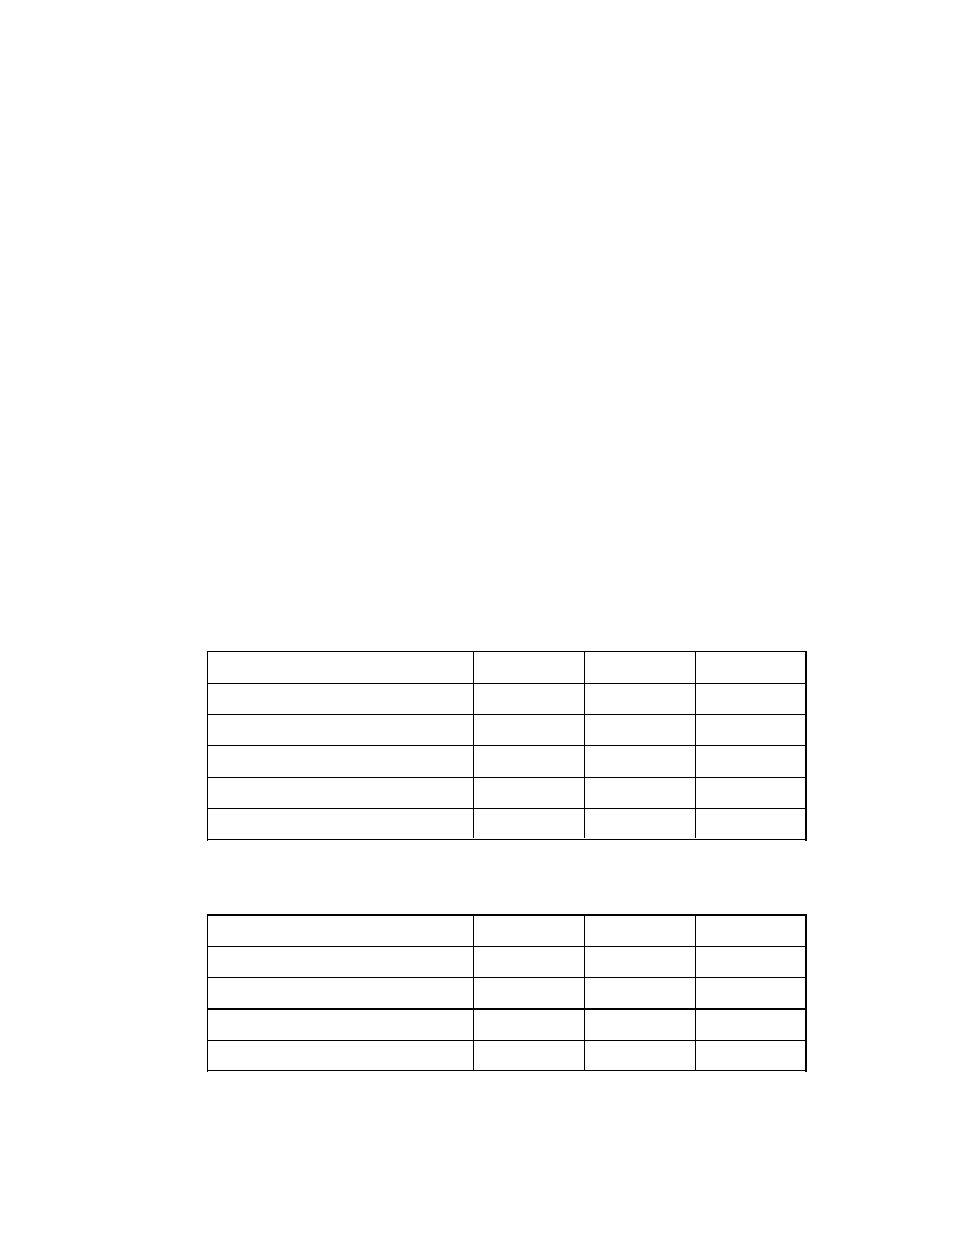
Table E.1 Product ID display mode
Set product ID
POWER
READ
CHECK
Product ID change mode
Blinking
Off
Off
M3093DG
Off
Off
Off
M3093GX
Off
On
Off
M3096G
On
Off
Off
M3099G
On
On
Off
Table E.2 Product ID change mode
Set product ID
POWER
READ
CHECK
M3093DG
Off
Off
On
M3093GX
Off
On
On
M3096G
On
Off
On
M3099G
On
On
On
E $ 5