1 lane configuration, Procedure – Dahua Technology DH-IPC-EBW81242N-AS-S2 12MP Outdoor Network Panoramic Fisheye Camera with Night Vision User Manual
Page 153
Operation Manual
142
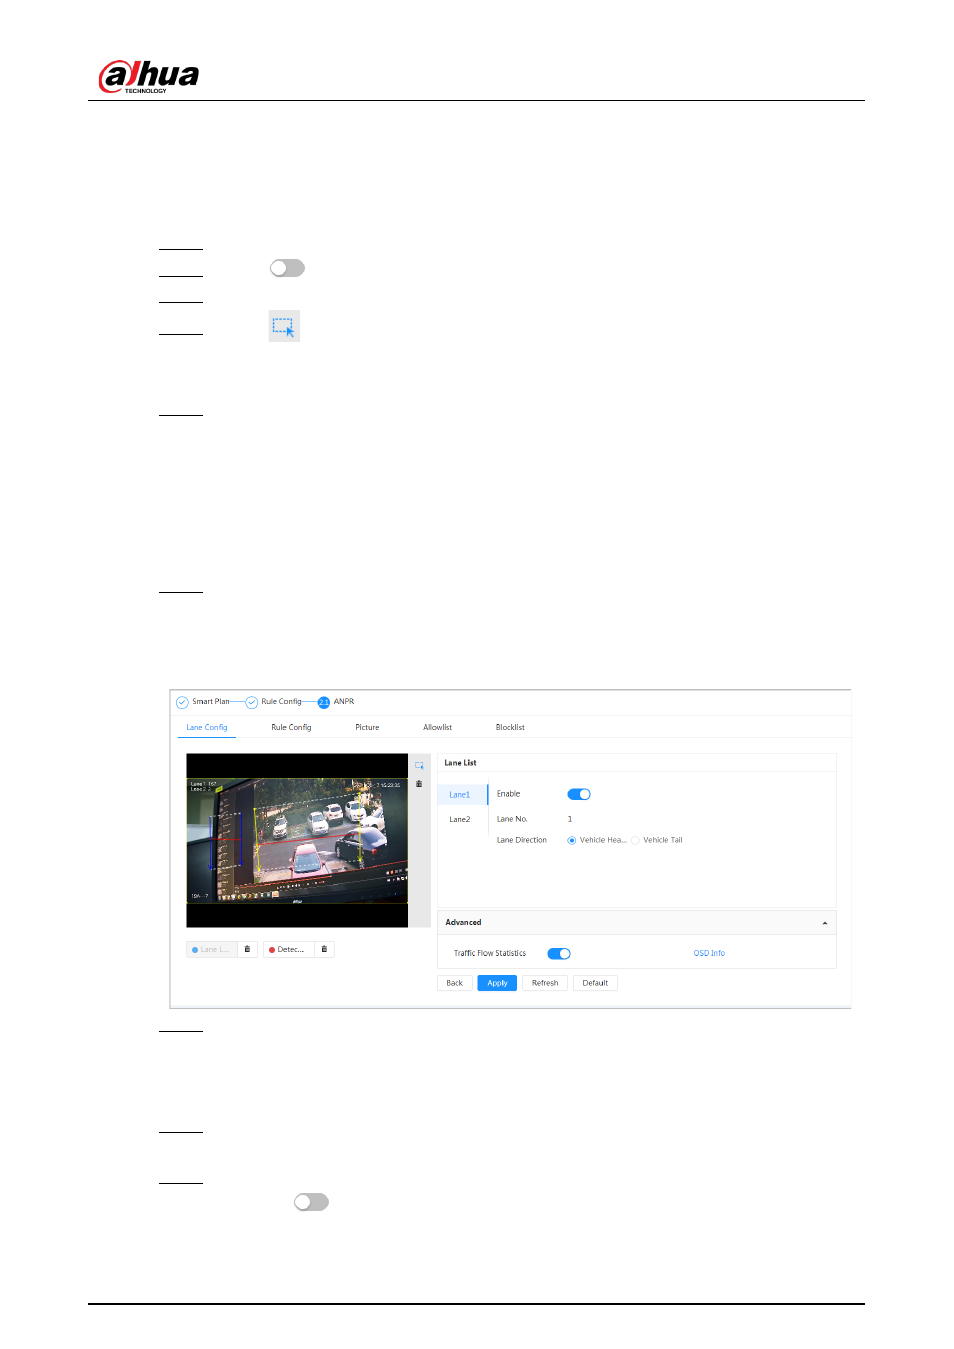
8.11.1 Lane Configuration
Configure lane configuration including detection area, lane line, detection line and lane direction.
Procedure
Step 1
Select
AI
>
Smart Plan
.
Step 2
Click
next to
ANPR
, and then click
Next
.
Step 3
Click the
Lane Config
tab.
Step 4
Click
and draw the detection area.
Press the left mouse button to draw the detection area, and press the right mouse button
to finish.
Step 5
Configure lane line information.
●
One lane line is composed of two lane lines with an arrow, and the arrow represents the
direction of the lane.
●
The lane is enabled by default after drawing. If you do not select a lane, the track frame
will be displayed on the screen, but the event of license plate recognition will not be
reported.
●
The lane number of each lane is unique and unchangeable.
Step 6
Select the lane direction.
●
Vehicle Head
: The driving direction of the vehicle in the lane is from top to bottom
↓
.
●
Vehicle Tail
: The driving direction of the vehicle in the lane is from bottom to top
↑
.
Figure 8-45 ANPR
Step 7
Configure detection line information.
●
The detection line is displayed in red and it only available in the drawn lane line.
●
When a motor vehicle triggers the detection line, a snapshot will be taken. Also the
license plate and its vehicle attributes will be reported.
Step 8
(optional) You can repeat step 4-7 to draw more lane lines and detection lines. You can add
two lane lines at most.
Step 9
(optional) Click
Advanced
.
●
Click
next to
Traffic Flow Statics
. The system only detects the number of motor
vehicle and generates report after you enable this function.