Turning the power on/off, Turning the power on, Turning the power off – Roland TD-50X Prismatic V-Drums Sound Module User Manual
Page 12: Settings for pads that support digital connection
12
Getting Ready
Turning the Power On/Off
* Once everything is properly connected (p. 11), be sure to
follow the procedure below to turn on their power. If you turn on
equipment in the wrong order, you risk causing malfunction or
equipment failure.
* Before turning the unit on/off, always be sure to turn the volume
down. Even with the volume turned down, you might hear some
sound when switching the unit on/off. However, this is normal and
does not indicate a malfunction.
Turning the power on
1 .
Minimize the volume of the devices connected to the
TD-50X.
2 .
Press the TD-50X’s [
L
] switch.
When you turn the unit on, the following screen appears.
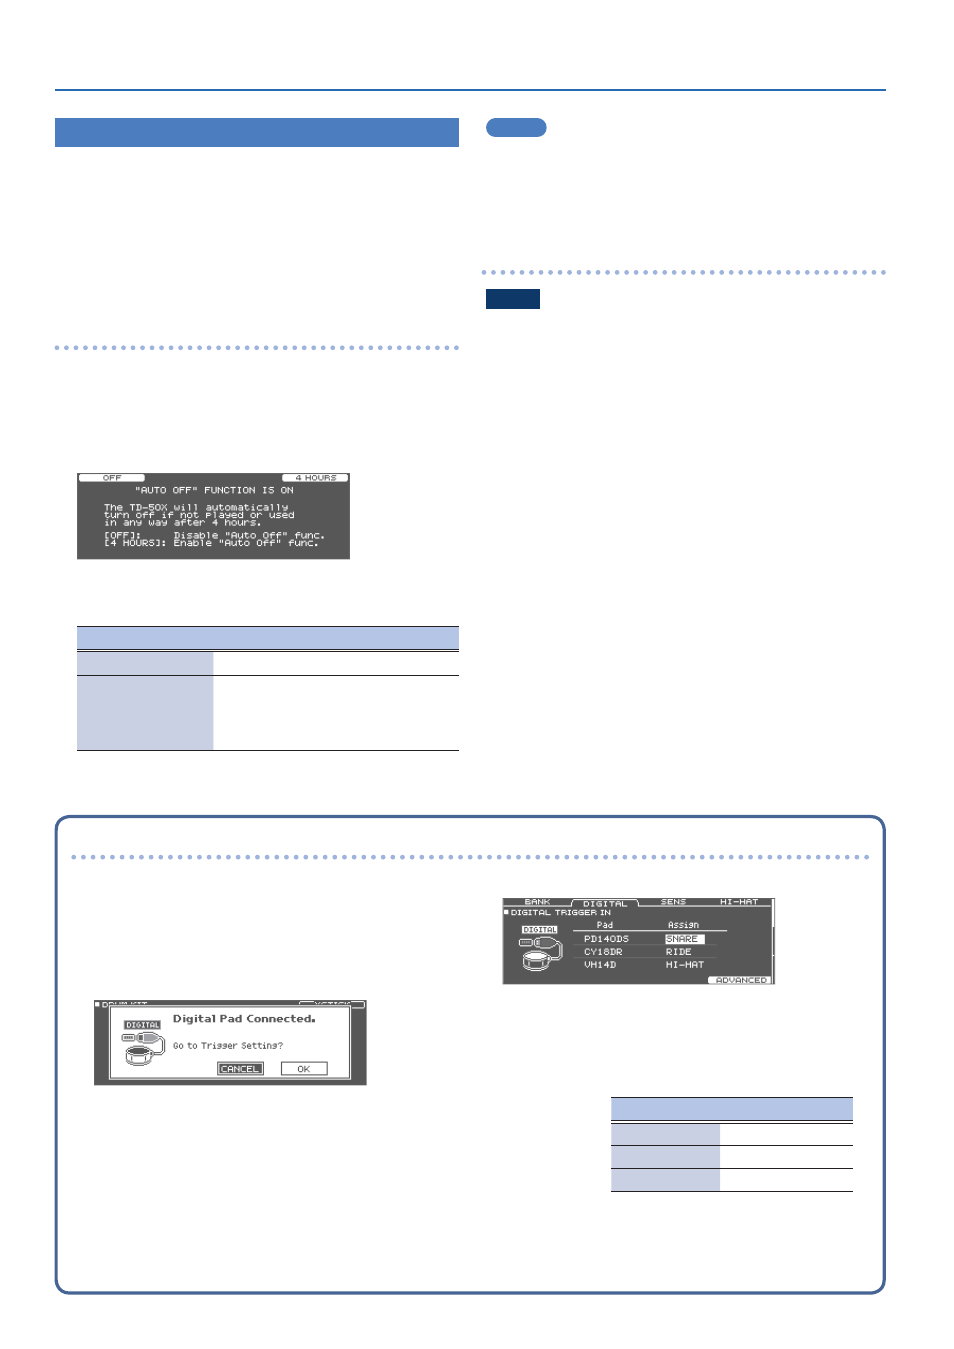
You can set whether to enable or disable the Auto Off function on
this screen.
Button
Explanation
[F1] (OFF) button
The power does not turn off automatically.
[F4] (4 HOURS) button
When four hours have elapsed without
any pad being struck or any operation
being performed, the unit will turn off
automatically.
If the Auto Off function is set to “OFF,” this screen won’t appear.
MEMO
When connecting a digitally-connected pad, a settings screen
may appear for the pad. For details, refer to “Settings for pads that
support digital connection” (p. 12).
3 .
Turn on the connected devices and adjust the volume.
Turning the power off
NOTE
Settings that you edit on the TD-50X are saved when you turn off
the unit. You must turn off the power by pressing the [
L
] switch.
1 .
Minimize the volume of the devices connected to the
TD-50X.
2 .
Turn off the power of the connected devices.
3 .
Press the TD-50X’s [
L
] switch.
The screen will indicate “Please wait. Now saving...,” and the unit will
turn off when the settings have been saved.
* If you need to turn off the power completely, first turn off the unit,
then unplug the power cord from the power outlet.
Settings for pads that support digital connection
The first time you connect a pad that supports digital connection to
a DIGITAL TRIGGER IN port, the following screen appears.
Following the instructions in the screen, make settings to specify
the trigger input to which the connected pad should be assigned.
* If you assign the same trigger input used by a pad connected to
a TRIGGER IN jack, the pad that’s connected to that TRIGGER IN
jack does not output sound.
&
For details on the pad settings, refer to the “Specifying the Pad
1 .
Select “OK,” and press the [ENTER] button.
2 .
Use the cursor buttons to select the pad that you
want to configure, and use the [-] [+] buttons or the
dial to configure the assignment.
When you select a pad, its [FUNC] button blinks.
Pad
Assign
PD140DS
SNARE
CY18DR
RIDE
VH14D
HI-HAT
(Setting example)
* You can’t specify multiple instances of the same assignment.
3 .
Press the [KIT] button to return to the DRUM KIT
screen.