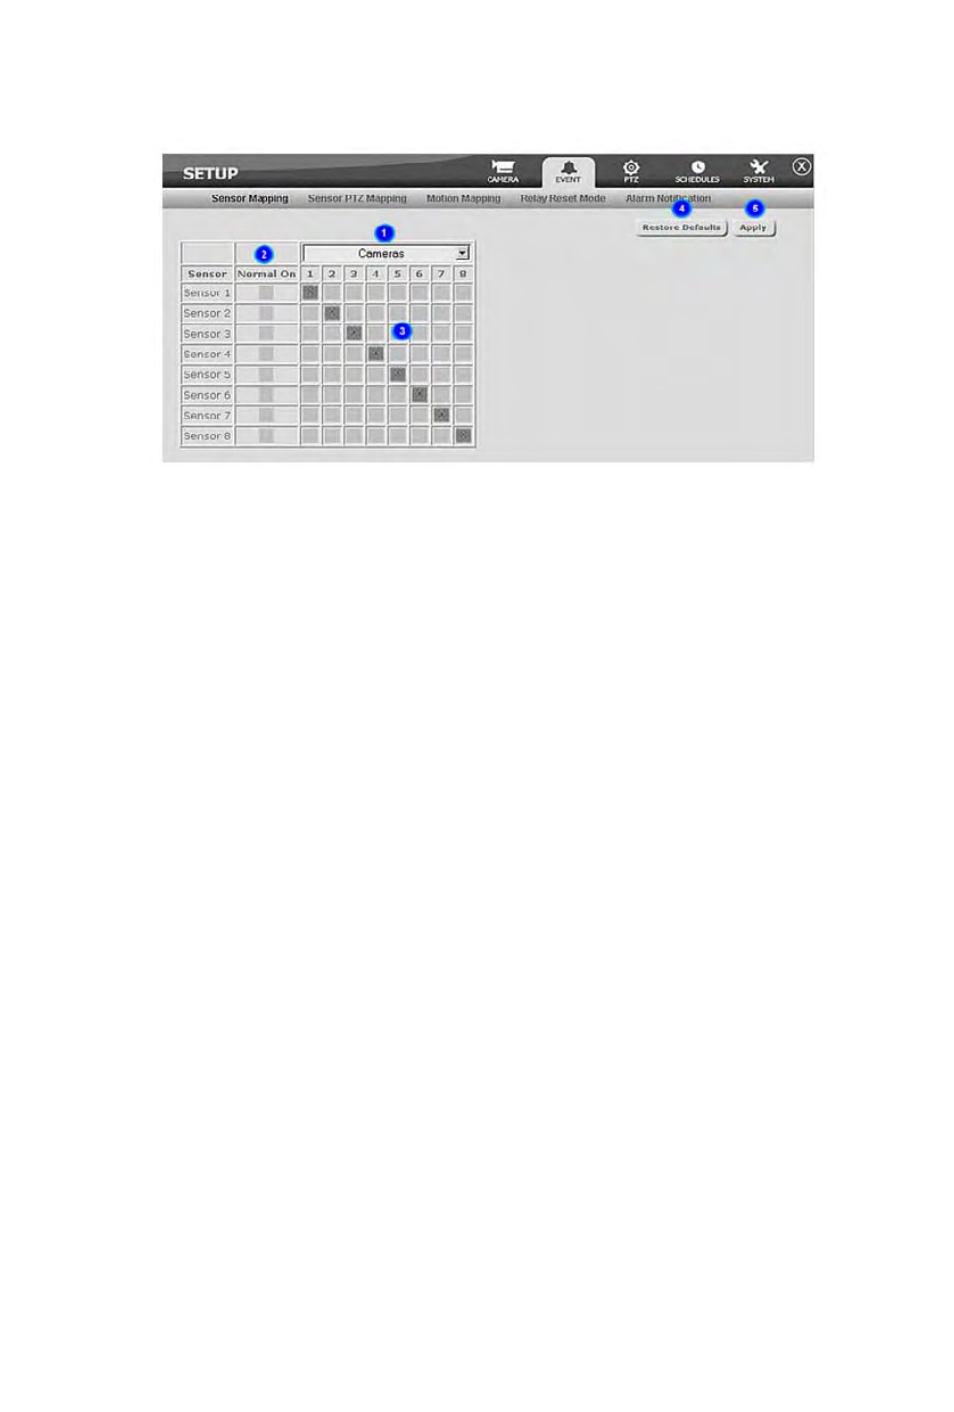
Sensor mapping – Rugged Cams Rugged Vision DVR User Manual
Page 77

Sensor Mapping
1. Sensor
Mapping
– Indicates what sensor mapping is currently displayed; mapping to
cameras or relays.
2. Normal
State
– Indicates what the normal state of the sensor is set to. If the sensor is
normally set to ON, then click on the normal state to set it on.
3. Mapping – Indicates the mapping that have been set. An “X” signifies that there is a mapping
there.
4. Restore
Defaults
– Restores the default settings.
5. Apply – Saves the settings.
Map Sensors
1.
To map the sensors to cameras, simply select Cameras in the Sensor Mapping option. Click
on the grid to place an “O” to mark the sensor-camera mapping. Once a sensor has been mapped to a
camera, this means that when that particular sensor is triggered, such as when a smoke detector
detects smoke, the camera which is mapped to that sensor will start to record. NOTE: You can map one
sensor to more than one camera and vice versa. When applied, this means that when a smoke detector
or an infrared proximity sensor are triggered, the camera that is mapped to these sensors will start to
record.
2.
To map the sensors to relays, simply select Relays in the Sensor Mapping option. Click on
the grid to place a mapping. Depending on what reset mode is selected in the drop down list menu, the
appropriate mark will appear on the grid. A “T” for time-based reset mode, an “S” for sensor synchro-
nized reset mode or an “X” for manual reset mode. Once a sensor has been mapped to a relay, this
means that when that particular sensor is triggered, such as when a smoke sensor detects smoke, the
relay which is mapped to that sensor will either open or close. NOTE: You can map one sensor to more
than one relay and vice versa. When applied, this means that when a smoke detector or an infrared
proximity sensor are triggered, the relay that is mapped to these sensors will open or close, i.e. light will
turn on.
3.
To apply settings, click on the Apply button.
77
