Create router configuration, Sample configuration files, Concerto configuration – Grass Valley Prelude v.3.0 User Manual
Page 35: Assign hardware to levels
Prelude — Instruction Manual
35
Create Router Configuration
Create Router Configuration
On a new Prelude system, with all the devices present on the network,
loaded with the latest software, and the Prelude license key activated, you
can now configure the Prelude system to make it operational.
Sample Configuration Files
Sample configuration files are included on the software CD. These files can
be used to learn about Prelude configuration, or as a starting point for cre-
ating a new configuration.
lists the configuration files available at
the time of publication. Additional sample files may be added, however, or
existing files may be removed. Each sample Router config file has a
matching Panel config file, with similar names.
The sample files are available from the Prelude UI by selecting
Load Router Config From File
and
Load Panel Config From File
.
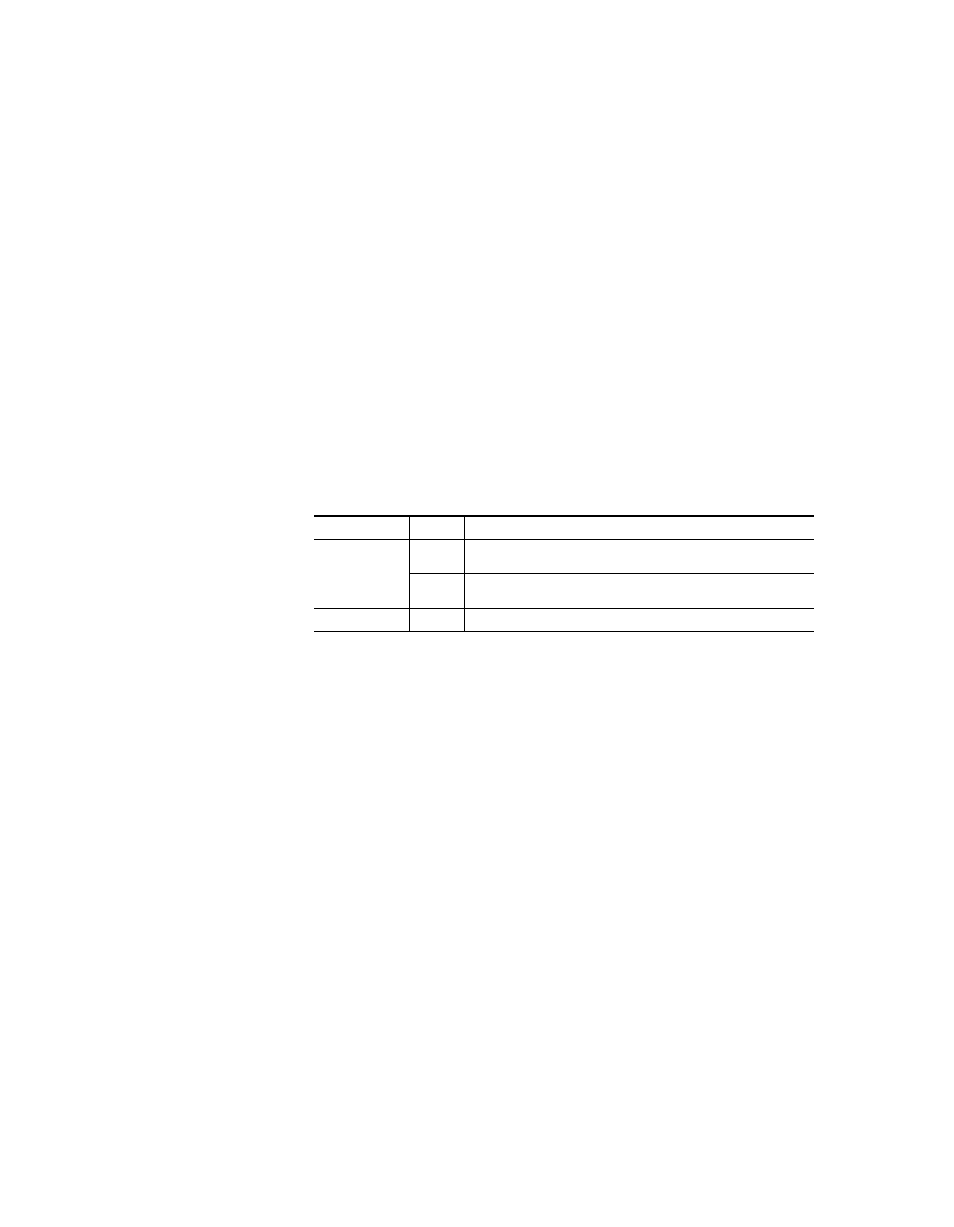
Table 5. Sample Prelude Configuration Files
Type
Name
Description
Router Config
32VKAA
32 x 32 Concerto matrix with four levels (Video, Key, AES1/2, AES3/4).
Frame IP address 192.168.1.34.
64VA
64 x 64 Concerto matrix with two levels (Video, AES1/2).
Frame IP address 192.168.1.34.
Panel Config
Default
A default configuration for each panel type is available for loading.
Concerto Configuration
Concerto frames can be equipped with various boards, permitting different
types and combinations of signal routing. Basic configuration consists of
assigning these boards to levels, defining the matrix size of each level, and
assigning and naming the Sources and Destinations. Prelude systems that
employ Concerto frames store the router configuration information on the
control panels.
Note
To control two Concerto boards as a single level, the boards must be installed
in adjacent slots.
Assign Hardware to Levels
1.
Run NetConfig with the Prelude option registered.
2.
Click on the
Prelude
button, then click on the
Levels
tab.
3.
In IP view on the left, navigate and click on the Concerto device to
reveal the installed boards.