The switch point setup window – Grass Valley UniConfi NVISION Series v.2.0 User Manual
Page 72
62
Switch Point Settings
The Switch Point Setup Window
The Switch Point Setup Window
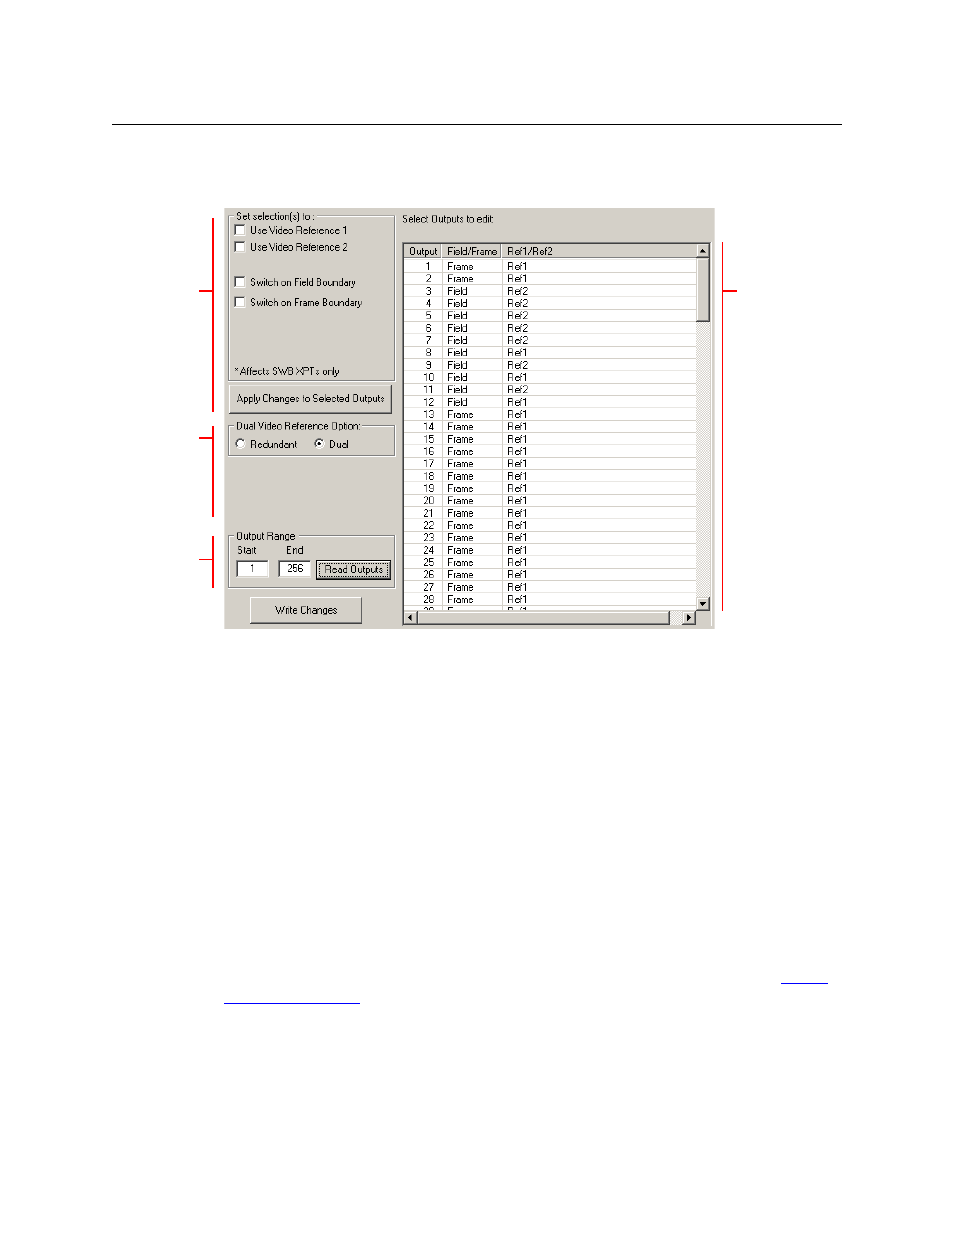
This is the ‘Switch Point Setup’ window, showing dual reference:
Specify an output range at the bottom of the page and click Read Outputs to display the
router’s outputs in the output list at the right side of the window.
At the left side of the page are two radio button where you can choose whether the router uses
a dual reference or a redundant reference. (If you have a single reference connection, use either
setting.)
If you have selected dual reference, you can specify which reference to use for selected outputs.
Use click, shift-click, and control-click techniques to select any set of outputs. Then choose the
the reference connector in the section at the left and click the ‘Apply Changes to Selected
Outputs’ button. The changed outputs redisplay in the output list.
You can also change the switching mode of selected outputs. The choices are to switch on frame
boundaries or field boundaries. Select one or more outputs. Then choose the switching mode in
the section at the left and click the Apply Changes to Selected Outputs button. The changed
outputs redisplay in the output list.
To save your changes, click Write Changes at the bottom of the screen. If you close UniConfig or
switch to a different window, your changes will be lost without warning.
Other fields, not shown here, can appear in the window, depending on the router type. See
on page 63 for details of individual routers.
Output list
Switching
parameters
Reference
Type
Output
Range