How to perform an output-follow diagonal take – Grass Valley UniConfi NVISION Series v.2.0 User Manual
Page 114
104
Connections Window
Special Takes
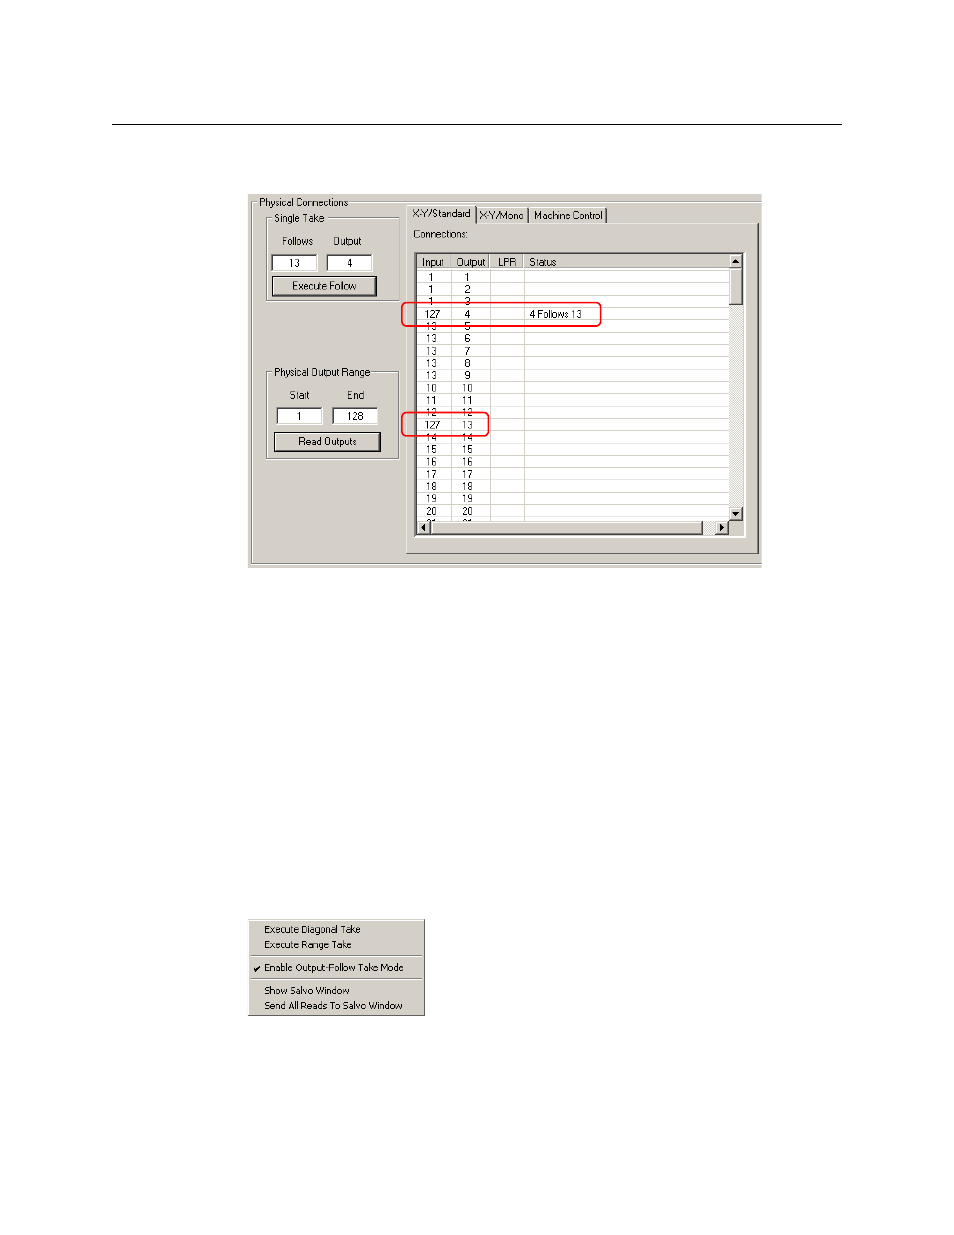
3 Enter a “follows” number and an output number in the ‘Single Take’ section and click ‘Exe-
cute’:
Here, output 4 follows output 13. In the diagnostic crosspoint list, you can see that input 127
has been routed to output 13. Because output 4 follows output 13, input 127 appears at out-
put 4 as well.
4 The diagnostic crosspoints list shows the take results. You might have to scroll the list and
you might have to click ‘Read Outputs’ to see the change.
You can disable output-follow takes at any time if you wish to perform normal takes.
How to Perform an Output-Follow Diagonal Take
A diagonal take in output-follow mode creates a cascade of output-follow pairs. The result is
multiple outputs emitting the same input signal.
Follow these steps:
1 Go to the ‘Connections’ window. Choose the XY/standard, XY/mono, or machine control tab
(if you have the choice) as required by your objective.
2 Right-click anywhere in the ‘Connections’ window to access the window’s context menu.
Check ‘Enable Output-Follow Take Mode’ to enable output-follow takes.
The ‘Connections’ window alters its appearance to support output-follow takes. For
instance, the ‘Input’ field in the ‘Single Take’ section becomes the ‘Follows’ field.