Changing the control card’s ip address – Grass Valley UniConfi NVISION Series v.2.0 User Manual
Page 46
36
Communication
Serial and Ethernet Settings
Changing the Control Card’s IP Address
1 Select a control card. In Ethernet mode, use the control card pane or enter the card’s present
IP address manually. In serial mode, run a cable to the applicable serial port of the control
card. See
How to Connect to a Router Control Card
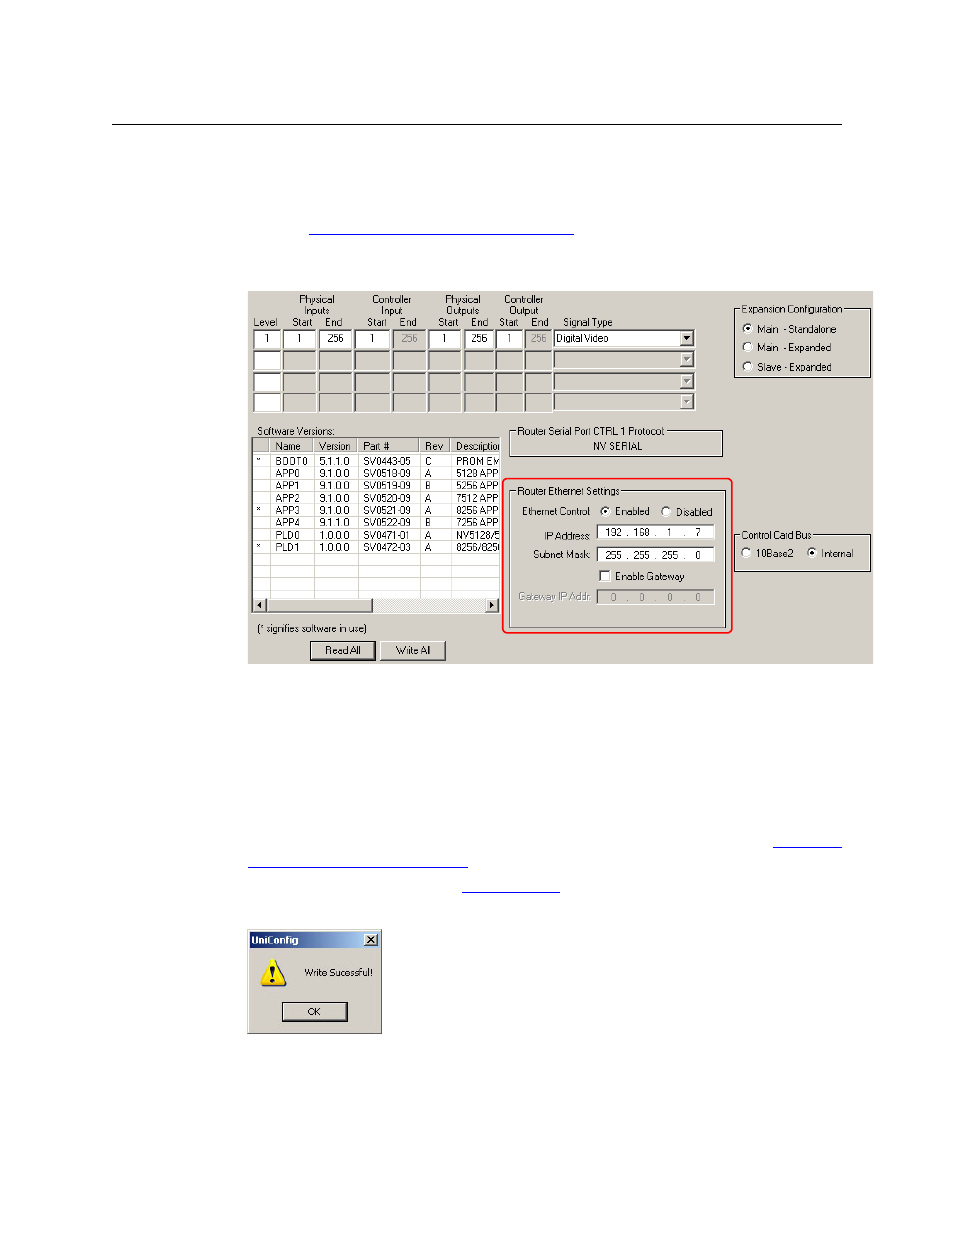
2 From the ‘Window’ menu, select ‘Configuration’. The ‘Configuration’ window appears. This
example is the configuration window for an NV8256:
3 In the ‘Configuration’ window, click Read All. UniConfig populates the ‘Configuration’ win-
dow with the current router configuration.
4 In the ‘Router Ethernet Settings’ section, choose the ‘Enabled’ radio button to enable Ether-
net communication.
Then, enter the IP address and subnet mask for this control card. (Keep in mind that you are
doing this while your PC is connected to the router serially.) The subnet you specify should
be the one that includes the router and your PC.
It is possible to enable, and specify the IP address of, a gateway in this dialog. See
Ethernet Communication Settings
on page 38 if you want to do that.
For background information, see
5 Click Write All to save changes to the control card. A confirmation message appears: