Grass Valley Kalypso Installation Planning Guide User Manual
Page 35
Kalypso Installation Planning Guide
35
Menu Panel Installation
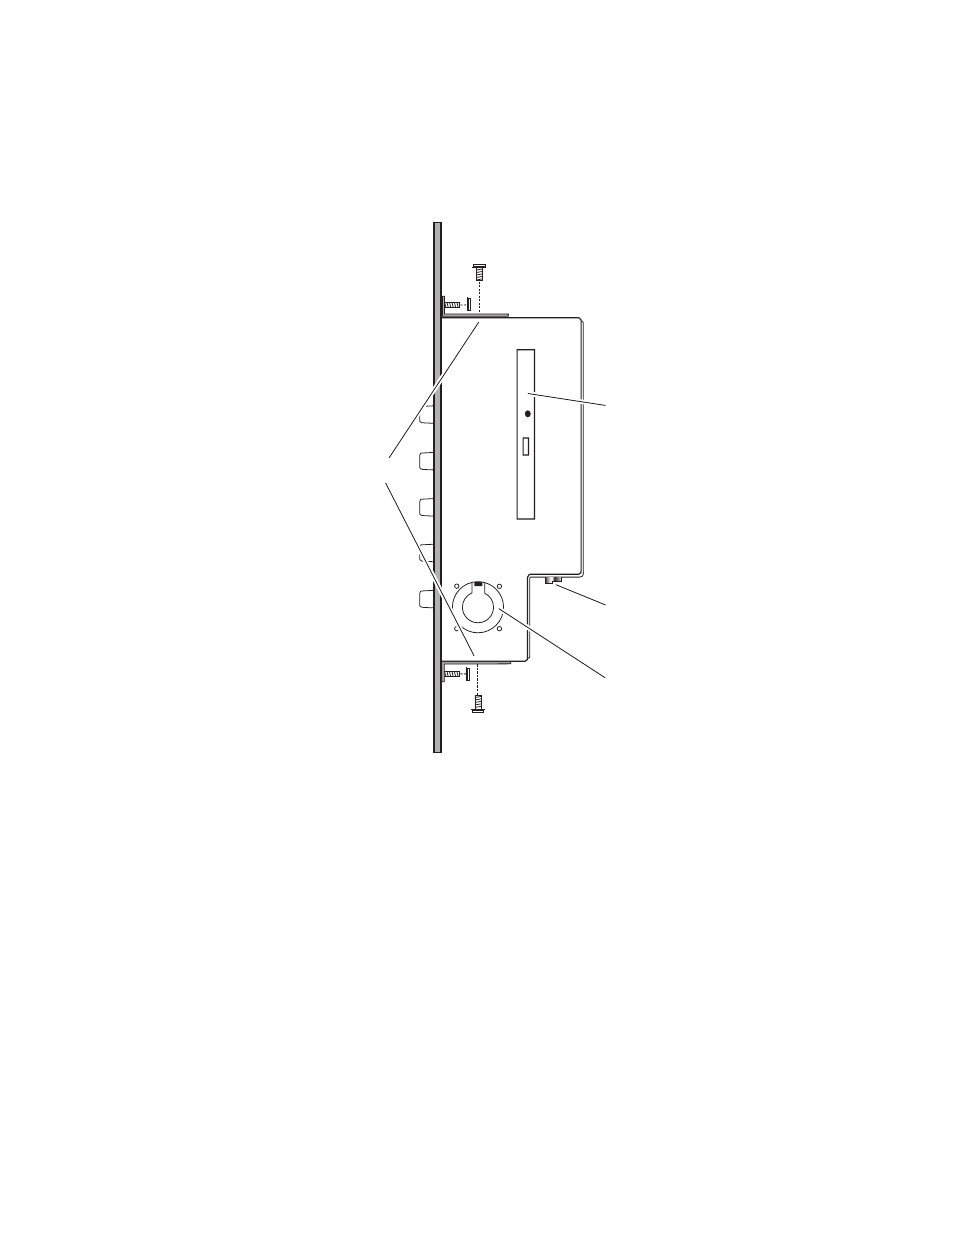
The Flush Mount bezel is attached to the top and bottom of the Menu panel
with two mounting brackets as shown in
. Four #10 screws are
included for attaching the Flush Mount assembly to the Menu panel.
Figure 34. Attaching Flush Mount Bezel to Menu Panel
To install the Menu panel into a console cutout, the Flush Mount bezel is
removed. The mounting brackets directly support the top and bottom of
the Menu panel. Eight wood screws (not provided) are required for
securing the mounting brackets to the console. The Menu panel attaches to
the bracket using slotted holes, permitting a 1.5 in. (38 mm) range of height
adjustment to accommodate different console thicknesses (
). For the best cosmetics, it is recommended to have the Main panel
protrude slightly above the console surface to conceal the cut console edge.
CAUTION Console thickness should not be less than 0.5 in./13 mm for proper support
of the Menu panel.
Dimensions for the console cutout without the Flush Mount bezel are given
in
Mounting Brackets
x2
x2
x4
Top
Bottom
Right
Side
Exhaust Fan
CD-ROM
Drive
(not used)
8096_03_04_r2
Menu Panel Cabling
Including External
CD-ROM
x4