4 wireless control unit (wcu), Connection steps – Grass Valley HD Wireless User Manual
Page 26
26
HD Wireless User’s Guide (v6.2)
Chapter 2 - Installation
2.4 Wireless Control Unit (WCU)
An optional mounting kit is available for mounting the WCU into a standard 19-inch rack.
Caution
When installing the WCU always allow 1 RU space above and below the WCU to properly
ventilate the unit.
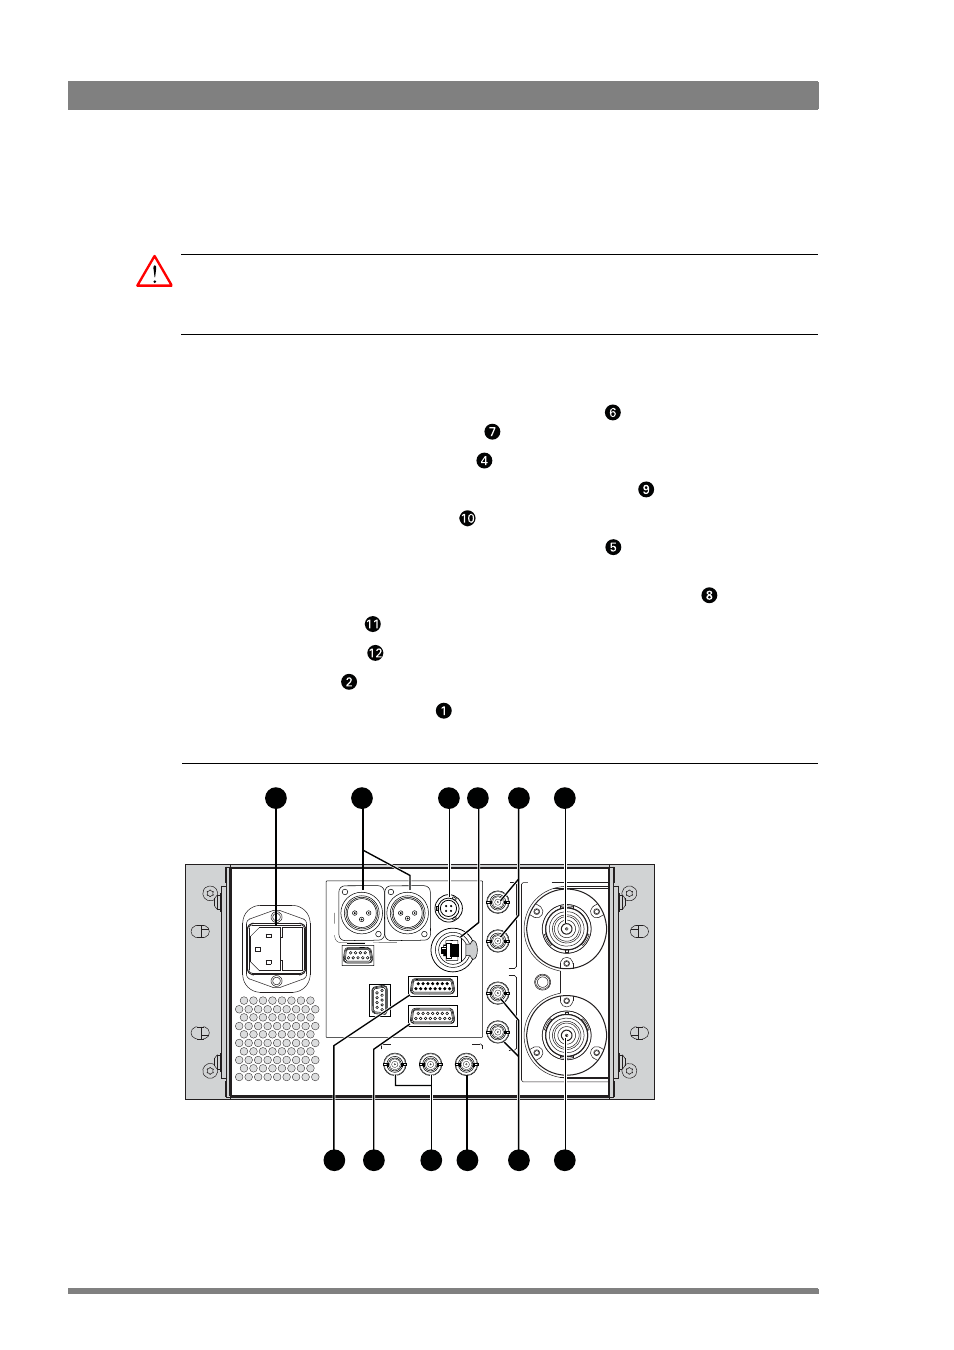
Connection steps:
1.
Connect the triax cable from the AMU to the Triax input 1
of the WCU. If you use a
second AMU, connect it to Triax input 2
of the WCU.
2.
Connect the OCP to the C2IP network
.
3.
Connect a digital monitor (SD or HD) to the SDI3 (OSD) output
.
4.
Connect the SDI1 and SDI2 outputs
of the WCU to the studio system.
5.
If required, provide a reference signal to the Genlock input
of the WCU (SD black-burst,
CBVS and HD-TLS are supported). Terminate the looped-through connector with 75
.
6.
Connect an analog (SD) monitor to CVBS output connector 1 (OSD) or 2
.
7.
Connect the intercom
system (see below).
8.
Connect the signalling
system (see below).
9.
Connect the audio
10. Connect the WCU power socket
to the mains power supply.
Figure 2-7. WCU connections
TRIAX
GENLOCK
C.V.B.S.
1
2
(OSD)
SERIAL DIGITAL OUTPUT
1
2
N
Data1
A
ux
Sign
I / Com
RS232
2
Audio out
1
1
2
1
2
3
Network
1
2
3
4
5
6
7
8
9
10
11
12