Adding a blacklist entry – H3C Technologies H3C SecCenter Firewall Manager User Manual
Page 105
99
Field Description
Hold Time
Lifetime in minutes of the blacklist entry.
Deployment Result
Result of the deployment operation.
Operation
•
Click the
icon to deploy the blacklist entry to virtual devices.
•
Click the
icon to modify the aging time or type of the blacklist entry.
•
Click the
icon to delete the blacklist entry.
CAUTION:
Blacklist entries exist based on virtual device groups. Deleting a virtual device will also delete its blacklist
entries.
Blacklist management functions
.
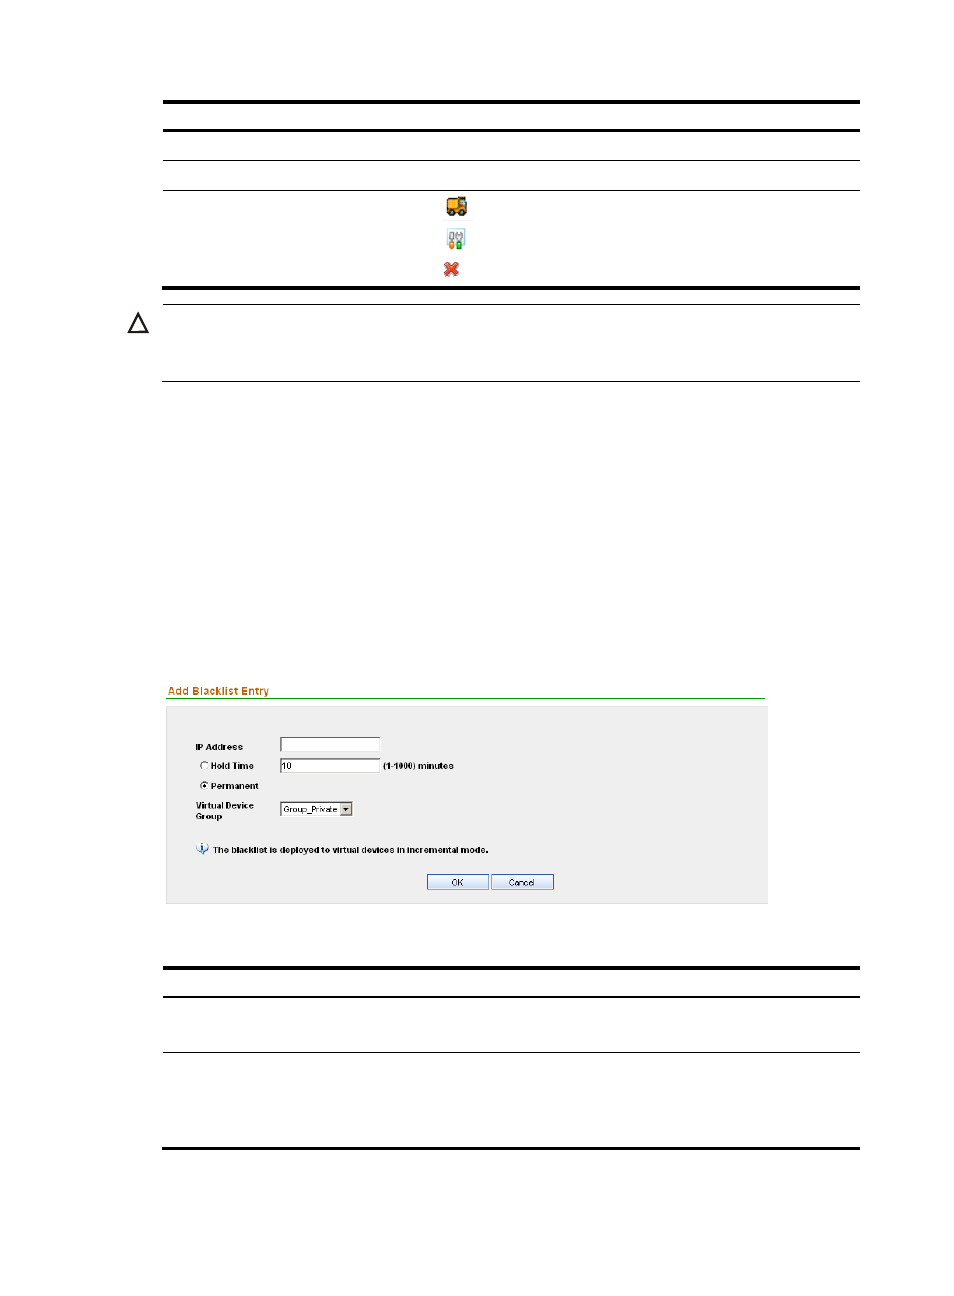
Adding a blacklist entry
1.
From the navigation tree of the firewall management component, select Blacklist under Intrusion
Detection to enter the blacklist list page, as shown in
.
2.
Click Add to enter the page for adding a blacklist entry, as shown in
.
3.
Configure the settings, as described in
.
4.
Click OK.
The system creates a blacklist entry based on the virtual device group. A blacklist entry is uniquely
identified by the combination of a virtual device group, an IP address, and the aging time.
Figure 100 Add a blacklist entry
Table 97 Configuration items
Item Description
IP Address
Required
Type the IP address in dotted decimal notation to be blacklisted.
Hold Time
Permanent
Required. Configure either of them.
•
Click Hold Time to set the entry to be a non-permanent one and specify a lifetime for
it. The value is an integer in the range of 1 to 1000 minutes.
•
Click Permanent to set the entry to be a permanent one.