Wiper motor assembly removal and cleaning, Warning – Rena MACH X (Digital Color Label Printer) User Manual
Page 81
SECTION 4
OPERATOR MAINTENANCE
75
Wiper Motor Assembly Removal and Cleaning
Removal:
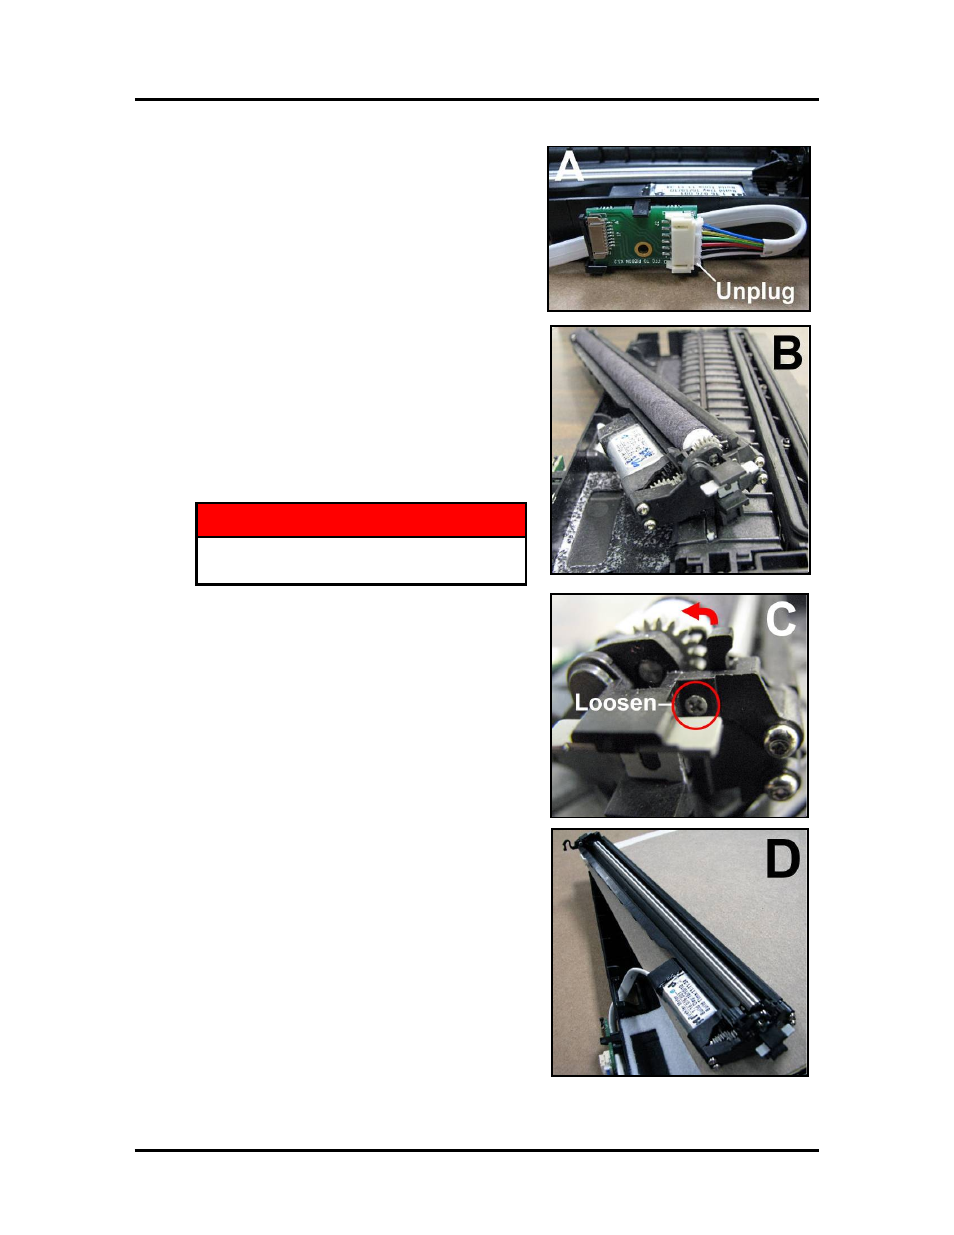
1. Disconnect (unplug) the wiper motor cable from the
Service Station Printed Circuit Board [A].
2. Remove the Printed Circuit Board [A] from the
Service Station Tray. Carefully release clips to
remove board.
3. Lift out the Wiper Motor Assembly [B].
4. Remove the Wiper Roller from the Wiper Motor
Assembly [C] [D]. See procedure on previous page.
Cleaning:
1. Pour distilled water into a flat-bottom container to the
depth of about 17mm.
2. Carefully immerse the Wiper Motor Assembly, motor
side up, into the water.
WARNING
DO NOT IMMERSE MOTOR OR GET
MOTOR WET; TO AVOID DAMAGE.
3. If vents are showing, carefully add more water until
they are covered. Allow the Wiper Motor Assembly
to soak for 10 minutes.
4. Carefully remove the Wiper Motor Assembly. Inspect
the vents and remove any debris with tweezers. Pat
dry with an absorbent lint-free towel.
NOTE: If this assembly shows signs of wear or
damage it should be replaced. If the Service Station is
more than one year old, depending on monthly
volume, it may be worthwhile to replace the entire
Service Station instead of replacing components.
5. Lightly lubricate the Wiper Motor Gears (3) with
synthetic PTFE grease (Super Lube 21030 or
equivalent).
Install:
1. Allow the Wiper Motor Assembly to dry.
2. Re-install in reverse order.
NOTE: Make sure the wiper roller is re-installed,
wiper roller latches are fully closed/locked and the
wiper roller retaining screws are fully tightened (do
not over-tighten).
TIP: If you are planning to clean the Service Station
Tray; don’t re-install this component until you have
completed the Service Station Tray cleaning process.