Rena MACH X (Digital Color Label Printer) User Manual
Page 69
SECTION 4
OPERATOR MAINTENANCE
63
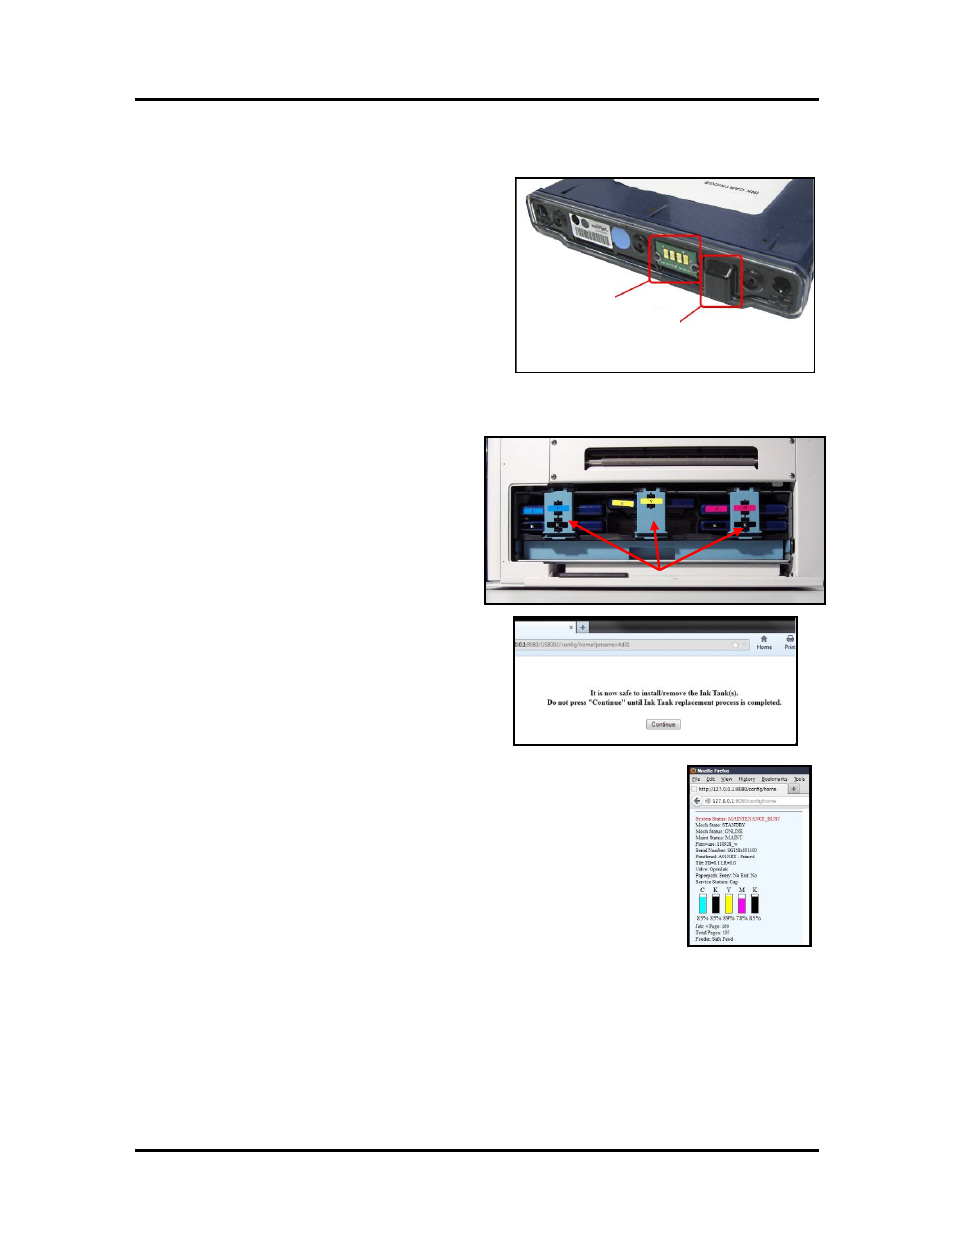
5. Lightly clean the QA Chip contacts [C] with a pencil eraser.
6. Clean the Ink Level Prism [D] and QA Chip
contacts [C] with a clean, dry, lint-free cloth.
NOTE: You can dampen the cloth with distilled
water to wipe the Prism, but DO NOT get the
QA Chip contacts wet.
7. Reinstall the Ink Tank(s) (label up) and securely
latch the Ink Tank Latch(es).
INSTALLATION TIP: Make sure the Ink
Tanks seat properly. Insert the Tank into the
appropriate Ink Station, then pull the Tank back
about an inch and push forward firmly to insure
that the Ink Nozzles penetrate the seals on the Ink Tanks.
8. Close and lock all three Ink Tank Securing
Latches.
IMPORTANT: Make sure both sides of
the Latch are engaged at the bottom.
9. Click on the button labeled “Continue”, in the
Confirm screen of the Toolbox.
10. Watch the Toolbox screen on your computer. You should see all the ink
colors fill-in; if all the Ink Tanks are properly installed and recognized.
Tip: If an Ink Tank color still does not fill-in. Press the “Refresh Ink Level”
button. If the problem continues you may need to replace the Tank with a
new/known good Tank.
Even new Ink Tanks can have dirty/corroded QA Chip contacts. This is not
always visible to the eye.
If problem persists after replacing with a “new/known good” Tank; please
call for service.
11. Close the Ink Tank Door.
C
D