Section 4 – operator maintenance, Ink tanks, Replacing the ink tanks – Rena MACH X (Digital Color Label Printer) User Manual
Page 68: Cleaning ink tank contacts, Section 4 – o perator maintenance, Anks
SECTION 4
OPERATOR MAINTENANCE
62
SECTION 4 – Operator Maintenance
This section covers how to care for the Printer, Ink Tanks, Printhead Cartridge, Service Station, etc…
Ink Tanks
Replacing the Ink Tanks
Replace the Ink Tanks when the ink runs out.
This procedure is almost identical to the procedure for installing new Ink
Tanks into a new printer. The only difference are:
- The Toolbox will display an “Ink_Out..” condition; once the ink in a
particular Tank is depleted.
- The empty Ink Tank(s) must be removed before installing the new Tank(s).
With these differences in mind; please refer to the section titled “Installing
the Ink Tanks”.
Cleaning Ink Tank Contacts
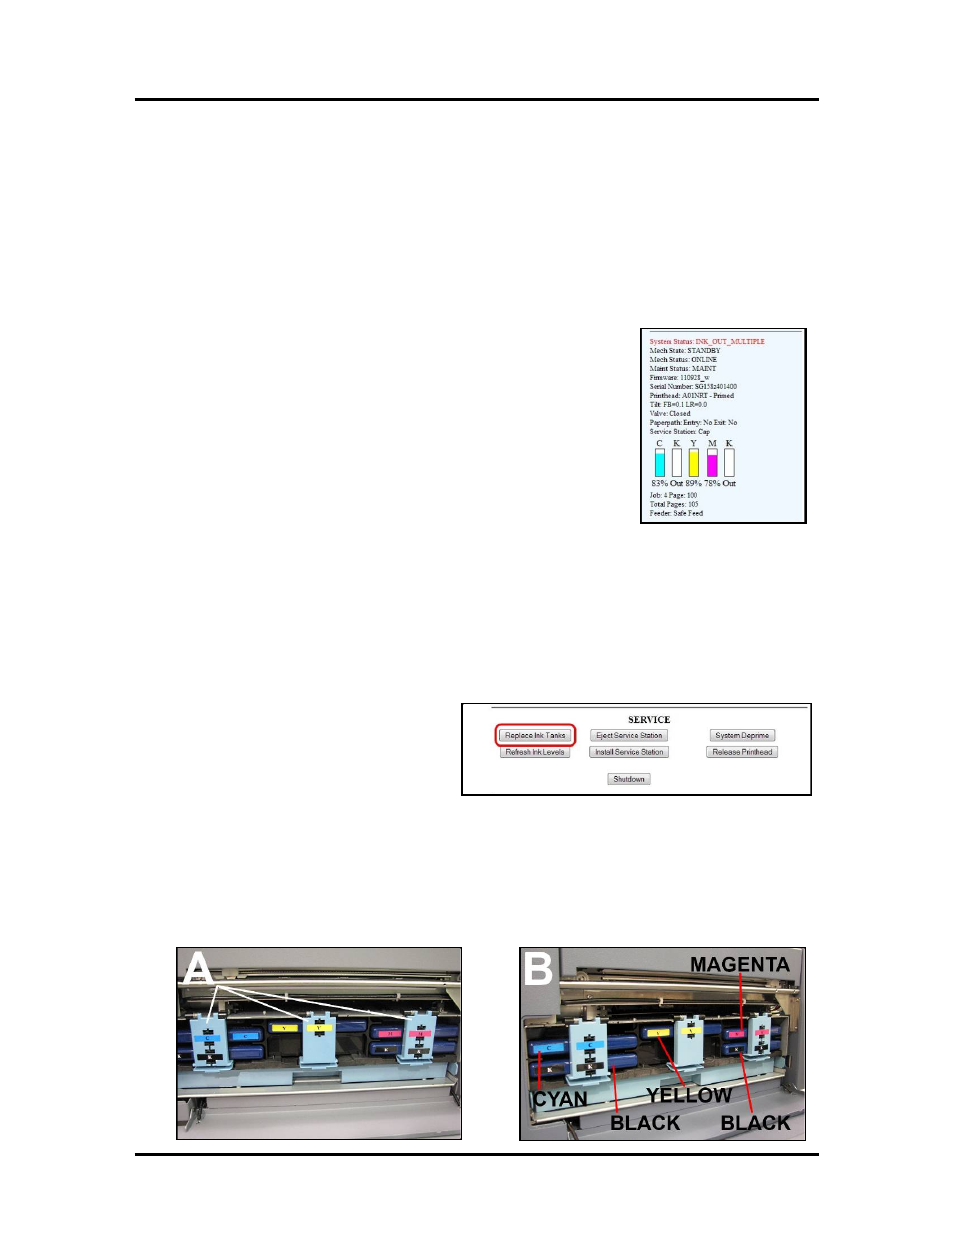
When reinstalling or replacing Ink Tanks, the Ink Level indicators in the Toolbox may show “?” or “out”,
for one or more Tank positions.
- The “out” condition may be due to a dirty Ink Tank Level Prism.
- The “?” condition may be due to dirty QA Chip contacts.
You can clean the prism and Tank contacts as follows:
1. Open the Toolbox Utility.
2. Click “Replace Ink Tanks”. Once the
“Confirm” window opens, it is safe to
remove the Ink Tanks.
IMPORTANT: Do NOT press
“Continue” until after you have installed the Ink Tank(s) and verified that the Ink Tank Latches
are securely closed.
3. Open the Ink Tank Door.
4. Release the corresponding Ink Tank Latch(es) [A] and remove the Ink Tank(s) [B] that had shown
the Ink status as “?” or “Out”.