BayTech MRP units 2012 User Manual
Page 27
Page
27
--------------------------------------------
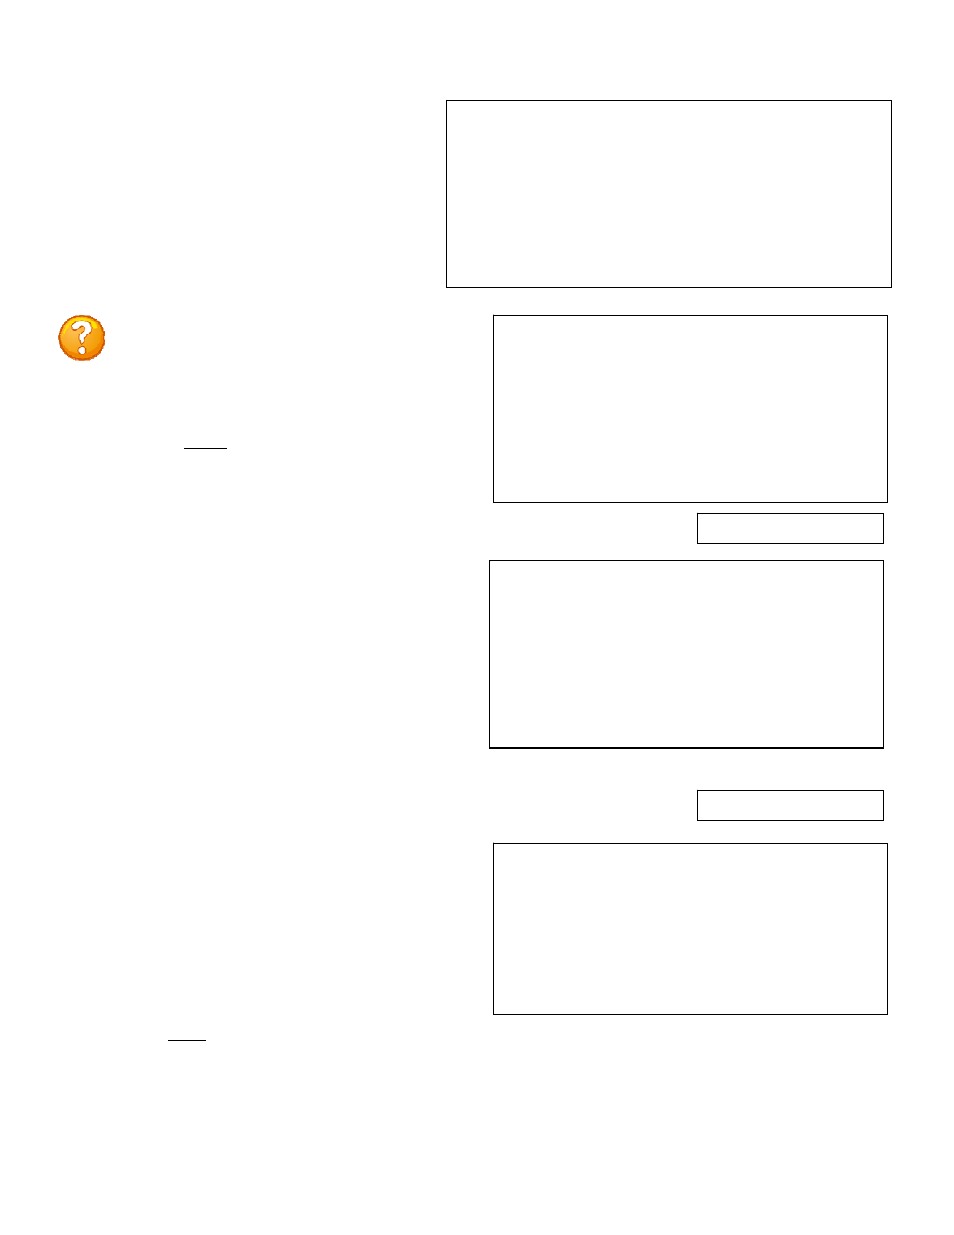
| User | Assigned Outlets |
| | C1,1| C1,2| C1,3| C1,4|
--------------------------------------------
1) Engineer | N |
Y
| N | N |
--------------------------------------------
A)...Add User
D)...Delete User
R)...Rename User
C)...Change Circuit Group
Enter user number to assign Outlets, A, D, C or R.
Assigned Outlets
Enter Outlet number(s):
Select 1), assigns an outlet to a user. The unit will prompt for outlet number:
Type the number of the outlet to be assign. For
example, if you want engineer to have access to
Outlet (C1,2), enter the number 2, followed by
Outlets (C1,2), (C1,3), and (C1,4) enter the
numbers 2, 3, and 4 separated by commas
followed by
The unit redisplays the Assigned Outlet Menu of
the user with a “Y” for the assigned outlets.
--------------------------------------------
| User | Assigned Outlets |
| | C1,1| C1,2| C1,3| C1,4|
--------------------------------------------
1) Engineer | N |
Y
| N | N |
--------------------------------------------
1)...Add Outlet(s)
2)...Remove Outlet(s)
3)...Add All Outlets
4)...Remove All Outlets
C)...Change Circuit Group
Select 2), removes individual outlets from a user. The unit will prompt for
outlet number
Enter Outlet number(s):
Type the number of the outlet to be removed from
the user’s access. For example, if you want to
remove Outlet (C1,2), enter the number 2,
followed by
access to Outlets (C1,2), (C1,3), and (C1,4) enter
the numbers 2, 3, and 4 separated by commas
followed by
Assigned Outlet Menu of the user with an “N” for
the outlets NOT assigned.
--------------------------------------------
| User | Assigned Outlets |
| | C1,1| C1,2| C1,3| C1,4|
--------------------------------------------
1) Engineer | N |
Y
| N | N |
--------------------------------------------
1)...Add Outlet(s)
2)...Remove Outlet(s)
3)...Add All Outlets
4)...Remove All Outlets
--------------------------------------------
| User | Assigned Outlets |
| | C1,1| C1,2| C1,3| C1,4|
--------------------------------------------
1) Engineer | N |
Y
| N | N |
--------------------------------------------
1)...Add Outlet(s)
2)...Remove Outlet(s)
3)...Add All Outlets
4)...Remove All Outlets
C)...Change Circuit Group
The Assigned Outlet Menu displays the outlets
a user can access.
Select a user number from the Managed User
Menu, the unit will display the Assign Outlet
Menu:
NOTE: If an outlet user’s list is changed while
the user is logged in, their outlet list changes
dynamically. If enabled, an updated outlet
status report will be issued. “Y” means the
outlet is assigned to the user. “N” means the
outlet is NOT assigned to the user.