Using usb media, Using a usb cable – Baby Lock Destiny (BLDY) Instruction & Reference Guide-Part2 User Manual
Page 91
PRINT AND STITCH (COMBINING EMBROIDERY PATTERNS AND PRINTED DESIGNS)
284
■ Using USB Media
a
Insert the USB media into the primary (top)
USB port on the machine.
b
Select the pattern, and then press
.
→ The select USB output screen appears.
c
Press
to select the USB port where
the USB media is inserted.
→ Two files of the background image only and one file
for aligning embroidery into position are copied
(PDF format) onto the USB media.
d
Remove the USB media where the image
data is saved from the machine, and then
copy the image data from the USB media to
the computer.
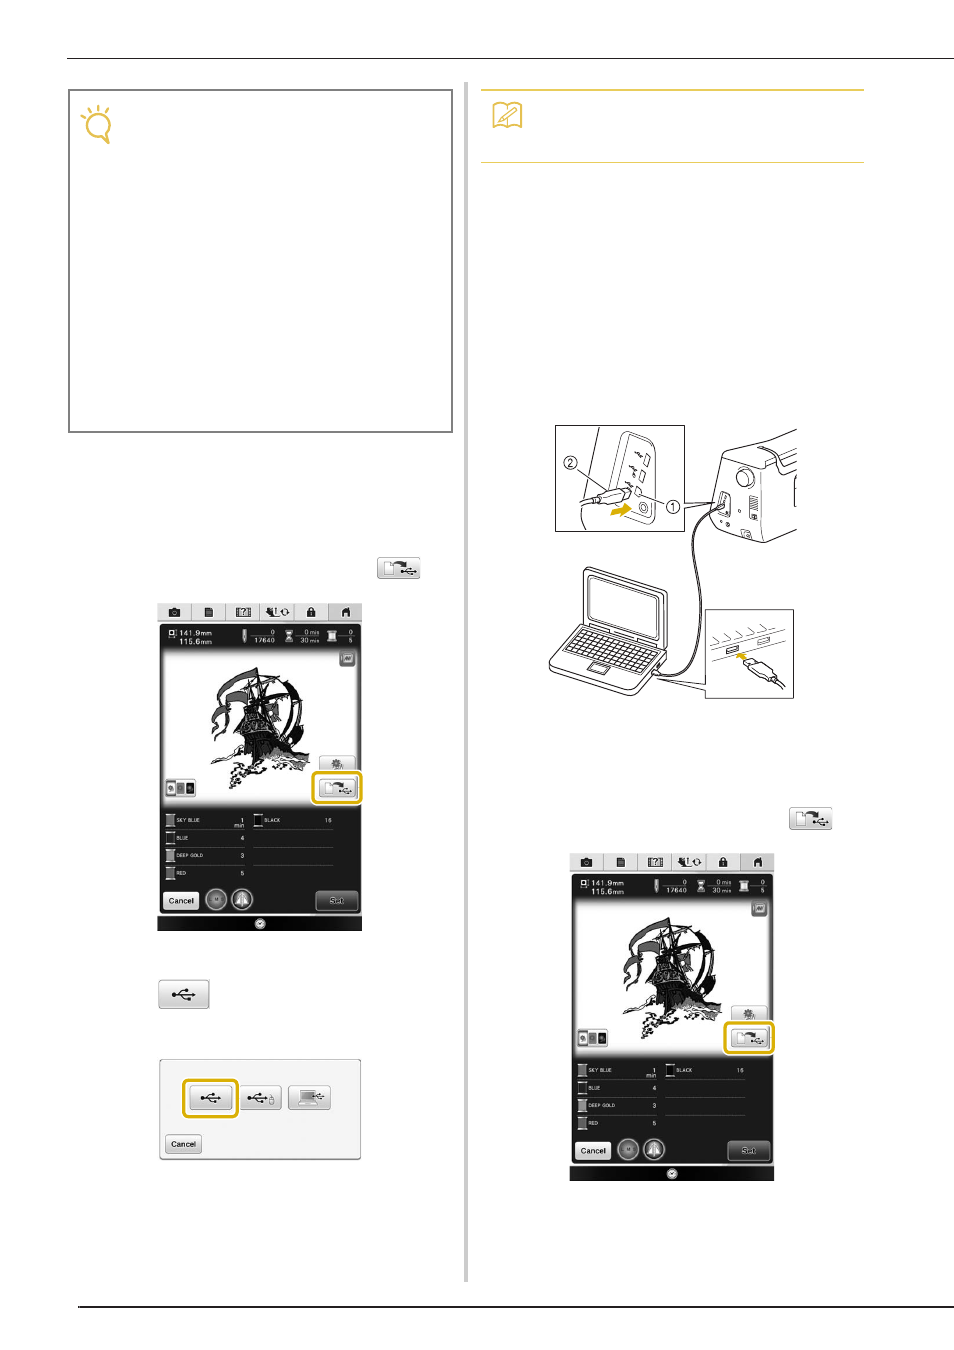
■ Using a USB Cable
a
Plug the USB cable connectors into the
corresponding USB ports on the computer
and on the machine.
a USB port for computer
b USB cable connector
→ The “Removable Disk” icon appears in “Computer
(My Computer)” on the computer.
b
Select the pattern, and then press
.
→ The select USB output screen appears.
Note
• Print the background and embroidery
position sheet in their original dimensions. If
an image is printed in a different size, the
sizes of the embroidery pattern and
background may not match. In addition, the
built-in camera cannot detect the
embroidery position mark. Make sure that
the print settings are correctly specified.
• When printing the PDF file of the image with
positioning marks, specify the highest
image quality possible for full-color printing.
In addition, use matte printing paper. Due to
poor printing conditions, the machine’s
built-in camera may not be able to correctly
detect the positioning marks. (For details on
printing, refer to the operating instructions
for your printer.)
Memo
• Do not remove the USB media from the
machine until data output is finished.