Baby Lock Destiny (BLDY) Instruction & Reference Guide-Part2 User Manual
Page 116
USING THE CAMERA TO CONNECT PATTERNS
309
Ad
va
n
ced
Em
br
oi
d
er
y
6
l
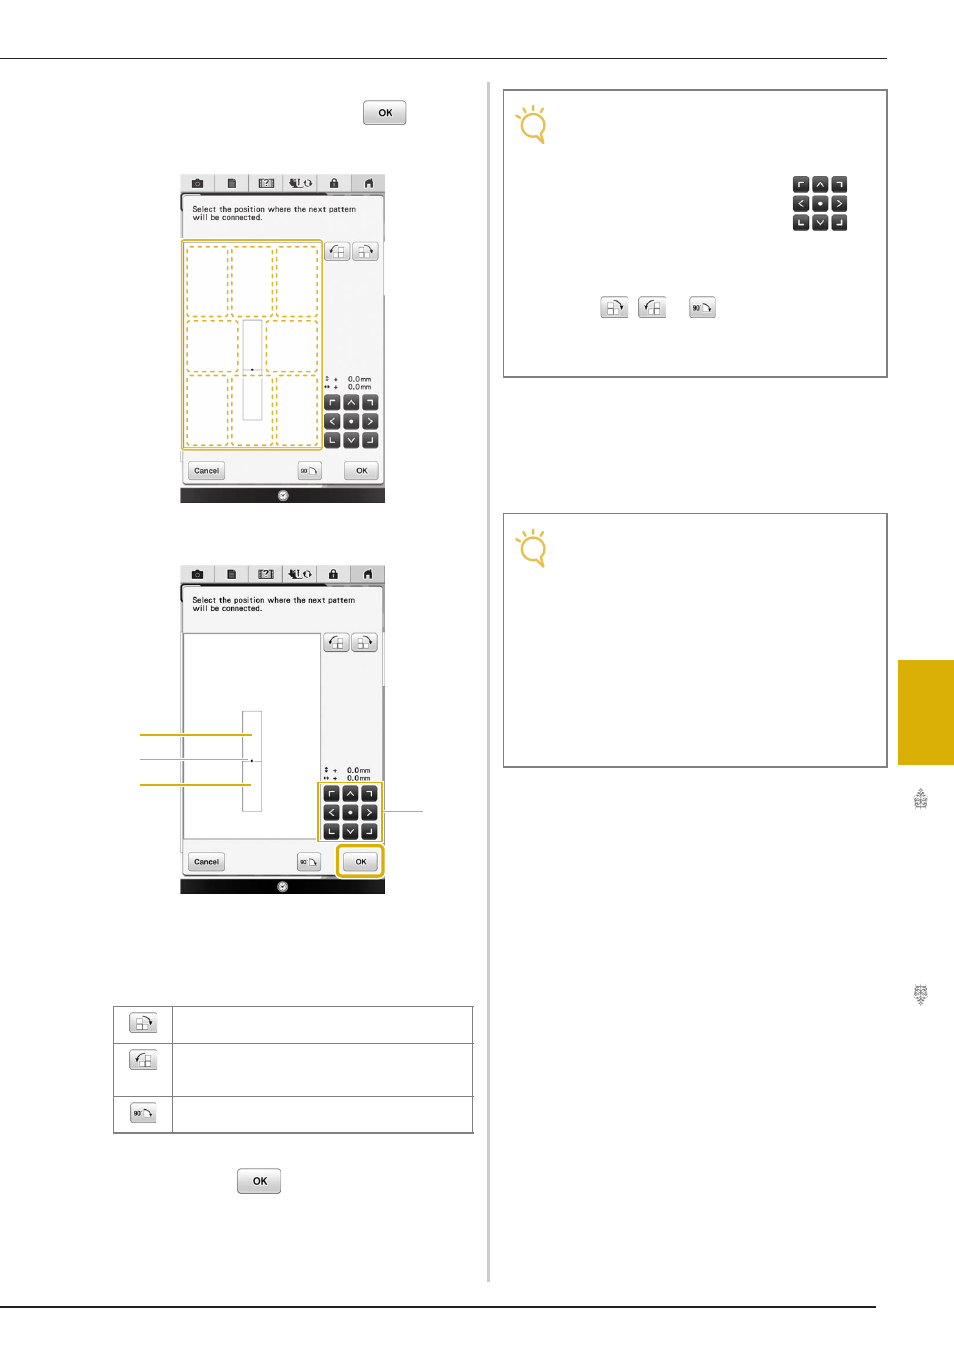
Select the position of the second pattern by
pressing on the screen. Press
after
specifying the position.
*
You can adjust the position of the second pattern
using the keys described below.
a Connecting point
b First pattern A
c Second pattern B
d Press to move the second pattern.
→ Message appears on screen and carriage will move
after pressing
.
m
Prepare two embroidery positioning
stickers. Following the on-screen
instructions to affix these two stickers to the
fabric so that the positioning marks can be
detected by the camera.
Press to rotate the second pattern in a clockwise
arc referring the first pattern as a center.
Press to rotate the second pattern in a
counterclockwise arc referring the first pattern as a
center.
Rotate the second pattern 90 degree in a
clockwise.
a
b
c
d
Note
• The second pattern will be automatically
connected to the first pattern without
adjustment. Change the position of the
second pattern manually using
.
• The position of the second pattern can be
moved using your finger or the included
touch pen.
• Use
,
or
if you want to align the
pattern to the corner of the center of the
first pattern, when changing the pattern’s
connecting position.
Note
• Use the positioning stickers included with
this product or purchase replacement
stickers (BLSO-EPS) from your Baby Lock
retailer. If any other sticker is used, the
camera may not recognize it.
• The 182 mm × 257 mm (7 inches × 10
inches) embroidery positioning sticker sheet
with strong adhesive is most appropriate for
connecting patterns (BLSO-EPS). If any
other positioning sticker is used, it may peel
off. If the sticker peels off, the patterns
cannot be connected.