Before embroidering, Embroidery step by step – Baby Lock Destiny (BLDY) Instruction & Reference Guide-Part2 User Manual
Page 3
BEFORE EMBROIDERING
196
Embroidery Step by Step
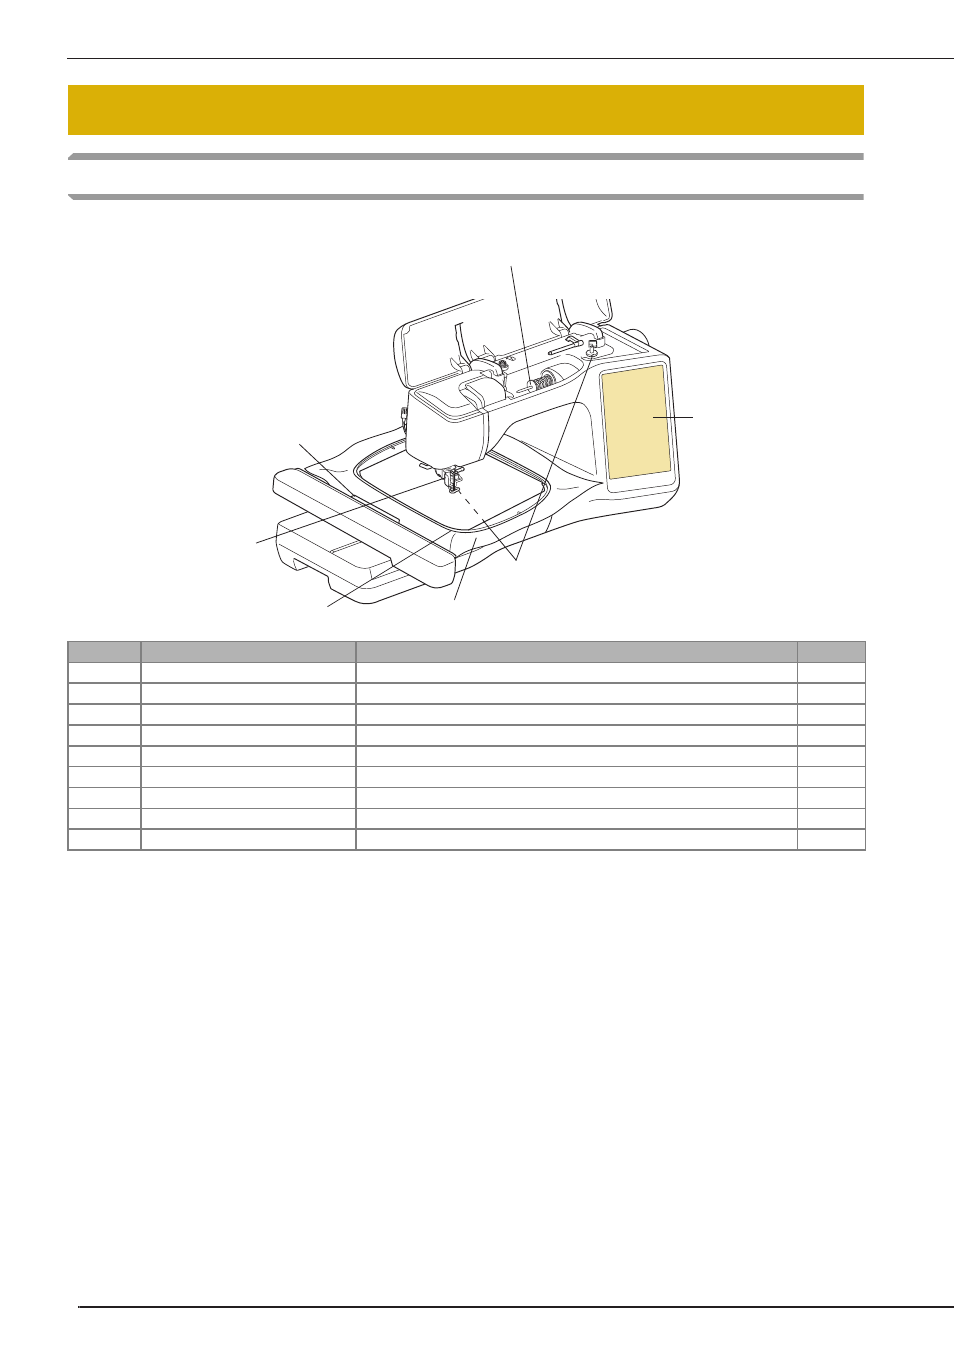
Follow the steps below to prepare the machine for embroidery.
BEFORE EMBROIDERING
Step 3
Step 1, 2
Step 7
Step 5
Step 4
Step 6, 8
Step 9
Step #
Aim
Action
Page
1
Presser foot attachment
Attach embroidery foot “W+”.
197
2
Checking the needle
Use needle 75/11 for embroidery. *
75
3
Embroidery unit attachment
Attach the embroidery unit.
197
4
Bobbin thread setup
For the bobbin thread, wind embroidery bobbin thread and set it in place.
52
5
Fabric preparation
Attach a stabilizer material to the fabric, and hoop it in the embroidery frame.
242
6
Pattern selection
Turn the main power to ON, and select an embroidery pattern.
200
7
Embroidery frame attachment
Attach the embroidery frame to the embroidery unit.
247
8
Checking the layout
Check and adjust the size and position of the embroidery.
249
9
Embroidery thread setup
Set up embroidery thread according to the pattern.
60
*
It is recommended that a 90/14 needle should be used when embroidering on heavy weight fabrics or stabilizing products (for example;
denim, puffy foam, etc.). Ball point needle (golden colored) 90/14 is not recommended for embroidery.