Baby Lock Destiny (BLDY) Instruction & Reference Guide-Part2 User Manual
Page 61
CONFIRMING THE PATTERN POSITION
254
g
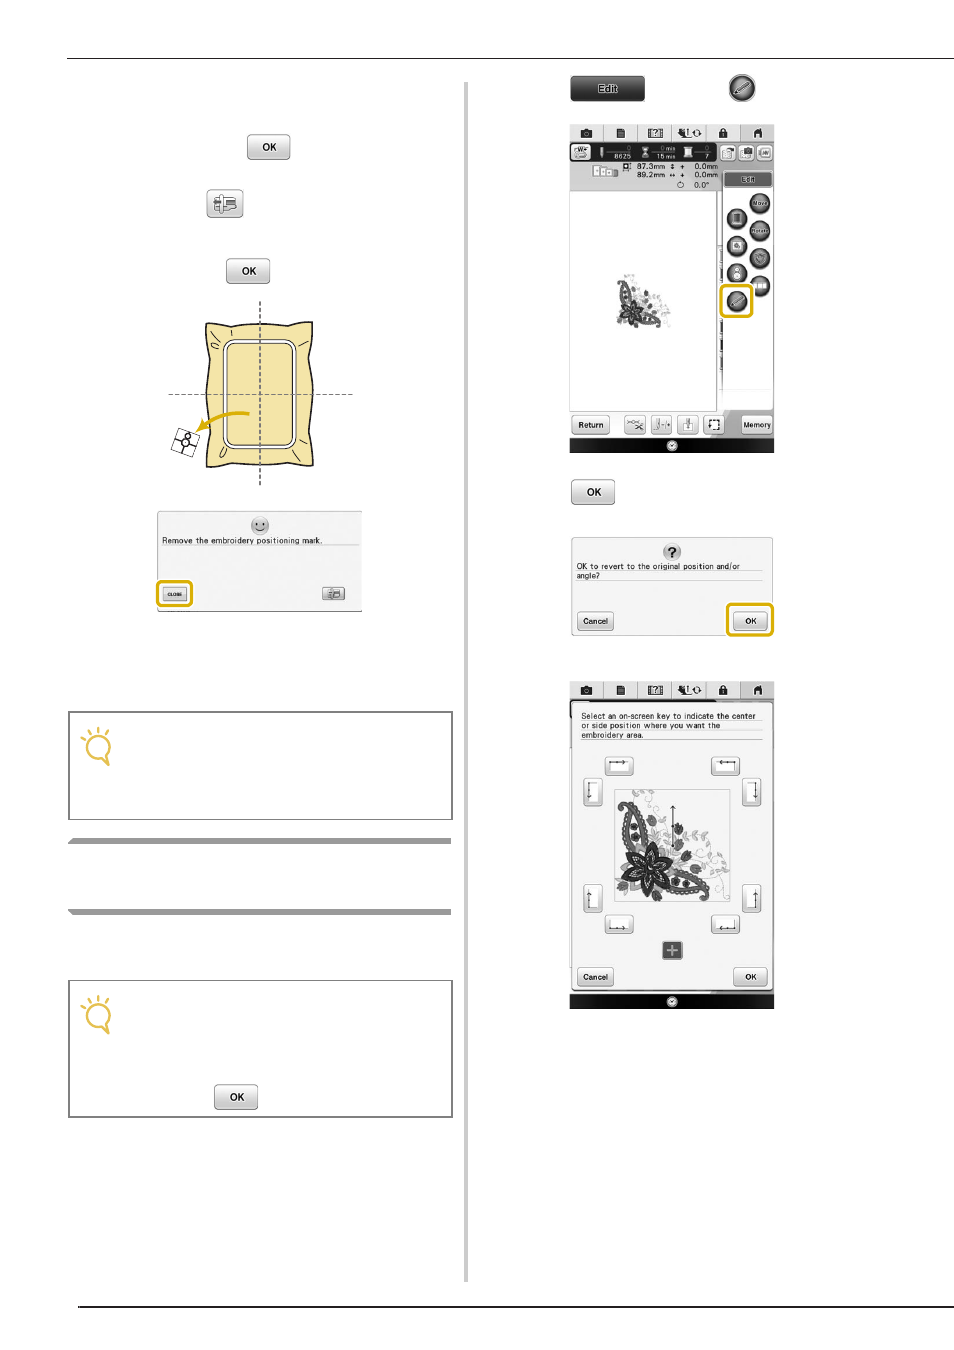
A reminder message appears. Remove the
embroidery positioning sticker from the
fabric, and press
.
*
To remove the embroidery positioning sticker more
easily, press
so that the embroidery frame
moves slightly forward and away from under the
needle. After the embroidery positioning sticker is
removed, press
.
h
Press the “Start/Stop” button to begin
embroidering.
*
See “Embroidering Patterns” on page 260.
Specifying the Embroidering
Position With the Sensor Pen
By using the sensor pen, the embroidering position
can be adjusted to the desired location.
a
Press
, and then
.
b
Press
.
→ The embroidering position selection screen appears.
c
Select the reference point for positioning
the embroidery pattern.
*
To align the edge of the embroidery with a pattern
or mark on the fabric, select the edge of design. If
the center of the pattern to be embroidered is
determined, select the center position.
Note
• After the included embroidery positioning
stickers are used up, optional stickers are
available. For details, refer to “Options” on
page 22.
Note
• If the message “The carriage of the
embroidery unit will move. Keep your hands
etc. away from the carriage.” appears
during the operation, ensure safety, and
then press
.