Checking the pattern position – Baby Lock Destiny (BLDY) Instruction & Reference Guide-Part2 User Manual
Page 64
CONFIRMING THE PATTERN POSITION
257
Bas
ic Em
b
ro
ide
ry
5
c
Press
to adjust the positions.
→ If you don’t need to adjust the positions, continue to
step
g
.
d
Press
to move the LED pointer on
the fabric for adjusting the first position.
e
Press
to apply the setting.
f
Press
to move the LED pointer on
the fabric for adjusting the second position.
g
Press
to apply the setting.
h
The preview in the screen is updated
according to the specified embroidering
position.
i
Press the “Start/Stop” button to start
embroidering.
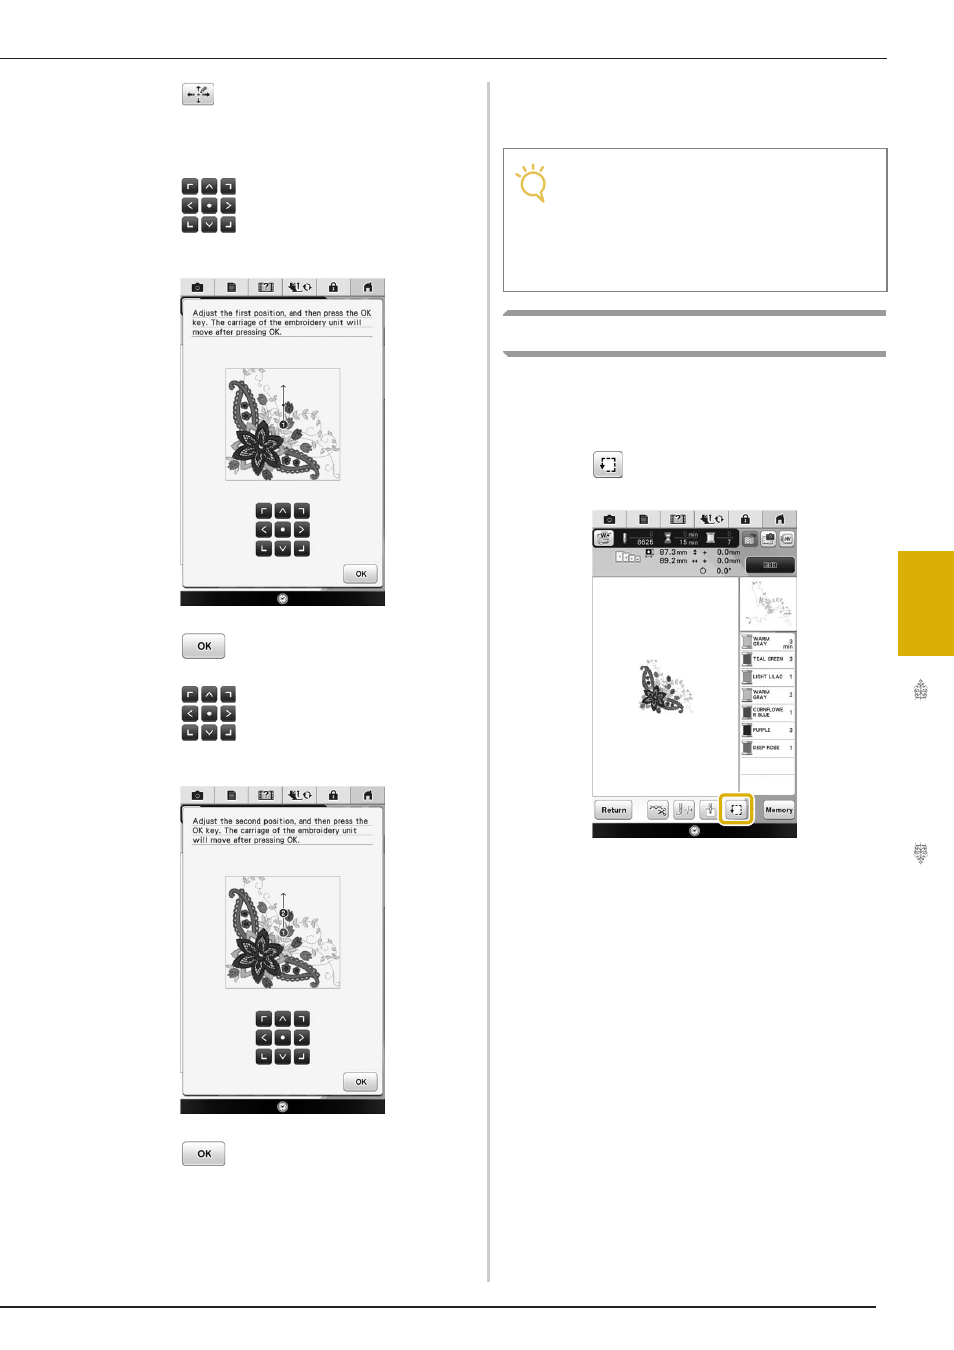
Checking the Pattern Position
The embroidery frame moves and shows the
pattern position. Watch the frame closely to make
sure the pattern will be sewn in the right place.
a
Press .
→ The following screen is displayed.
Note
• When using the sensor pen to specify the
embroidering position, it may not be
possible to exactly specify the desired
location. In this case, move the embroidery
frame to align the center of the pattern with
the location indicated by the LED pointer.