Key functions – Baby Lock Destiny (BLDY) Instruction & Reference Guide-Part2 User Manual
Page 44
VIEWING THE EMBROIDERY SCREEN
237
Bas
ic Em
b
ro
ide
ry
5
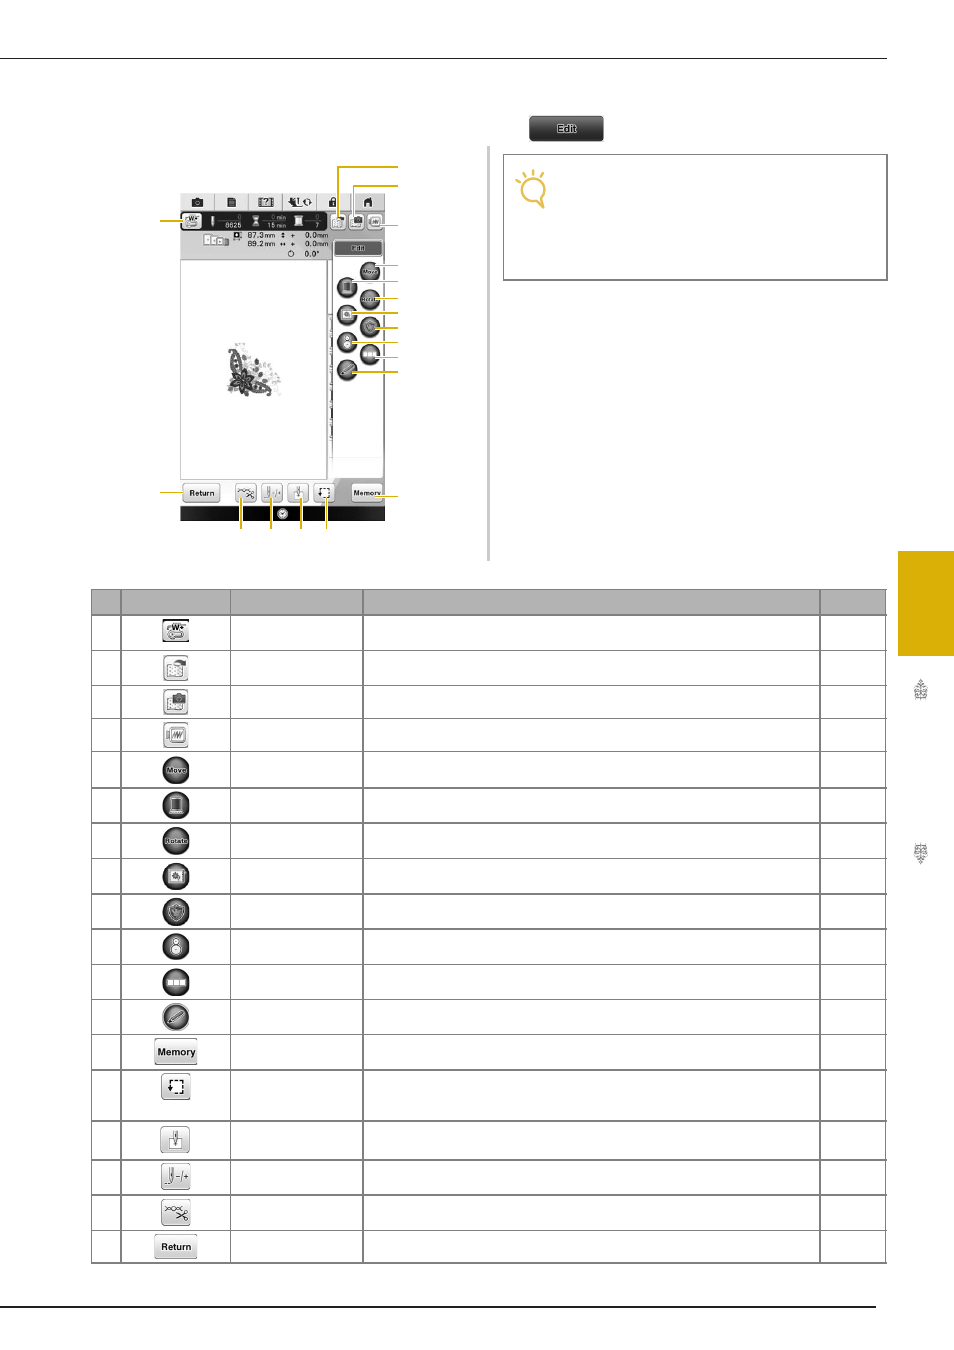
■ Key Functions
Using these keys, you can move or rotate pattern, etc. Press
to display the editing window.
e
b
f
m
r
n
o
q
p
d
c
g
h
i
j
k
l
a
Note
• Some operations or functions are not
available for certain patterns. If the key
display is darkened, you cannot use that
function or operation with the selected
pattern.
No.
Display
Key Name
Explanation
Page
a
Needle point check
key
Press this key to check the needle drop point with the light of the LED pointer.
249
b
Fabric image save key Press this key to save the currently displayed fabric image.
272
c
Fabric scan key
Press this key to scan the fabric to align the embroidery position.
272
d
Image key
Press this key for a preview of the sewn image.
212
e
Move key
Press to display the pattern moving window.
212
f
Uninterrupted
embroidery key
Press this key to embroider the selected pattern with a single color.
272
g
Rotate key
Press this key to rotate the pattern. You can rotate a pattern 0.1 degree, 1
degree, 10 degrees or 90 degrees at a time.
213
h
Basting key
Press to add the basting stitch to the pattern. You can set the desired basting
distance.
276
i
Appliqué key
Press to create an appliqué piece using the selected pattern.
277
j
Embroidery
positioning key
Press this key to align the embroidering position using the built-in camera.
252
k
Pattern connect key
Press to start pattern connecting embroidering. You can connect the patterns
accurately using the built-in camera.
307
l
Sensor function key
Press this key to use the sensor function.
254
m
Memory key
Press this key to save a pattern in the machine’s memory, USB media or a
computer.
299, 300
n
Trial key
Press this key to check the position of the pattern.The embroidery frame moves
to the desired position so you can check that there is enough space to sew the
pattern.
257
o
Starting point key
Press this key to move the needle start position to align the needle with the
pattern position.
293, 294
p
Forward/Back key
Press this key to move the needle forward or back in the pattern; useful if the
thread breaks while sewing or if you want to start again from the beginning.
267-269
q
Cut/Tension key
Press this key to specify automatic thread cutting, thread trimming or the
thread tension. For embroidery, these functions are set automatically.
287-290
r
Return key
Press this key to return to the pattern type selection screen.
—