AMETEK Compact IX 2253 User Manual
Page 53
User Manual
2253i / 2253iX
AMETEK California
Instruments
53
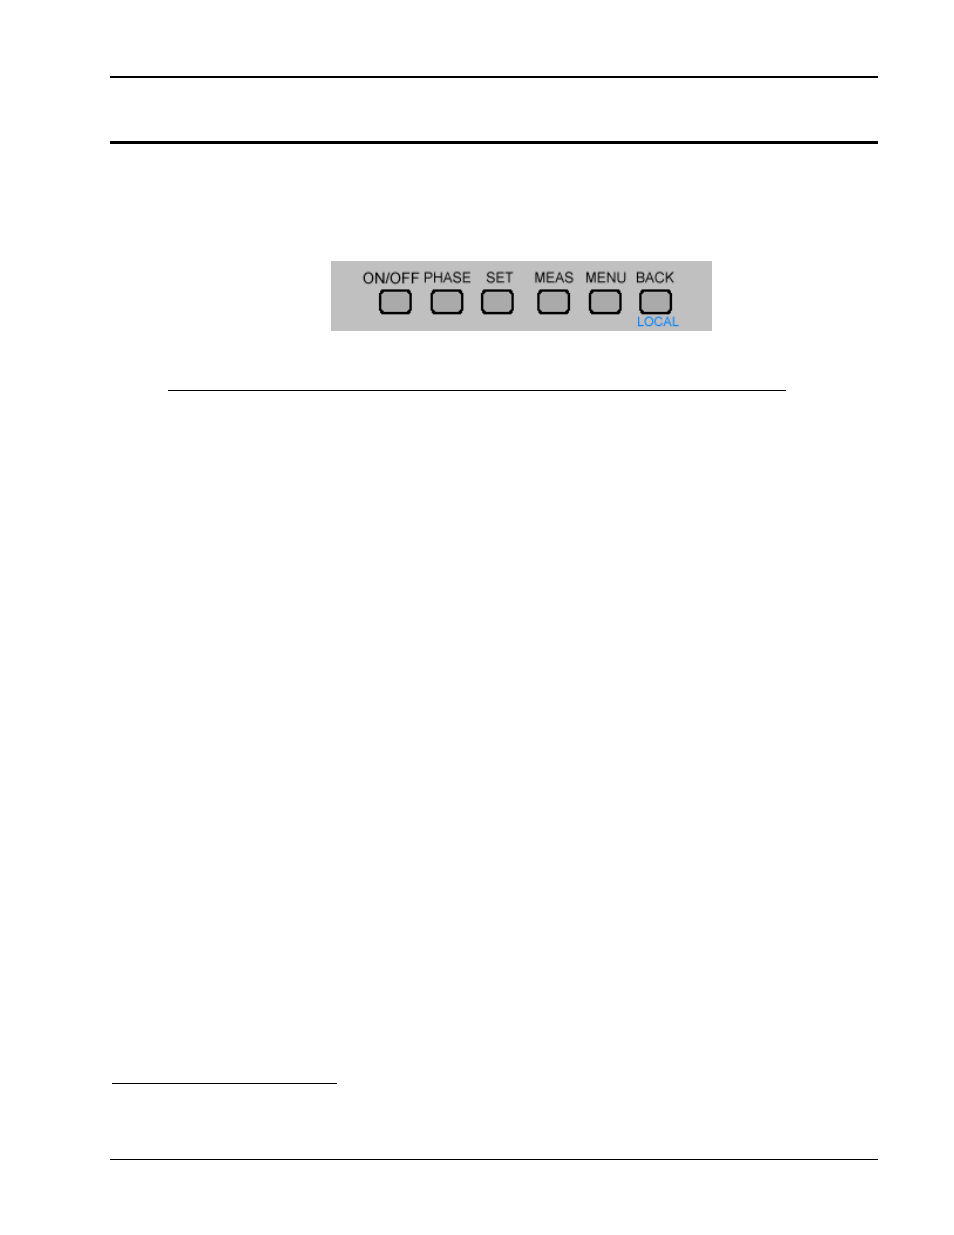
4.1.5 Menu Keys
The i/iX Series is operated through a series of menus. These menus can be reached by using a
number of menu keys located along the bottom of the LCD display and the UP/DOWN cursors keys.
Several menus have more than two entries. Since the LCD display has two display lines, additional
entries may not be visible but can be reached by scrolling up or down using the UP/DOWN cursor
keys. The following menu keys are available:
Figure 4-3: Menu Keys
KEY DESCRIPTION
ON/OFF
The ON/OFF key located to the left of the Menu keys may be used to
control the state of the output relay. The active state is indicated by
the Output LED. If the output relays are open (LED is off), the output
is floating.
PHASE
The PHASE key is used to toggle between phase A, B, C or all
phases (coupled mode). On models with the –MODE option, this key
is active only while the 2253iX is in three phase mode.
SET
The
SET
key selects the PROGRAM setting screen. While this
screen is displayed, the rotary knob can be used to change either
voltage or frequency. Additional output settings such as current limit
can be reached by using the down cursor key.
For test options such as –704 or –160, the SET key can be used to
skip to the next test in a test sequence during test execution.
MEAS
The
MEAS
key selects the measurement screen for the selected
phase. If all three phases are selected, the measurement data for
phase A will be displayed. There are no user changeable fields in the
measurement screen. The rotary knob is active while the
measurement screen is displayed. Additional measurement data can
be displayed by using the up and down cursor keys.
MENU
The top-level menu is accessed by pressing the MENU key. Refer to
section 4.2 for details on available menus.
BACK
The
BACK
key may be used to back up to the previous menu level
or previously selected screen. It can also be used as a backspace
key to delete the last digit entered.
For tests options such as the –160 and –704 options, the BACK key
can be used to abort a test in progress.
If the unit is in remote mode, (Remote LED is lit), the front panel of
the power source is disabled. The BACK button doubles as a GOTO
LOCAL button (LOCAL) while the unit is in remote state. This allows
the user to regain control of the front panel. This LOCAL button can
be disabled by sending a Local Lockout bus command
1
. This
prevents unauthorized changes of settings in ATE applications.
1
Note: When using the iXCGui Windows program with USB, RS232 or LAN interface, the local function is disabled. See
programming manual for user application programming.