Y s i – YSI ADV6600 User Manual
Page 90
Section 6. Data Collection
ADV6600
Y S I
Environmental
Page 80
Before beginning a deployment, make sure you have read and completed the procedures outlined in
previous chapters of this manual, including membrane installation, probe installation, firmware
setup, calibration and diagnostics. Be particularly careful that you have performed your dissolved
oxygen calibration with Autosleep RS232 activated in the Advanced|Setup menu associated with the
water quality sensors as described in Section 4.5.3 above.
1. Connect the ADV6600 to a computer.
2. Launch the ADVantage 6600 software.
3. Choose Connect to System. Verify the
COM setting and Baud Rate. Click on
Connect.
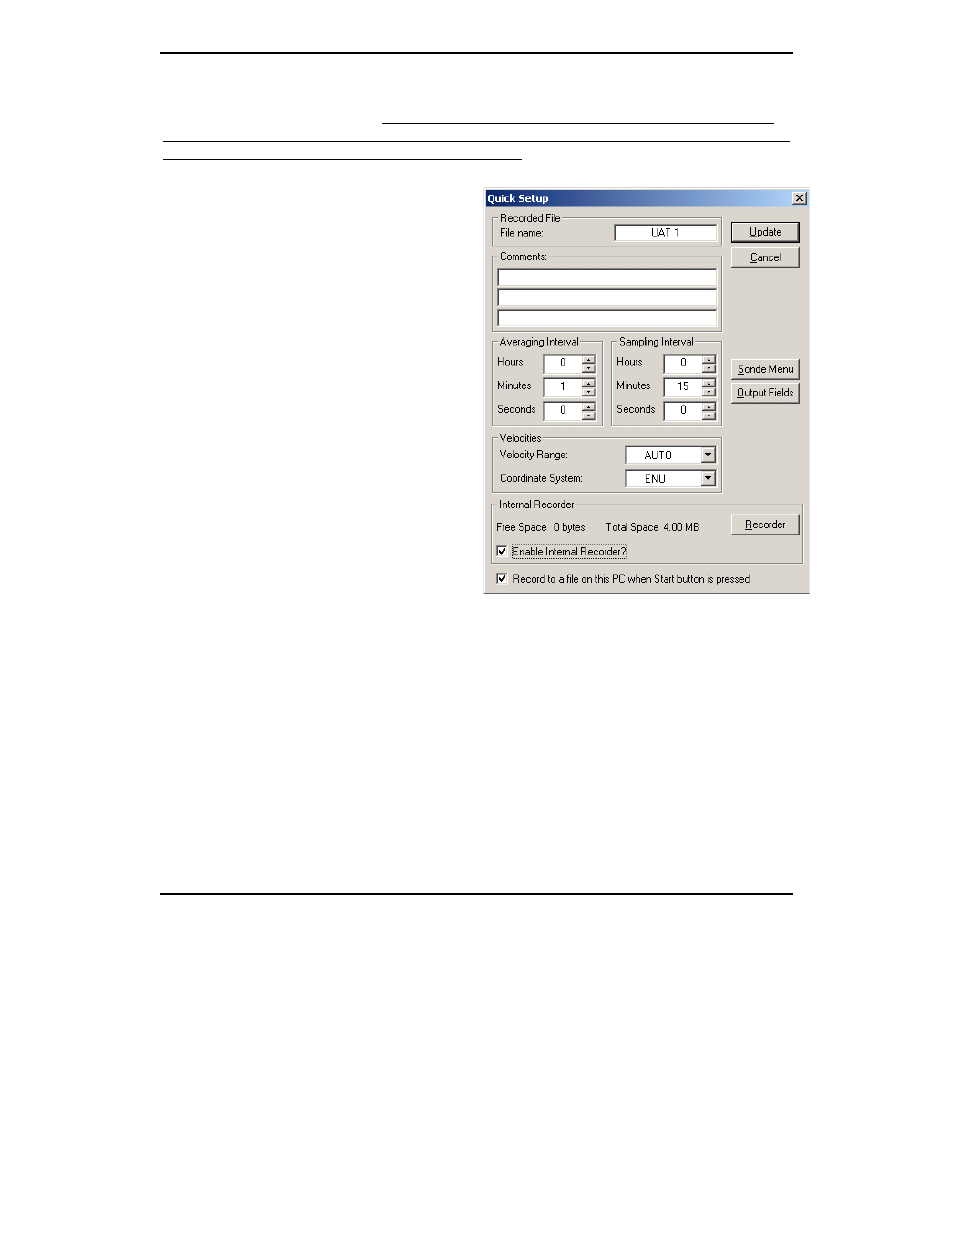
4. Click Change System Settings. The
Quick Setup dialog box, as shown at
the right, will appear.
5. Enter up to 5 characters for a file name.
Note that ONLY alpha-numeric
characters are allowed. The sonde
firmware will automatically add a 3-
digit site number to these 5 characters
for a complete file name that appears as
such: 5char001.a66
6. Add comments regarding the
deployment or data file, or leave blank.
7. Set your Averaging Interval in minutes.
For most unattended studies, an
averaging interval of 1 minute provides
sufficient data smoothing. Larger
values may provide somewhat
smoother data, but also will result in
reduced battery life.
8. Select your Sample Interval in minutes. Typical values for most long term studies are 15,
30, or 60 minutes with the larger values providing longer battery life at the expense of time
resolution. You may wish to select 15 minutes for your initial deployment to check for the
rate at which velocity and water quality parameters typically change at a particular site and
then later increase the sample interval if appropriate.
9. For most deployments, make certain that the Velocity Range is set to AUTO and that the
coordinate system is set to ENU.
10. Make sure the Enable Internal Recorder box is checked.
11. Click on Update. The settings will be saved and the Quick Setup window will disappear.
12. From the Data Collection list choose either:
a.) Start real-time data collection or begin regular deployment to begin a
deployment immediately.
b.) Start a deployment at specified time in the future to schedule a future start
time