TeeJet RMS Office User Manual
Page 115
RMS Office
Software Version 3.10
Chapter 4 - RMS Map Manager 4-37
Shape File Conversion
Setting Up A Field Transfer Template
Figure 4-24 shows the Field Transfer Template dialog. This dialog is used to set up a field transfer
template. The Template Name edit box appears at the top of the dialog is. Templates should be
given a unique name, which identifies the type of conversion they handle. In Figure 4-24, the tem-
plate is named “Point to SHP”, identifying that this template is used for RMS Point object to Shape-
file object conversions.
Below the Template Name edit box is the Field Transfer list. This list contains the field transfers or
mappings that are performed between the given source file and destination file objects. The
source file object fields appear in the list's left column and the destination file object fields appear
in the list's right column. Figure 4-24 shows the mapping of the RMS Point object's NAME field to
the Shapefile object's NAME field and the RMS Point object's ELEVATION field to the Shapefile
object's ALTITUDE field.
Use The New, Edit, and Delete buttons, to the right of the Field Transfer List, to change the entries
in the list. Press the New button to create a new field transfer. You are presented with the Field
Transfer dialog (see Configuring A Field Transfer on page 4-38). Press the Delete button to delete
the current field transfer (the transfer currently highlighted in the list). You are presented with a
message box that asks you to confirm the delete. Press Yes to delete the transfer. Otherwise press
No. Press the Edit button to edit the current field transfer. You are presented with the Field Trans-
fer dialog (see Configuring A Field Transfer on page 4-38).
Several buttons in the Field Transfer Template dialog only appear when you transfer fields from an
RMS file to a Shapefile. Use the Up/Down Arrow buttons to change the order of field transfers in
the list. The order of the transfers determines the order that the program writes the fields to the
Shapefile in. In Figure 4-24, the SHAPE_NAME field precedes the ALTITUDE field in the resulting
Shapefile. The Copy All button copies all the fields, in the RMS file object, to the Shapefile object.
Press this button have your Shapefile object contain an exact copy of the fields in the RMS file
object.
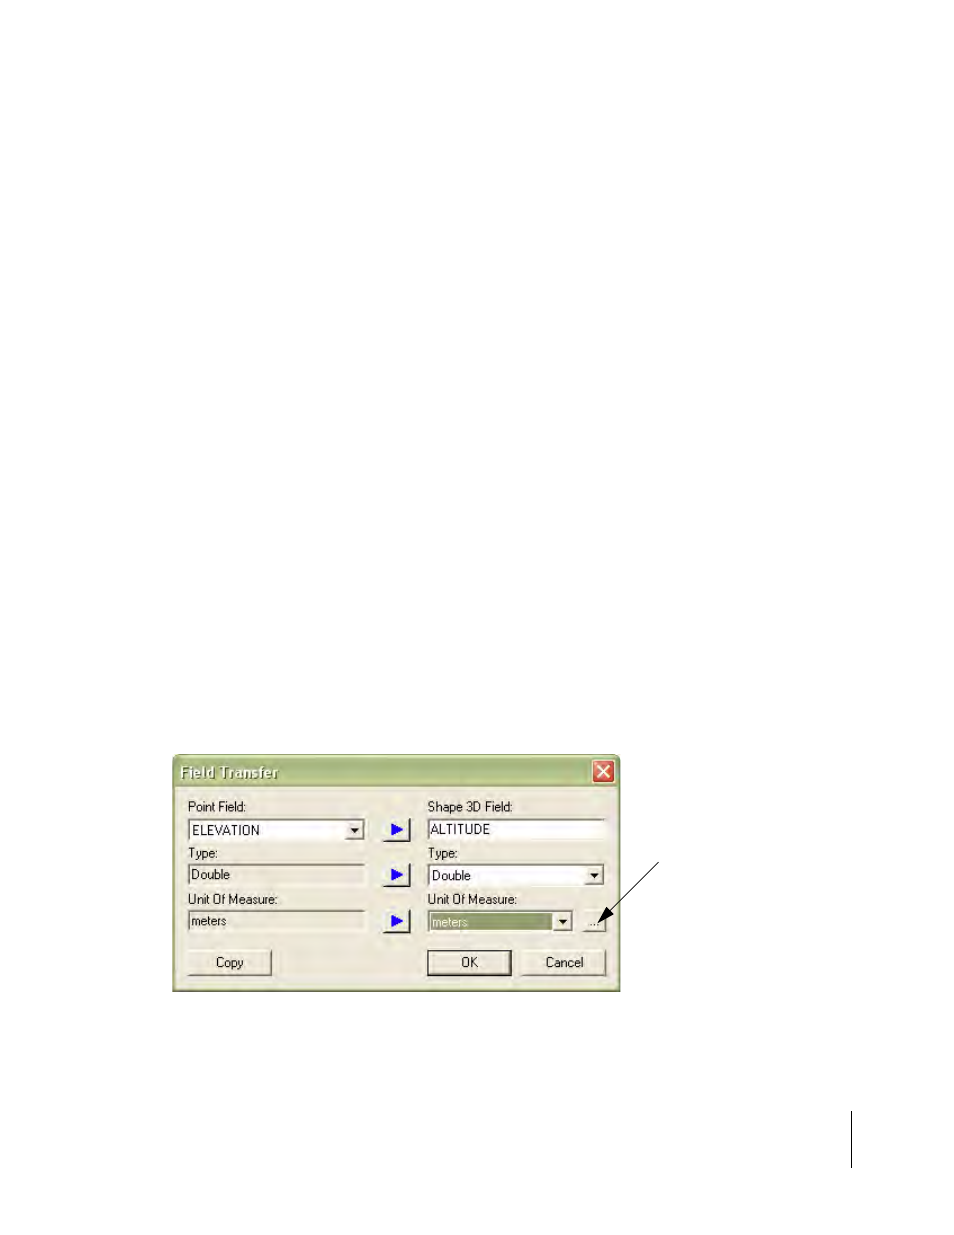
Figure 4-25: The Field Transfer Dialog
Unit of Measure Browse
Button