Some modeling terms & trivia, Landing – Great Planes PT-40 MkII Kit - GPMA0118 User Manual
Page 57
The most common mistake when learning to fly is “over
control.” Think of pressure instead of large movements of
the control sticks. Remember all PT’s will recover from
almost any over control situation within 50 - 100 feet if you
simply let go of the sticks.
Add and practice one maneuver at a time, learning how
your PT behaves in each one. For ultra-smooth flying and
normal maneuvers, we recommend using the “low rate”
settings as listed on page 53. High rate control throws will
give your PT enough control for loops, barrel rolls and many
other basic aerobatic maneuvers.
After you have several flights on your PT, it’s time to reward
yourself with your first aerobatic maneuver – a loop. Climb
to a safe altitude and turn into the wind. Apply full throttle,
level the wings, then slowly pull back on the elevator stick to
about 1/2 to 3/4 up elevator (depending on your throws)
and hold this control input. After you go over the top and
start down the back side of the loop, pull the throttle back to
about half. This will keep the stresses on the airplane low
and the airspeed relatively constant. Keep holding “up”
elevator until the plane is level, then slowly release the
sticks. You’re done! It’s really that easy!
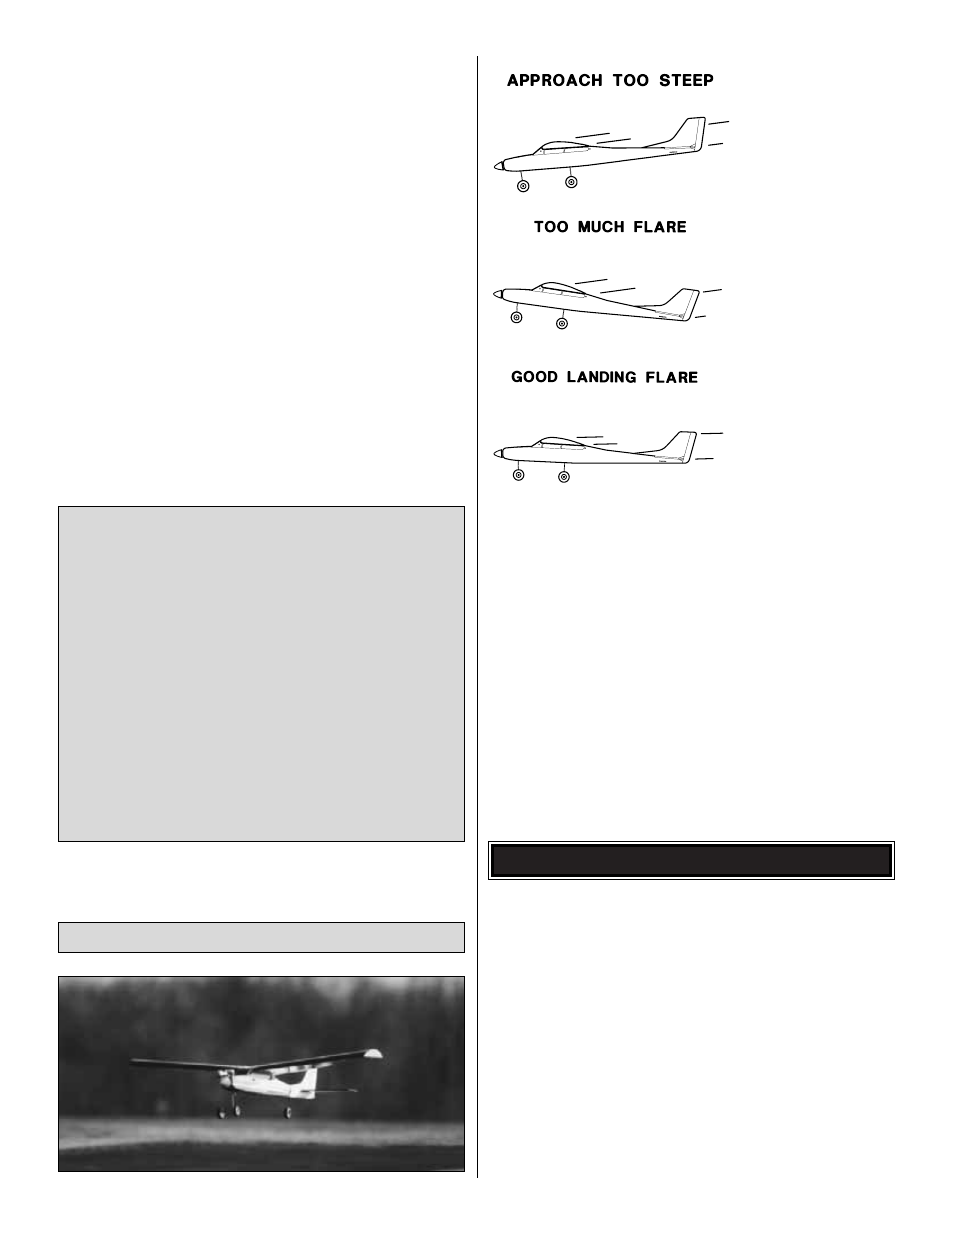
When it’s time to land, fly a normal landing pattern and
approach as follows: Reduce the power to about 1/4 and fly
a downwind leg far enough out from the runway to allow
you to make a gentle 180 degree turn. As you make the
turn into the wind for your final approach, pull the throttle
back to idle. The PT has a lot of lift so you will need a slow,
reliable idle in order to achieve a nice slow landing. Allow
the plane to keep descending on a gradual glide slope until
you are about 3 feet off the runway. Gradually apply a little
up elevator to flare for landing. You should apply just
enough up elevator to hold the plane just off the runway
while the excess speed bleeds off. The PT should settle
onto the runway for a slow, slightly nose-high landing.
Good luck and have fun flying your PT, but always stay
in control and fly in a safe manner.
...so you’ll know what they are talking about at the
flying field.
Ailerons – Hinged control surfaces located on the trailing
edge of the wing, one on each side, which provide control
of the airplane about the roll axis. The control direction is
often confusing to first time modelers. For a right roll or
turn, the right hand aileron is moved upward and the left
hand aileron downward, and vice versa for a left roll or turn.
Angle of attack – The angle that the wing penetrates the
air. As the angle of attack increases so does lift and drag,
up to a point.
ARF – A prefabricated model - Almost Ready to Fly.
SOME MODELING TERMS & TRIVIA
Hold this angle
until touchdown.
Danger of
stalling!
Release elevator.
Apply up elevator.
Landing
CAUTION (THIS APPLIES TO ALL R/C AIRPLANES):
If, while flying, you notice any unusual sounds, such as a
low-pitched “buzz”, this may indicate control surface
“flutter”. Because flutter can quickly destroy components
of your airplane, any time you detect flutter you must
immediately cut the throttle and land the airplane! Check
all servo grommets for deterioration (this will indicate
which surface fluttered) and make sure all pushrod
linkages are slop-free. If it fluttered once, it will probably
flutter again under similar circumstances unless you can
eliminate the slop or flexing in the linkages. Here are
some things which can cause flutter: Excessive hinge
gap; Not mounting control horns solidly; Sloppy fit of
clevis pin in horn; Side-play of pushrod in guide tube
caused by tight bends; Sloppy fit of Z-bend in servo arm;
Insufficient glue used when gluing in the aileron torque
rod; Excessive “play” or “backlash” in servo gears and
Insecure servo mounting.
57