Build the wing panels – Great Planes PT-40 MkII Kit - GPMA0118 User Manual
Page 27
❏
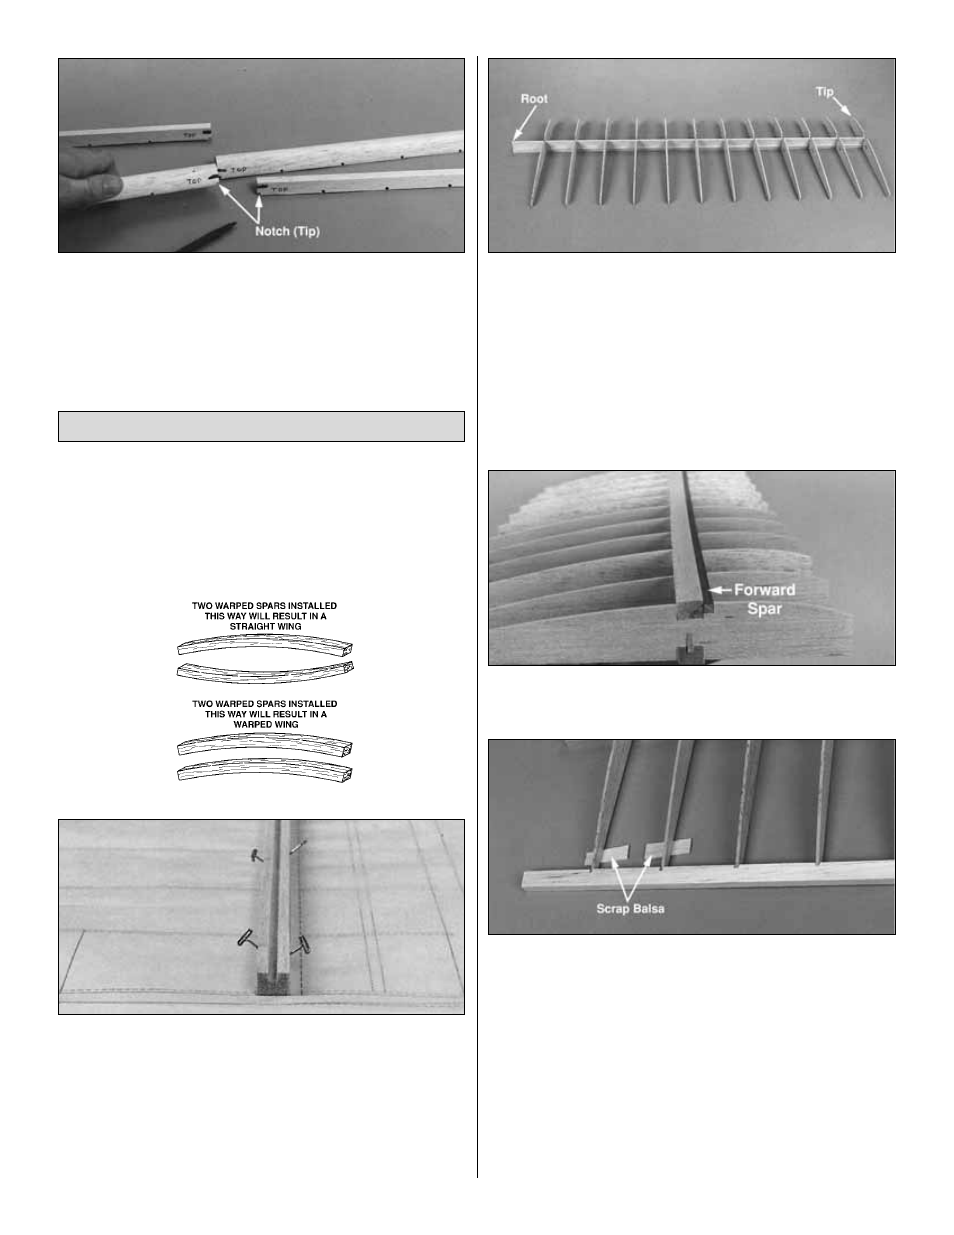
3. The TOP of each LE and TE has a pen mark applied
at the factory. For clarity you may mark them yourself as
“top.” The end with the notch is the TIP.
Both wing panels are built directly over the plans. Don’t
forget to cover the plans with waxed paper. Build the right
wing panel first so that your progress will look the same as
our photos. Note: For clar ity the photos show the
framework removed from our building board, even though
we too build over the plans.
❏ ❏
1. Examine the four slotted main spars for warps.
Refer to the sketch above, then divide them into pairs. Pin
one of the bottom spars to the plans using the pinning
method shown at enough locations to hold the spar straight
over the plans. The tip of the spar should align with the tip
rib R2 while the excess should be at the root
(the root of
the wing panel is the end that joins the other wing panel
and ...is not the tip).
❏ ❏
2. Insert the die-cut 1/8" balsa slotted web into the
slot in the main spar. The notched end of the web should be
at the tip with the notches pointing upward. Add (no gluing
yet) all the R2 and R3 wing ribs. Make sure each rib is fully
seated in the web and the ribs align with the plan.
❏ ❏
3. Add the matching slotted main spar to the
assembly (remember you made matching pairs). The top of
the spar should be even with the tops of all the R3 ribs.
❏ ❏
4. Add the 3/16" x 3/16" x 30" top forward spar.
❏ ❏
5. Slide a scrap piece of 3/32" balsa under each R2
rib near the trailing edge (use 1/16" balsa for the PT-20). Fit
the notched TE to the assembly with the ribs fully seated in
the notches. Pin the TE in to your building board.
❏ ❏
6. Examine the frame carefully to be sure everything
is fully pressed into position and aligned with the plans.
The bottoms of the R3 ribs must be contacting the plans
and the bottoms of the R2 ribs must be contacting the
shims you added in the previous step. We are about to start
gluing so now is the time to fix any problems.
Build the Wing Panels
27