Preparation build the fuselage – Great Planes PT-40 MkII Kit - GPMA0118 User Manual
Page 14
❏
7. Cut the hinges for the elevator and the rudder from
the supplied 2" x 9" hinge material, then snip off the
corners so they go into the slot easier. Note: If you are
building the PT-20, make the hinge for the bottom of the
rudder 3/8" wide.
❏
8. Temporarily join the elevator to the stab with the
hinges and widen any slots if required so they all match up.
❏
9.Return to step 1 and use the same procedures to
hinge the rudder and fin. Note: If you are building the
PT-20, make the bottom hinge slot in the rudder 3/8" wide.
❏
10. Use the same “centerline technique” you used when
you made the hinge slots to mark the perimeter of the
stabilizer and elevator. Round the perimeter of the stab and
elevator with your bar sander and 220-grit sandpaper using
the centerline as a guide. On the stab, keep the trailing
edge and the “flattened-off” center portion of the leading
edge square. Finish-sand the stab and elevator with 320-grit
sandpaper. Hint: Leave the elevator attached to the stab
during sanding so the ends will be rounded off the same.
Congratulations! You’ve made it through the first stage
and if this is your first model you should be proud of
yourself. You should also have learned a few “tricks of the
trade” used by the guys that designed this kit. Remember,
all of these helpful tips are the same methods that we use
to build our award winning models and are tips that you can
use and refine for future, more ambitious building projects!
❏
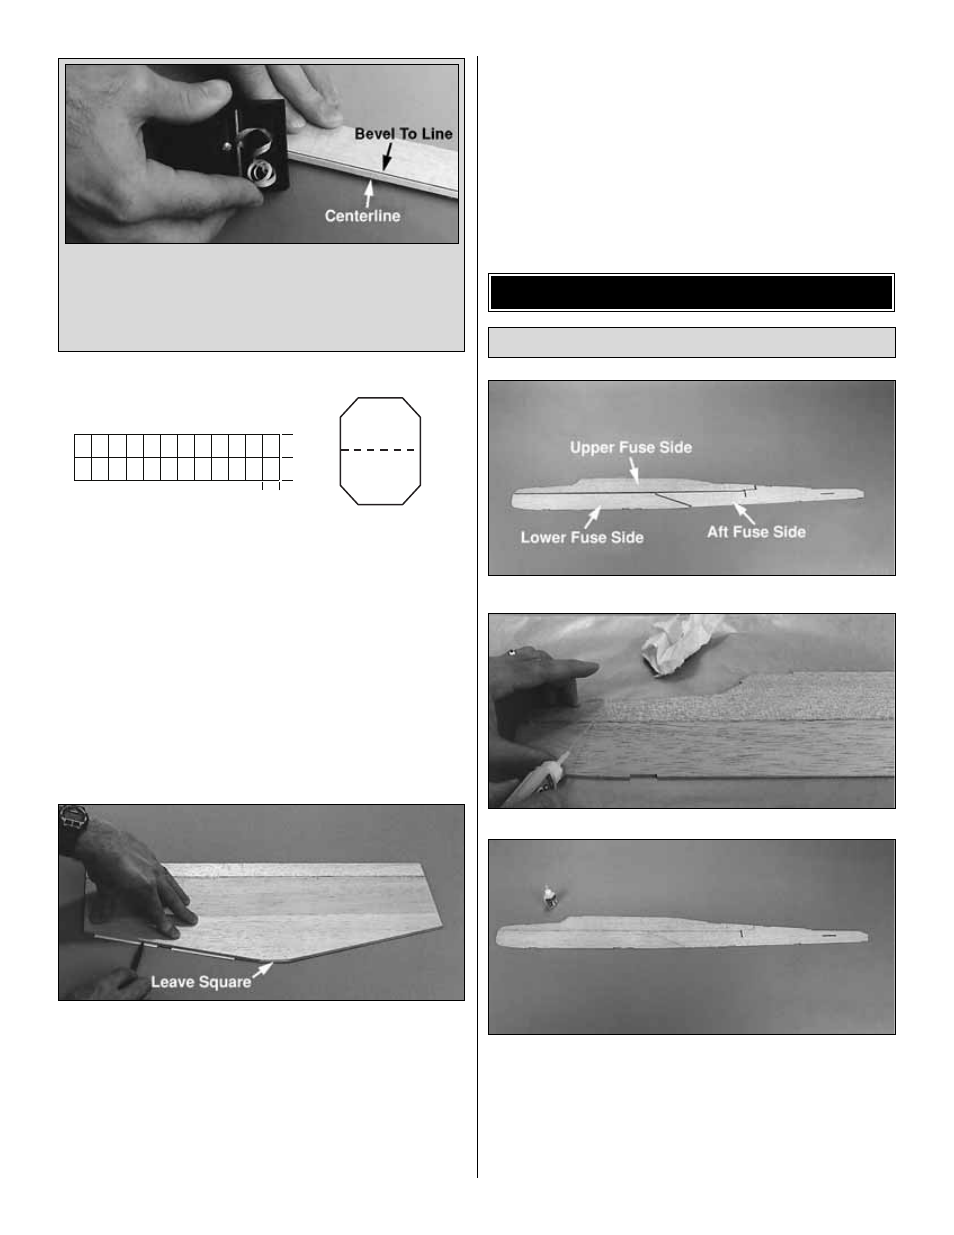
1. Test fit the die-cut balsa fuse side pieces as shown in
the photo. Sand the edges as necessary for a good fit.
When satisfied with the fit, make a fuse side using thin CA
to glue the parts together over waxed paper. Make a
second fuse side in the same manner. Note: It is easiest to
first glue the aft fuse side to the upper fuse side, then
glue the lower fuse side.
Preparation
BUILD THE FUSELAGE
1"
1"
3/4"
14
B. Use a razor plane or your bar sander with 150-grit
sandpaper to make the “V” on the rudder and elevator.
Use the “bevel to” lines and the previously drawn
centerline as a guide to keep the angle of the “V”
constant and centered.