Great Planes PT-40 MkII Kit - GPMA0118 User Manual
Page 12
12
Work on a flat surface over the plans covered with waxed
paper. Frequently refer to the plans to identify the parts and
their locations.
❏
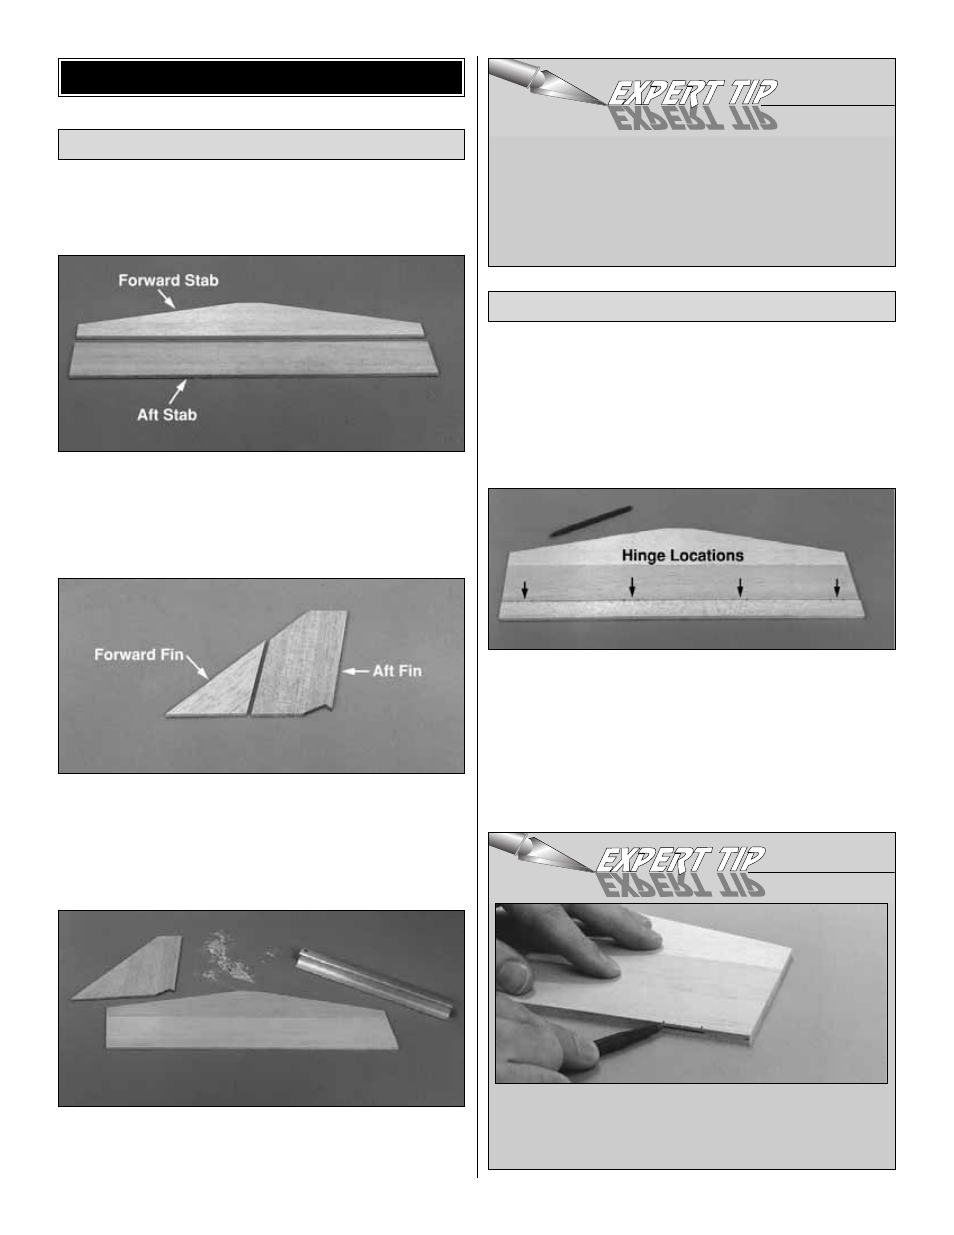
1. Locate the shaped balsa forward and aft stab. Check
their fit and sand the mating edges if needed. Apply a light
bead of medium CA to the mating edges and glue them
together. Immediately wipe away any excess CA before it
cures.
❏
2. Locate the shaped balsa forward and aft fin. Check
their fit and sand the mating edges if needed. Work over the
plans (don’t forget the waxed paper), then glue the two
parts together as you did the stab parts. Immediately wipe
away any excess CA from the surface before it cures.
❏
3. See the Expert Tip that follows, then sand the stab and
fin flat and smooth with sharp 220-grit sandpaper and your
bar sander or a sanding block.
Note: One of the best ways to enhance the finish and
appearance of your model is to do a good hinging job.
Properly aligned hinge slots and secure hinges will
eliminate problems at the flying field. Follow these
instructions and take your time in order to avoid crooked or
misaligned hinge slots that can lead to tight control
surfaces or loose hinges.
❏
1. Locate the balsa elevator (refer to the plan for size
and shape). Use a ballpoint pen to lightly mark the location
of the hinges on the stab and the elevator where they are
shown on the plan.
❏
2. Refer to the Expert Tip below and mark the location
of each hinge slot on the trailing edge of the stab.
Hinge The Elevator and Rudder
Build The Stabilizer and Fin
BUILD THE TAIL SURFACES
It is more important to keep the thickness of the entire
stab and fin constant than it is to completely eliminate
the glue joint. Don’t spend too much time sanding in
one particular spot where the seam might not be
perfect – otherwise that area of the stab or fin will
become thinner than the rest. This is a little more
important on the PT-20.
HOW TO DRAW A CENTERLINE
A. Place the part on a flat surface and draw a line
approximately 1" long with a ballpoint pen (a Bic Stik
works well).