Expert tip – Great Planes PT-40 MkII Kit - GPMA0118 User Manual
Page 45
❏
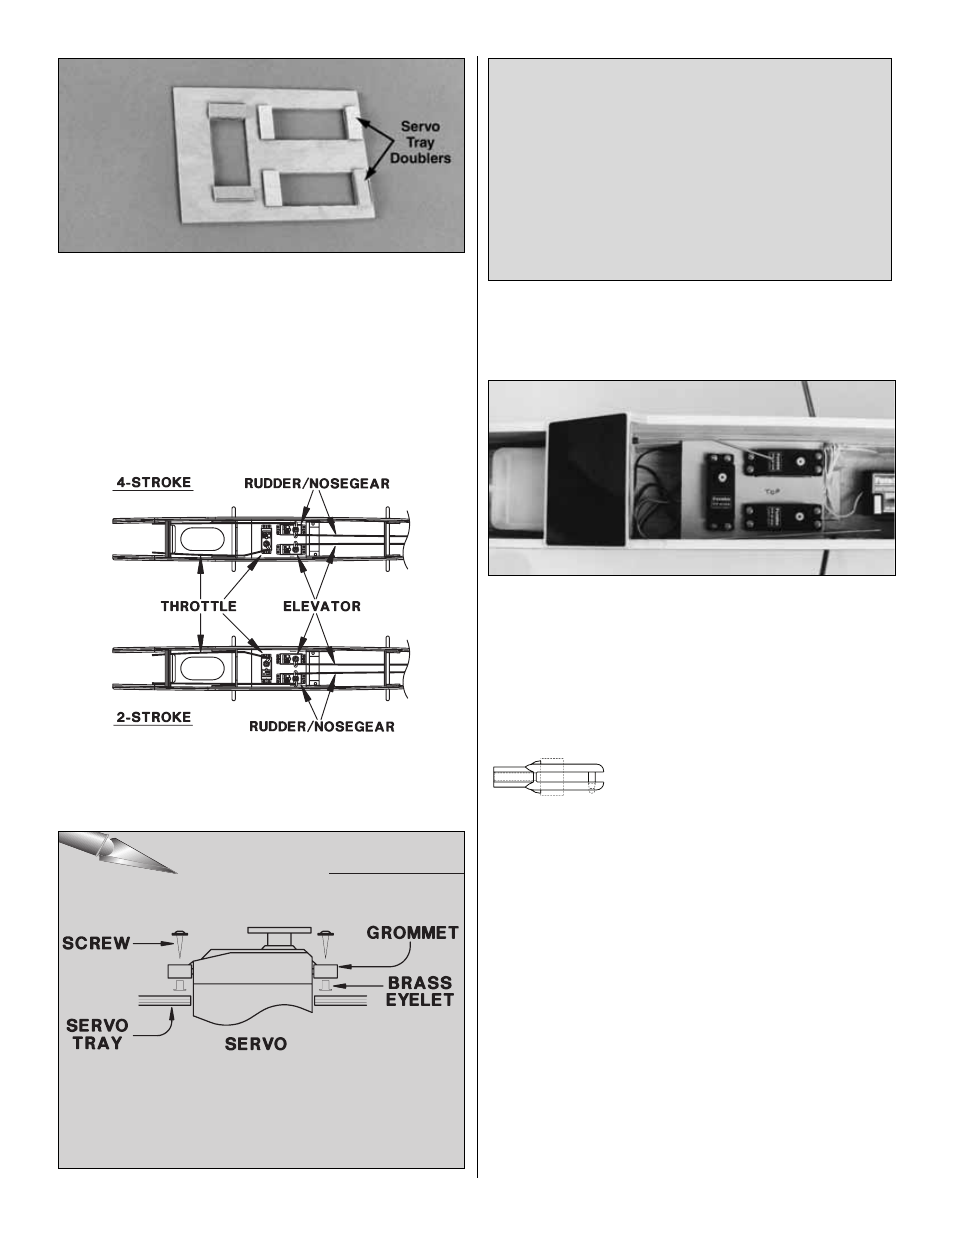
2. Glue the die-cut 1/8" plywood servo tray doublers to
the bottom of the servo tray with medium CA.
❏
3. Wrap the battery in one layer of 1/4" foam rubber and
secure the foam with tape or rubber bands. Install the
battery under the fuel tank floor, then temporarily install the
fuel tank compartment hatch with #2 x 3/8" screws.
❏
4. Cut the elevator and rudder pushrod tube guides
ahead of F-3 to the approximate length shown on the plan.
❏
5. See the Expert Tip below and mount three servos in
the die-cut 1/8" plywood servo tray in the position shown in
the sketch for the type of engine you will be using.
❏
6. Place the servo tray in the fuselage at the location
shown on the plan. Do not glue servo tray in position yet, as
you need to be able to shift it forward or aft to help balance
the model.
❏
7. Slide a silicone retainer over the “hex” end of a
nylon clevis. Screw the clevis 14 revolutions onto the
threaded end of a 36" wire pushrod.
❏
8. Cut six 1/4" bushings from the short plastic inner
pushrod tube provided in the kit. Slide the bushings on the
wire pushrod, spacing them as shown on the plans. Do not
cut the pushrod wires yet, as you may need to move the
servo tray to balance the model. Be sure that the bushings
on each end are “in” far enough so that they won’t come
out of the pushrod tubes and cause the control to lock. If
they are too loose, put a drop of thin CA on the pushrod
wire at each bushing to hold them in place. Make sure the
CA is fully cured before inser ting the pushrods into
the tubes.
NYLON CLEVIS
B. Insert the metal eyelets up from the bottom of the
rubber grommets. This way the “lip” of the eyelet will be
in contact with the servo tray when mounted. The rubber
grommets will isolate the servo from vibration.
C. Position the servo in the servo tray, then mark the
location of the mounting holes. Drill pilot holes in the tray
with a 1/16" bit at each mark.
D. Use the servo screws supplied with your radio to
mount the servos in the servo tray. Tighten the screws
until they just touch the top of the metal eyelet.
EXPERT TIP
EXPERT TIP
EXPERT TIP
45
MOUNTING SERVOS
The proper way to mount a servo is as follows:
A. Inser t a r ubber grommet into each of the four
servo notches.
Nylon Clevis