Great Planes PT-40 MkII Kit - GPMA0118 User Manual
Page 15
❏
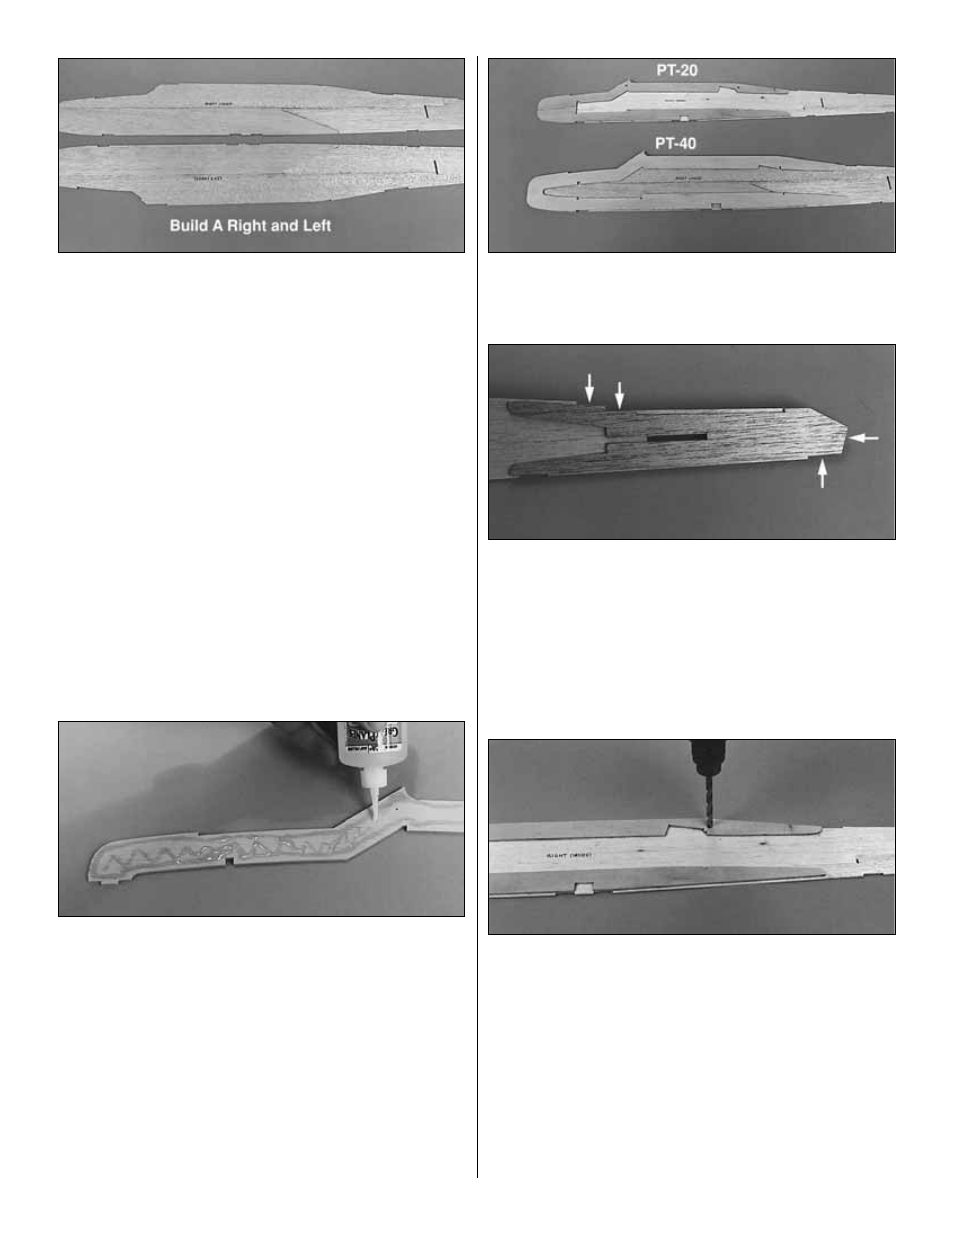
2. Examine the two fuse sides for blemishes, then
position them on your workbench exactly as shown in the
photo with the best-looking sides facing down. You must
build a right and a left side so be sure that the sides are
mirrored as you look at them. Mark the inside surfaces as
“right” and “left.”
❏
3. Lightly sand the edges of the die-cut 1/8" plywood
upper and lower fuse doublers to remove any slivers or
die-cutting irregularities.
Work especially carefully during the following two
steps. You must accurately position the fuse doublers on
the fuselage sides as this is the most critical step in building
a straight fuselage.
❏ ❏
4. Still working over waxed paper, test fit, then glue a
die-cut 1/8" plywood upper fuse doubler to the inside of
the right fuselage side with medium CA. See the photo at
step 6. The top edge of the doubler should align with the
top of the fuse side at the wing saddle. The balsa side
behind the wing saddle protrudes above the doubler
by 3/32".
❏ ❏
5. Test fit the lower fuse doubler in the notch of the
top doubler with 3/32" of the balsa fuselage side showing
below the doubler when it’s properly aligned. Glue the lower
doubler in position with medium CA the same way as you
did the upper doubler. See the photo at step 6.
❏
6. Repeat steps 4 and 5 to glue the doublers to the
inside of left fuse side. Be sure you are building a right
and a left.
❏ ❏
7. Test fit the die-cut balsa aft fuse doubler on the
inside of the right fuselage side. The “steps” in the front and
rear of the doubler should align with the fuselage side and
the aft end of the doubler and the fuselage side should also
align. Apply medium CA to the doubler, then glue it in
position. Repeat for the other fuselage side.
Skip step #8 if you will be using bolts to mount
your wing.
❏
8. If you will be installing the dowels for rubber band
wing attachment, drill 1/4" holes through the fuse sides at
each punch mark in the upper doublers. Use a backup
block of scrap wood under the fuse side to prevent splitting
the balsa as the drill bit goes through (and to keep from
drilling into your table).
❏
9. Locate the three die-cut 1/8" plywood firewall formers
F-1A, F-1B and F-1C and the three die-cut 1/8" plywood
wing bolt plates. Note: You need the wing bolt plates for
strength even if you will be using rubber bands to attach
the wing.
15