Preparation build the wing – Great Planes PT-40 MkII Kit - GPMA0118 User Manual
Page 26
fuselage and stab and mark the location of the slot in the
fuselage for the balsa dorsal fin tab. Remove the fin from
the stab and glue the dorsal fin tab to the dorsal fin. Sand
the fin, dorsal fin and the dorsal fin tab flat and smooth with
your bar sander and 150-grit sandpaper.
❏
12. Use the same centerline technique you did for the
stab to mark the centerline around the perimeter of the fin
and rudder. Use your bar sander to round the edges. The
“corner” where the dorsal fin meets the fin is a little tricky so
just work slowly and do not over-sand in that area. Finish-sand
the entire fin and rudder with 320-grit sandpaper.
❏
13. Reposition the fin on the stab with the dorsal fin tab
keyed into the fuse top. Confirm that the fin is parallel to the
centerline of the fuselage. Place a straightedge along the
side of the fin. The straightedge should be parallel to the
centerline you drew on the fuse. When the fin is aligned,
mark the position of the fin on the aft edge on the stab as a
reference for the next step.
❏
14. Use medium CA to glue the fin in position (with the
aft edge aligned with the marks you made on the stab)
while holding a triangle against it and the stab to maintain
vertical alignment.
❏
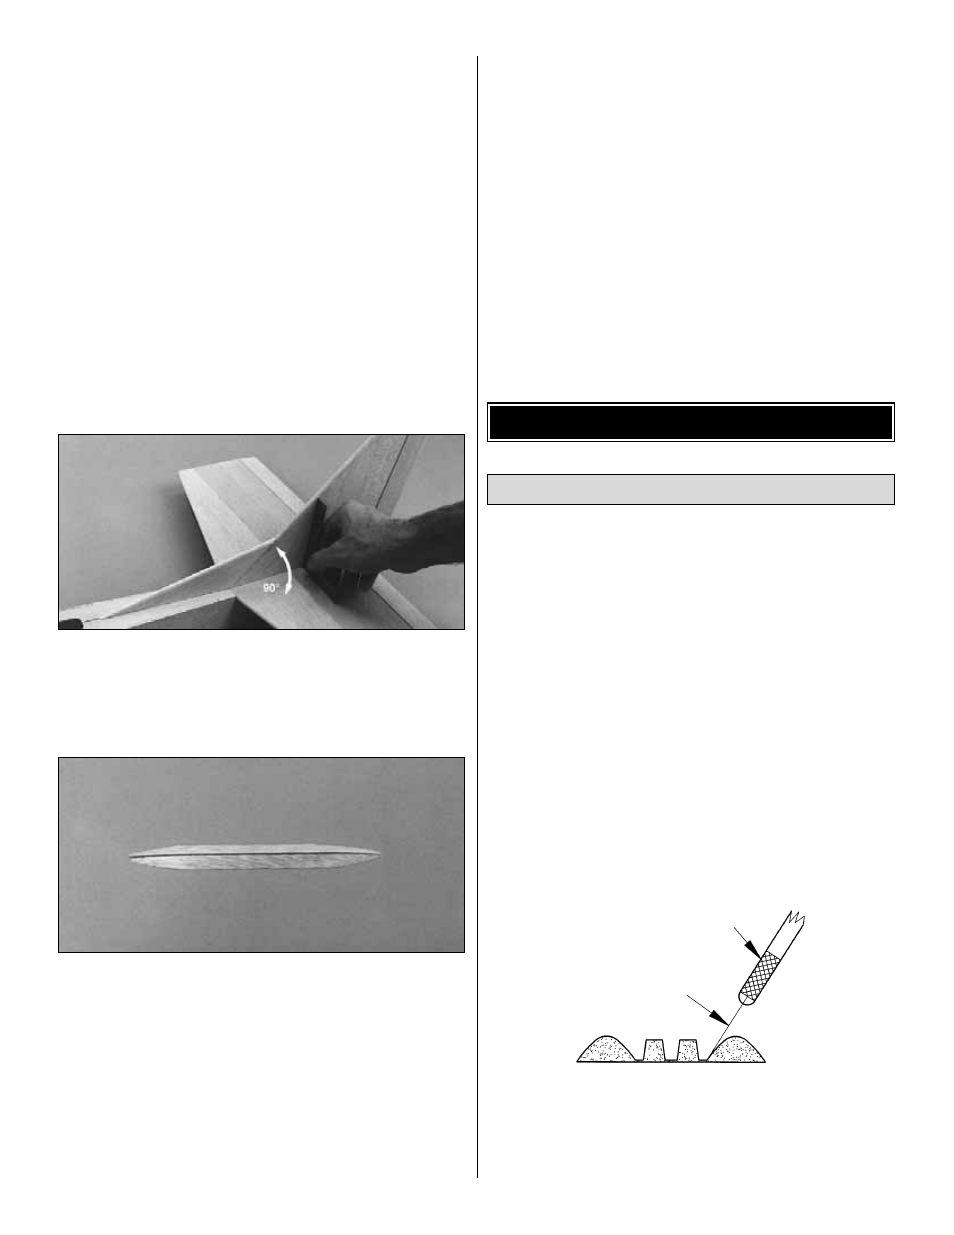
15. Locate the 12" balsa triangle stock and cut two
pieces to the length shown on the plan. These will be used
to reinforce the fin. Hold the pieces together (back-to-back),
then simultaneously shape them as shown in the photo and
on the plans.
❏
16. Refer to the Covering section on page 42 to see
how to glue the shaped fin reinforcements in position
after cover ing or, use medium CA to glue the fin
reinforcements to the stab and fin at this time.
❏
17. Mark the rudder’s bottom hinge location on the fuse.
Carefully cut the slot for the hinge in the tail end of the fuse.
Reattach the r udder to check the hinge alignment.
Remember, the bottom hinge for the rudder on the PT-20
is 3/8".
Hang in there. You only have to build the wing before you
start covering.
Building the wing for the PT is fun. Even if this is your first
kit you won’t have any trouble building a beautiful wing that
is straight and true. The secret is not to use any glue
until instructed to do so. You will soon see that the
structure just about holds itself together, giving you the
opportunity to make sure that everything fits perfectly
before you make an “irreversible oops!”
We mentioned at the front of this manual that you have a
choice in the type of wing to build – the trainer (“A-wing”) or
the spor t (“B-wing”). As stated earlier, we strongly
recommend that you build the trainer version if this is your
first R/C model.
❏
1. Carefully remove all die-cut 3/32" balsa R-2 & R-3
wing ribs from their die sheets. Remove any die-cutting
“fuzz” by lightly sanding each rib with 220-grit sandpaper.
❏
2. The shaped and notched leading edges (LE) and
trailing edges (TE) are fastened together by a thin layer of
balsa. Carefully separate them with your hobby knife as
shown in the sketch. Use your bar sander with 220-grit
sandpaper to lightly sand the rough edges away.
Preparation
BUILD THE WING
26