Join the wing panels – Great Planes PT-40 MkII Kit - GPMA0118 User Manual
Page 28
❏ ❏
7. Use thin CA for all points of contact starting with
the notches along the TE
(the Hobbico applicator tips really
help for this step). Press or hold all of the parts in position
as you apply the CA. Move on to the main spars and slotted
web and the rib/spar joints. If you can’t reach all the glue
joints with your CA bottle, don’t worry. Just get the ones you
can for now and we’ll remind you to get the others after the
wing is removed from the building board.
❏ ❏
8. Carefully fit the notched LE in position, making
sure all of the ribs are fully seated in the notches. The
bottom edge of the LE should contact the plan when the
TE is securely pinned to the building board. Glue the LE to
the ribs with thin CA.
❏ ❏
9. Position the dihedral gauge for the “A-wing” or
the “B-wing” against the aft sides of the main spars with
the bottom edge of the gauge over the center line of the
wing. Use a ballpoint pen to mark the dihedral angle on the
top and bottom spar, then use the same procedure to mark
the dihedral angle on the LE and TE.
❏ ❏
10. Remove the wing panel from the building board.
Hold it upside down and add thin CA to the underside of the
top spar where it contacts the web and the top forward
spar. Add thin CA to any joints you couldn’t reach before.
❏ ❏
11. Use a razor saw to cut the TE, main spar assembly
and LE about 1/16" longer than the lines you drew with the
dihedral gauge.
❏ ❏
12. Use a long bar sander and 150-grit sandpaper to
“fine tune” the dihedral angle by sanding a little at a time to
the dihedral line.
There you have it! One framed wing panel. Hurry up and
build the other one. Then you can join them and set the
wing on the fuselage to see what this thing is going to look
like and day dream about learning to fly! Return to step 1
and build the LEFT wing panel. Don’t forget to use the
other drawing on the plan so you build a LEFT side.
❏
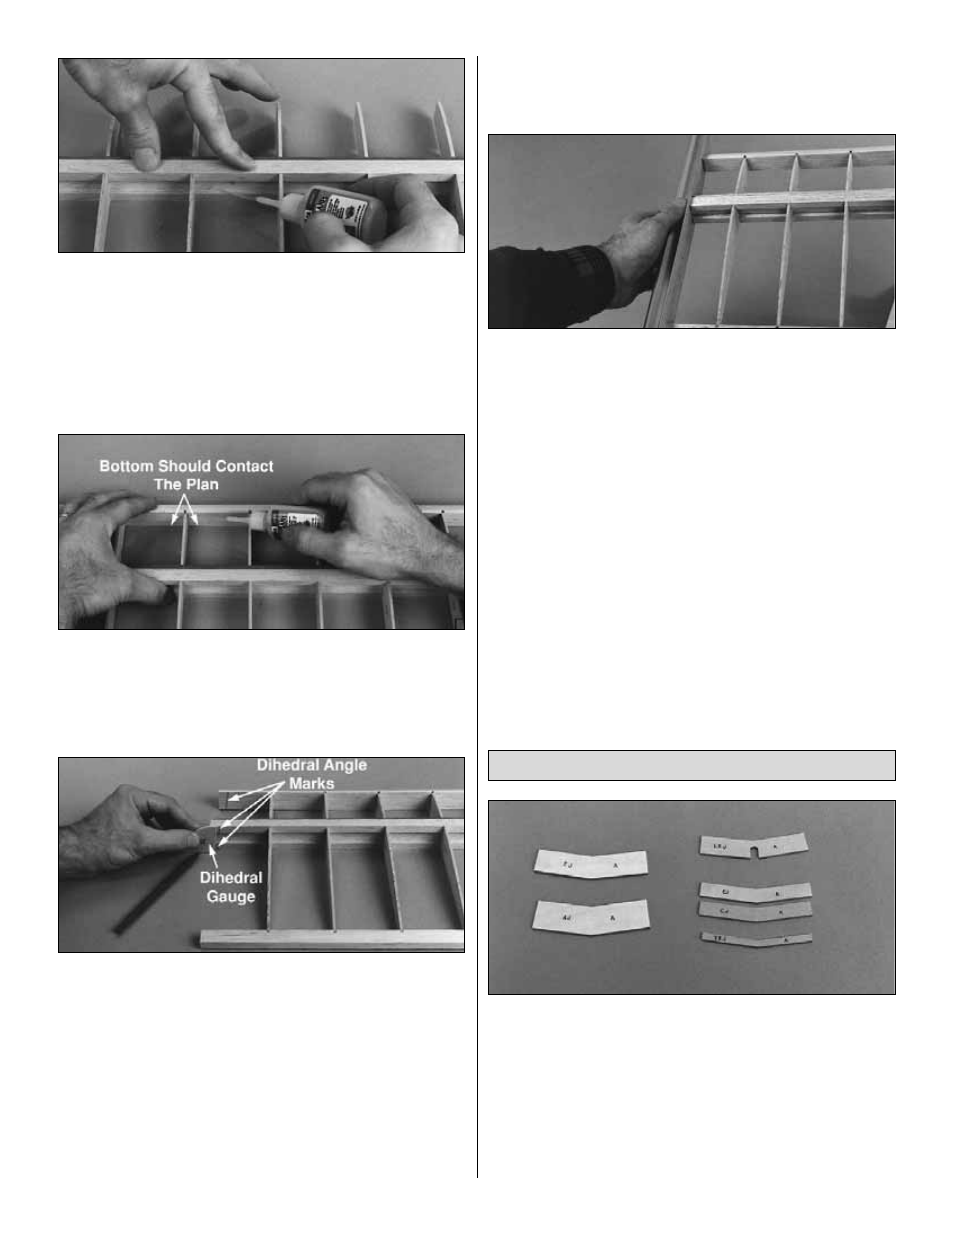
1. Gather all the die-cut 1/8" plywood wing joiners for the
wing you have decided to build. These would be the
leading edge joiner (LEJ-A or B), forward joiner (FJ-A or
B), two center joiners (CJ-A’s or B’s), aft joiner (AJ-A or
B) and finally the trailing edge joiner (TEJ-A or B).
❏
2. Use your bar sander and 220-grit sandpaper to
remove any die-cutting irregularities or slivers from
the joiners.
Join the Wing Panels
28