Great Planes PT-40 MkII Kit - GPMA0118 User Manual
Page 37
❏
11. Use your bar sander to sand the tip TE’s flush with
the tip rib.
❏
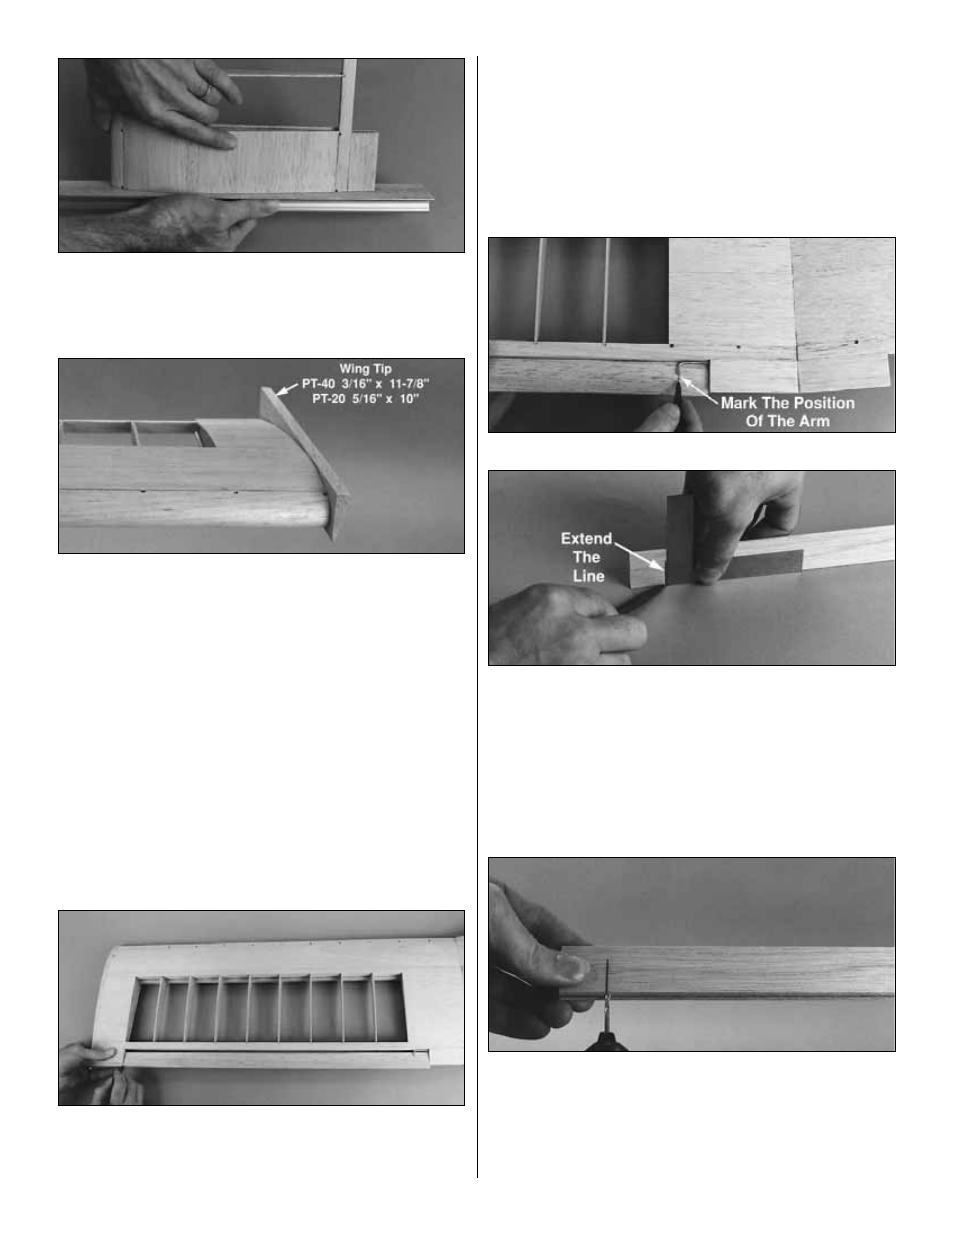
12. While you’re working on the end of the wing, glue the
3/8" x 11-7/8" tapered balsa wing tips to each end of the
wing with medium CA (the wing tips for the PT-20 are
5/16" x 10"). The wide part of the tapered tip goes on top.
Be sure the bottom of the tip is flush or approximately 1/16"
below the bottom tip sheeting.
❏
13. Carve or plane the tip so it is nearly flush with the
wing, then use your bar sander and 220-grit sandpaper to
make it flush.
Enough of the fun stuff. Let’s get back to work and finish
this wing!
❏ ❏
14. After the epoxy on the center trailing edges has
fully cured, position an aileron on the left wing panel and
mark the distance between the tip trailing edge and the
center trailing edge. Don’t forget there is a top and a
bottom to the aileron. Reference the sketch at step 1. Cut
the aileron 1/8" shorter than the mark. Mark this as the Left
aileron.
❏ ❏
15. Hold the left aileron in position, centered in the
aileron opening, then mark the location of the torque rod
arm. Use a square to extend your marks to the front edge
of the aileron.
❏ ❏
16. Use the techniques we’ve shown you to draw a
centerline along the entire length of the front edge of the
aileron (use the piece you cut off in the previous step to
“practice on” to find the centerline). Use the centerline and
the “torque rod mark” as a guide to drill a 3/32" hole 5/8"
deep into the aileron for the torque rod.
37