Recommended covering sequence – Great Planes PT-40 MkII Kit - GPMA0118 User Manual
Page 42
Tail Surfaces
❏
1. Tail Junction Strips as described above
❏
2. Stab bottoms
❏
3. Stab tops*
❏
4. Fin left side, then right side
❏
5. Elevator bottom, then top
❏
6. Rudder left side, then right side
Wing
❏
1. Ends of ailerons
❏
2. Bottoms, then tops of ailerons
❏
3. TE of wing (the hinge line)
❏
4. Wing tips
❏
5. Bottom of left, then right wing panel (overlap the
covering 1/4" at the center)
❏
6. Top of left, then right wing panel (overlap the
covering 1/4" at the center)
Fuselage
❏
1. Fuse bottom
❏
2. Fuse sides
❏
3. Fuse top
❏
4. Windshield
❏
5. Fuel tank compartment hatch
* It’s easier to cover the triangular fin reinforcements
before you glue them in place.
❏ ❏
A. Without ironing it down, place the left side of the
stab cover ing on the stab, then position the fin
reinforcement. Use a felt-tip pen to trace the outline of the
fin reinforcement onto the stab covering. Do the same thing
for the left side of the fin covering.
The stab and fin
MonoKote film pieces shown in these steps are cut only
slightly oversize for illustration clarity though as we
mentioned, you should cut most of your covering pieces
about 2" oversize all the way around.
❏ ❏
B. Remove the stab and fin covering from the model.
Place the covering on your workbench (or a cutting mat if
you have one), then cut it along the outline you made of the
fin reinforcement. After cutting, remove any ink left on the
covering with a cloth dampened with alcohol.
❏ ❏
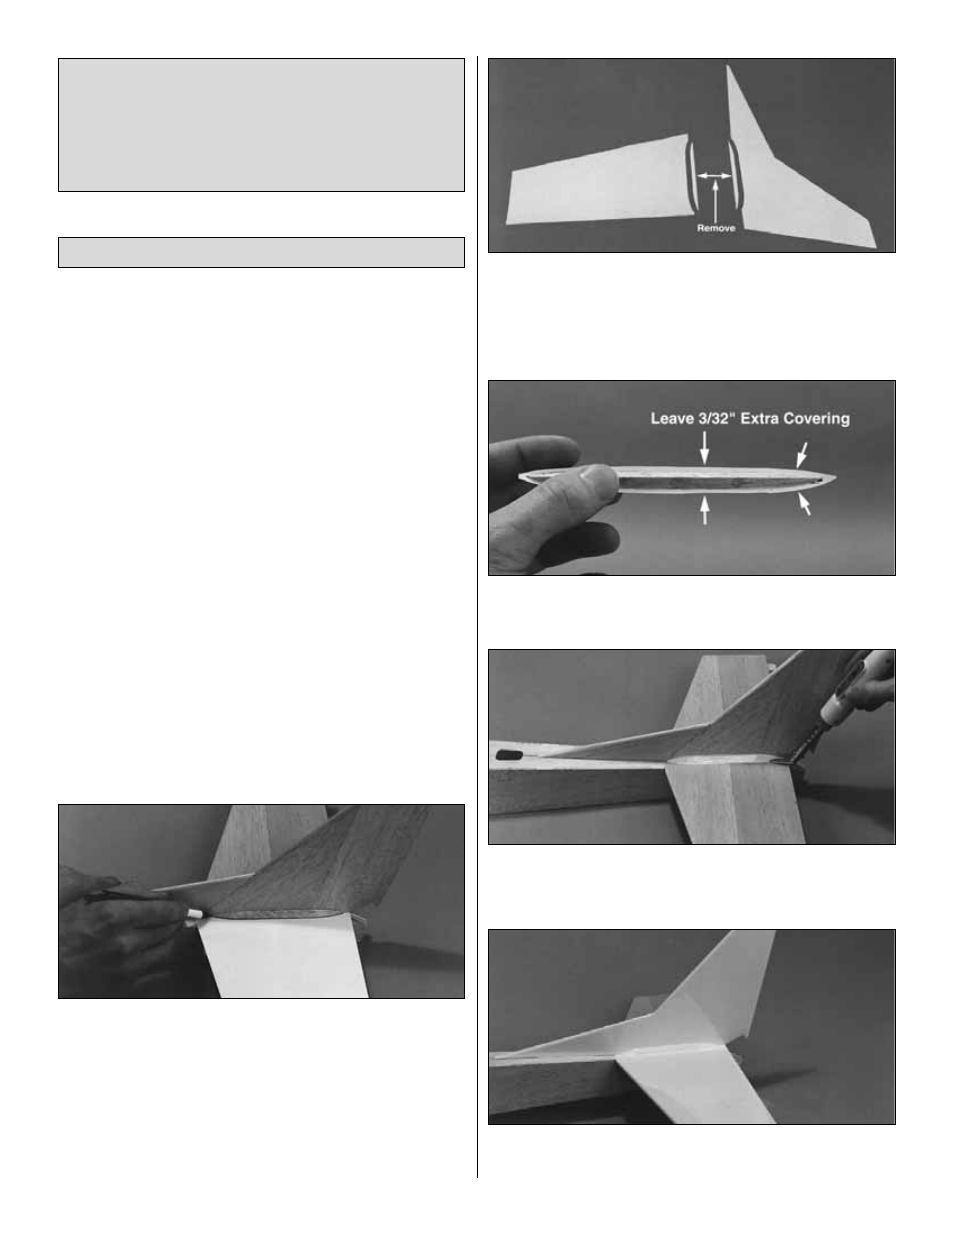
C. Cover the triangular fin reinforcement but leave
about 3/32" of extra covering all the way around.
❏ ❏
D. Glue the fin reinforcement in position with medium
CA. Use a Trim Seal Tool to iron the excess covering to the
fin and stab.
❏ ❏
E. Cover the stab and fin with the pieces you cut
earlier.
Recommended Covering Sequence
need to. Trim off the excess, then follow-up with your
sealing iron to secure the bond.
The idea behind this approach (which can be applied to
any part of the model) is to pre-stretch the MonoKote
film as it’s applied, removing the air pockets that can
expand later causing sags and wrinkles.
42