EVCO EVF328J9 User Manual
Page 33
EVCO S.p.A.
EVF 300 series | Installer manual ver. 1.1 | Code 144F300E114
Page 33 of 62
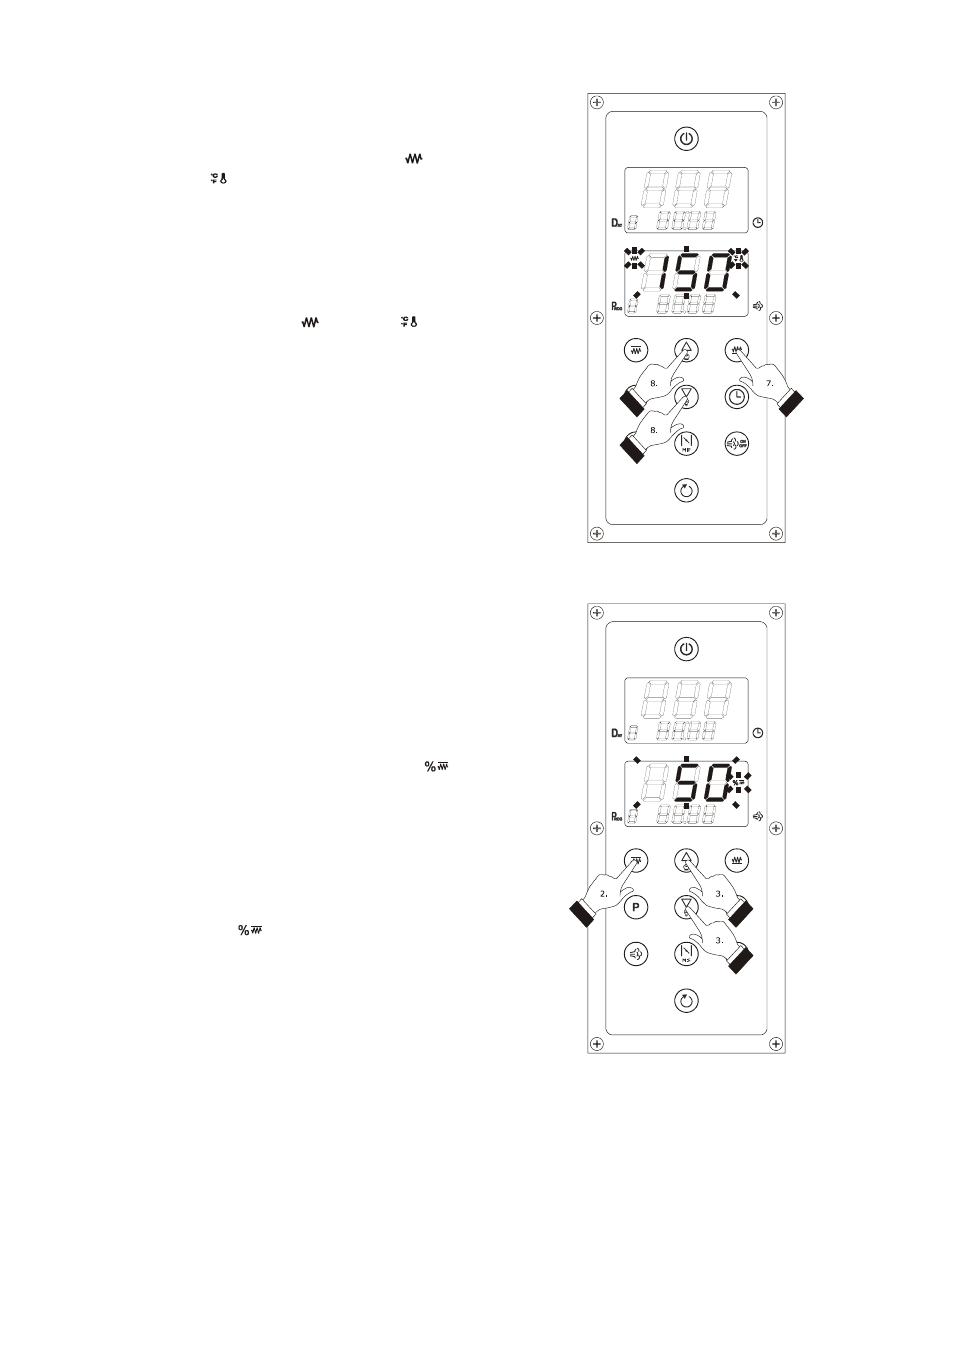
Operate as follows to set the floor set-point:
6.
Ensure that the device is switched on and that no
other procedure is in progress.
7.
Press and release the "FLOOR" key: the
LED
and the
LED of the “LOWER” display will flash
and the top part of the display will show the
flashing set-point value.
8.
Press and release the "UP" or "DOWN" key within
15 s to set the set-point value, see also
parameters r7 and r8.
9.
Press and release the "FLOOR" key or do not
operate for 15 s: the “
LED and the
LED”
will switch off and then the device will exit the
procedure.
Operate as follows to exit the procedure before the operation
is complete:
10.
Do not operate for 15 sec (any changes will be
saved).
It is also possible to set the floor set-point via parameter SP2.
14.4
Setting the power distributed at
the top and that distributed at
the floor (only if the CFG
parameter is set at 0)
Operate as follows to set the power distributed at the top:
1.
Ensure that the device is switched on and that no
other procedure is in progress.
2.
Press and release the "TOP" key twice: the
LED of the “LOWER” display will flash and the top
part of the display will show the flashing power
value.
3.
Press and release the "UP" or "DOWN" key within
15 s to set the power value, see also parameters
c0 and c1.
4.
Press and release the "TOP" key or do not operate
for 15 s: the
LED will switch off and then the
device will exit the procedure.
Operate as follows to exit the procedure before the operation
is complete:
5.
Do not operate for 15 sec (any changes will be
saved).
It is also possible to set the power distributed at the top via
the parameter Po1.
Setting the floor set-point
Setting the power distributed at the top