Storage, shutdown, transport – American Diagnostic Corporation (ADC) ADview Modular Diagnostic Station User Manual
Page 46
36
3.
Slide the pulse oximetry module along the guides on the bottom of the main BP
module from front to back until it snaps into place. All the segments of the pulse
oximetry module display will light when the modules have been connected
correctly.
4.
Turn the device on using the power button on the right side of the BP module.
At the end of the start-up sequence, the pulse oximetry module display will be
blank except for the “%SpO2” symbol.
5.
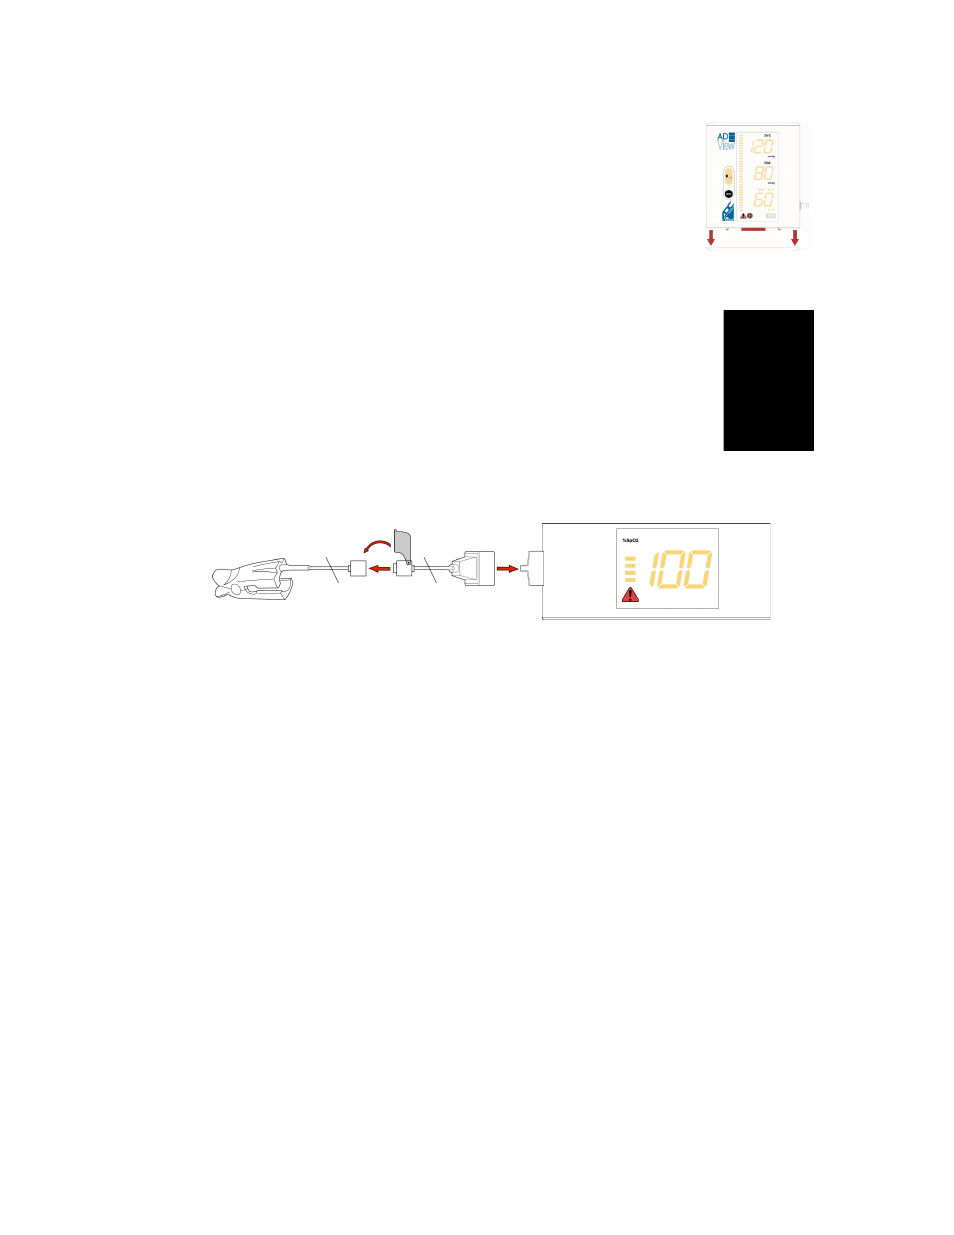
Turn the device off. Connect the adult reusable sensor to the 6’ extension cable and then the
cable to the connector on the module. Secure the cable to your device using the retention clip.
6.
Turn the device on. All display segments light up for three to five seconds. A short beep
indicates that the ADview is ready.
Note: If the pulse oximetry module does not appear to be working properly, cycle the power several times
using the power button on the right side of the BP module. This will “synchronize” all the modules. The
modules are synchronized when, after you turn the power on, all segments on all module displays light
simultaneously for 3 to 5 seconds, followed by a short beep, and all displays go to their “ready” state (BP:
battery icon and middle segments of the systolic value are lit; Temperature: appropriate temperature units
icon is lit; Pulse Oximetry: the “%SpO2” icon is lit).
Storage, Shutdown, Transport
Storage
The ADview must be stored between -20
°C (-4°F) and 55°C (131°F). Relative humidity must be less than
90%.
If you are storing the ADview Battery for 30 days or longer, it is recommended that you disconnect the
battery from the device.
Moving Your Device
To pack your device for repair or transport: