Taking an oral temperature, Taking an axillary temperature – American Diagnostic Corporation (ADC) ADview Modular Diagnostic Station User Manual
Page 35
25
• Dispose used probe covers in accordance with current medical practices or local regulations
regarding disposal of infectious, biological medical waste.
• Note that proper placement of the probe is essential to the accuracy of the measurement.
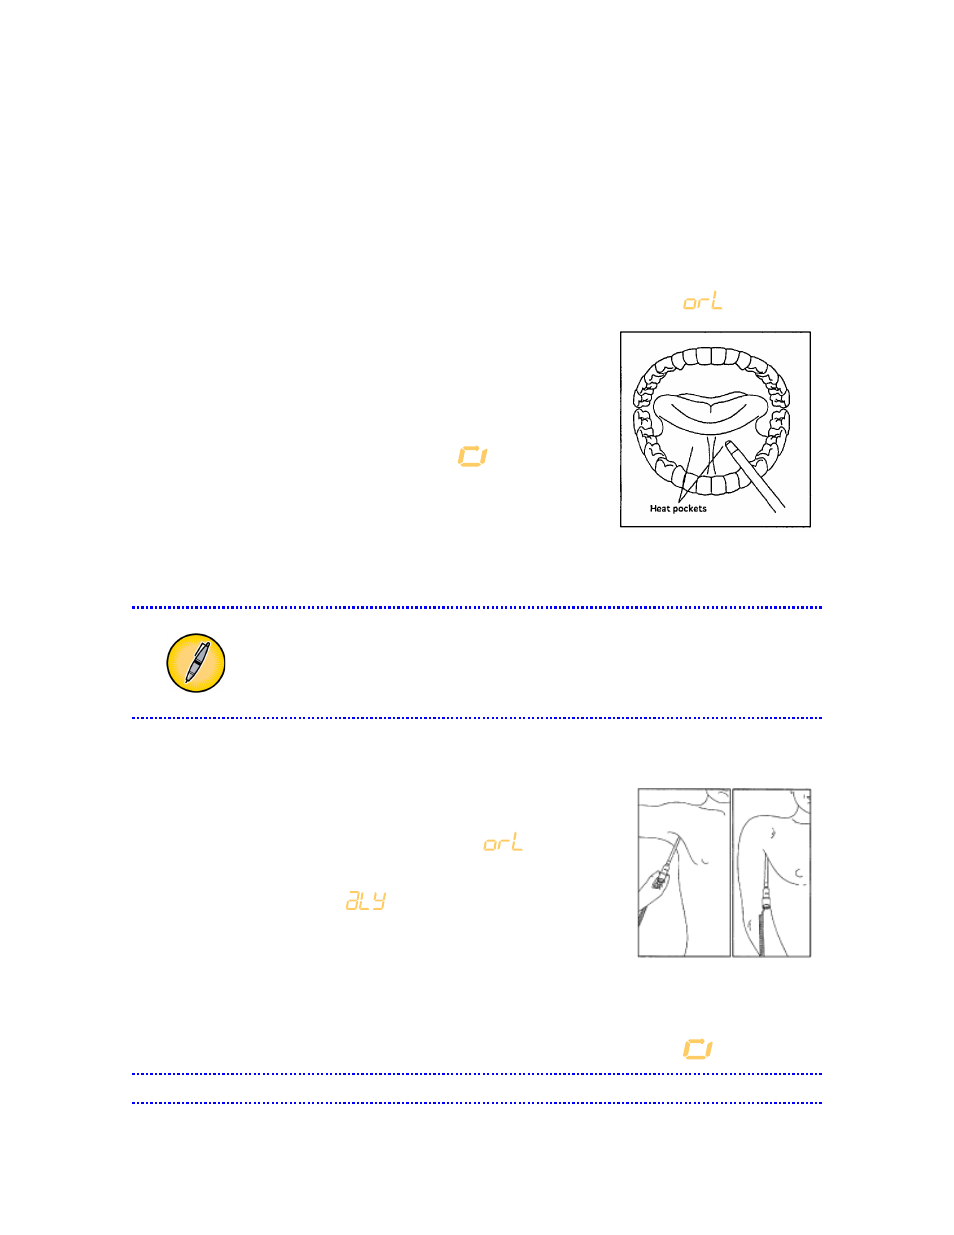
Taking an Oral Temperature
1.
Remove the blue probe from its holder and secure a disposable cover on it. The probe pre-
heating process begins with the flashing display of the type of measurement,
.
2.
After a few seconds, the device will beep to signify that the
probe is ready for placement. After the beep, place the probe
carefully under the patient’s tongue as denoted by the heat
pockets shown to the right. The posterior medial sublingual
pocket is preferred for accuracy. Hold the probe in place so that
its tip maintains tissue contact. Close the patient’s mouth.
During measurement, a “traveling dash”
is displayed.
3.
After 10-15 seconds, a long beep signals the end of the
measurement cycle. The temperature will display for two
minutes or until you initiate a new measurement.
4.
Remove the probe from the patient, discard the probe cover by pressing the end of the probe
handle, and return the probe to the probe holder. Note the temperature reading.
By default, the predictive method is selected. To select direct measurement from the
start, press the temperature mode select button located on left side of the temperature
module for three seconds or until you hear two short, quick beeps. When using direct
measurement, the display will alternate displaying “dir” and the current probe
temperature. A long beep signals the final temperature result.
Taking an Axillary Temperature
1.
Remove the blue probe from its holder and secure a disposable
cover on it. The probe pre-heating process begins with the
flashing display of the type of measurement,
.
2.
Briefly (less than 2 seconds) press the temperature mode select
button until it displays
for axillary.
3.
After a few seconds, the device will beep to signify that the probe is ready for placement. After
the beep, lift the patient’s upper arm and place the probe high under the patient’s axilla. Apply
pressure gently to assure good contact between the probe and axilla, and make sure there is no
interference such as clothing. Hold the probe in place so that its tip maintains tissue contact.
Place the arm by the patient’s side. During measurement, a “traveling dash”
is displayed.
Note that proper placement of the probe is essential to the accuracy of the