First-time setup – American Diagnostic Corporation (ADC) ADview Modular Diagnostic Station User Manual
Page 26
16
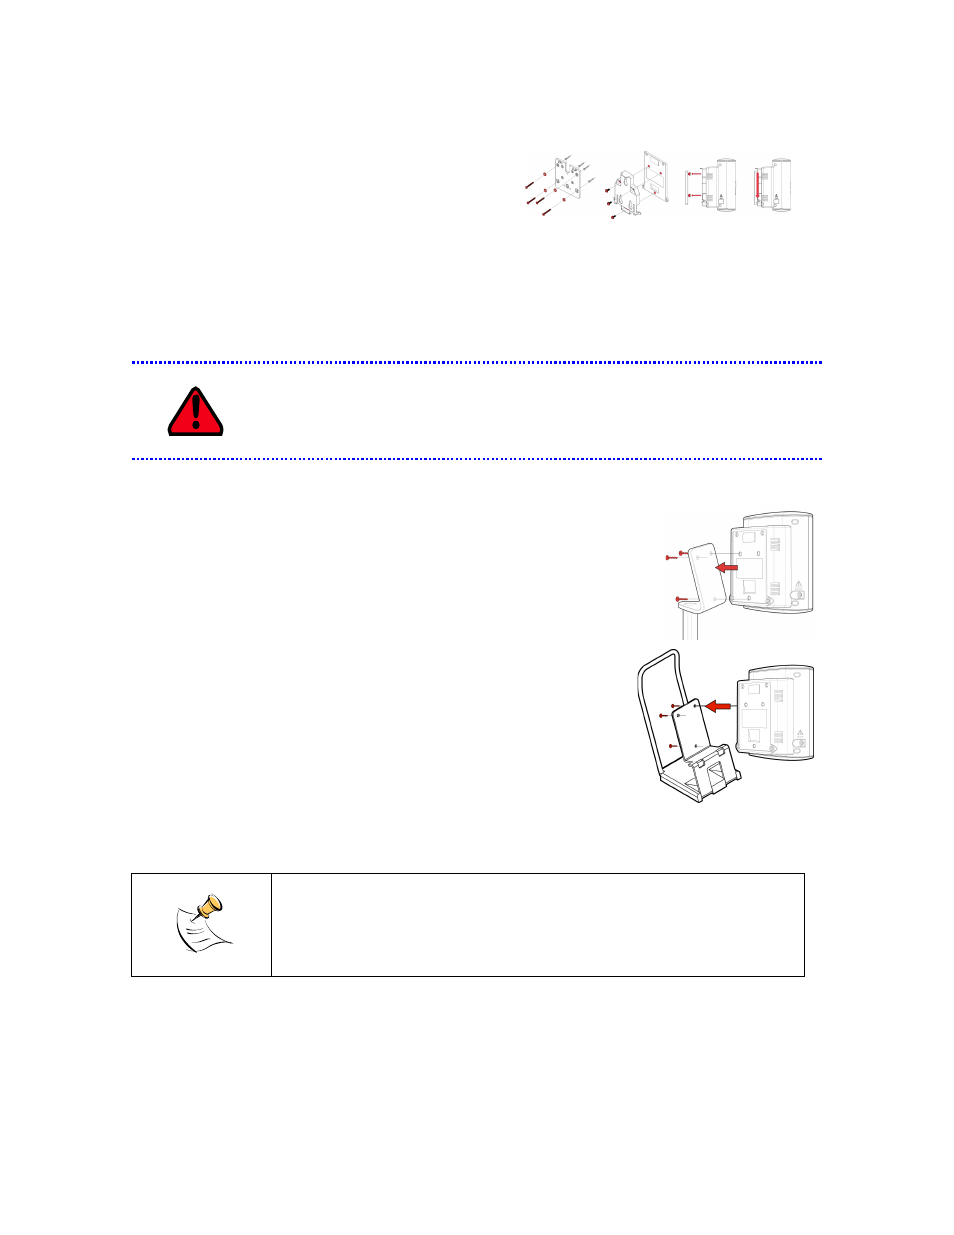
Mounting the Device on a Wall
Mount the ADview on the wall in place of an aneroid
manometer. To affix your ADview to the wall:
1.
Attach the bracket to the wall using 4 wall screws, and the basket using 2 screws.
2.
Attach the wall bracket adapter to the rear panel of the BP device using the 3 screws.
3.
Position the adapter onto the rivets of the wall bracket and slide the device down until it locks
into place.
The weight of the contents of the wall-mounted storage basket should never exceed
five pounds. Please do not store heavy items in the storage basket.
Affixing the Device to a Mobile Stand
Attaching the ADview to a mobile stand facilitates portability. To mount the
ADview to the mobile stand:
1. Assemble the mobile stand according to the manufacturer’s directions.
2. Using the three thumb screws, secure the rear panel of the BP device to
the stand.
Placing the Device on a Tabletop
Use the ADview with the tabletop stand to make it easier to carry with you.
To mount the ADview to the tabletop stand:
1. Using the three thumb screws, secure the rear panel of the BP
device to the stand.
First-Time Setup
The ADview must be plugged in and charged before first use.
Charging the Battery
The ADview Battery is powered by a rechargeable 6V lead-acid battery or by AC power. To turn the device
on for the first time, connect the device to the power supply, then the power supply to an AC mains power
source. Leave it connected for 8 to 12 hours to fully charge the battery.