Control throws – Hangar 9 Beast 100cc ARF User Manual
Page 57
57
Control Throws
Use a throw meter such as Hangar 9 digital meter or similar. For the rudder, you do not need
to use the throw meter. Adjust for maximum possible throw and half that for flight mode 2
explained below. Throws are equal for up and down elevator and left and right aileron. This
aircraft does not need differential on ailerons.
Expo should be in the direction that softens the sensitivity of the sticks close to center.
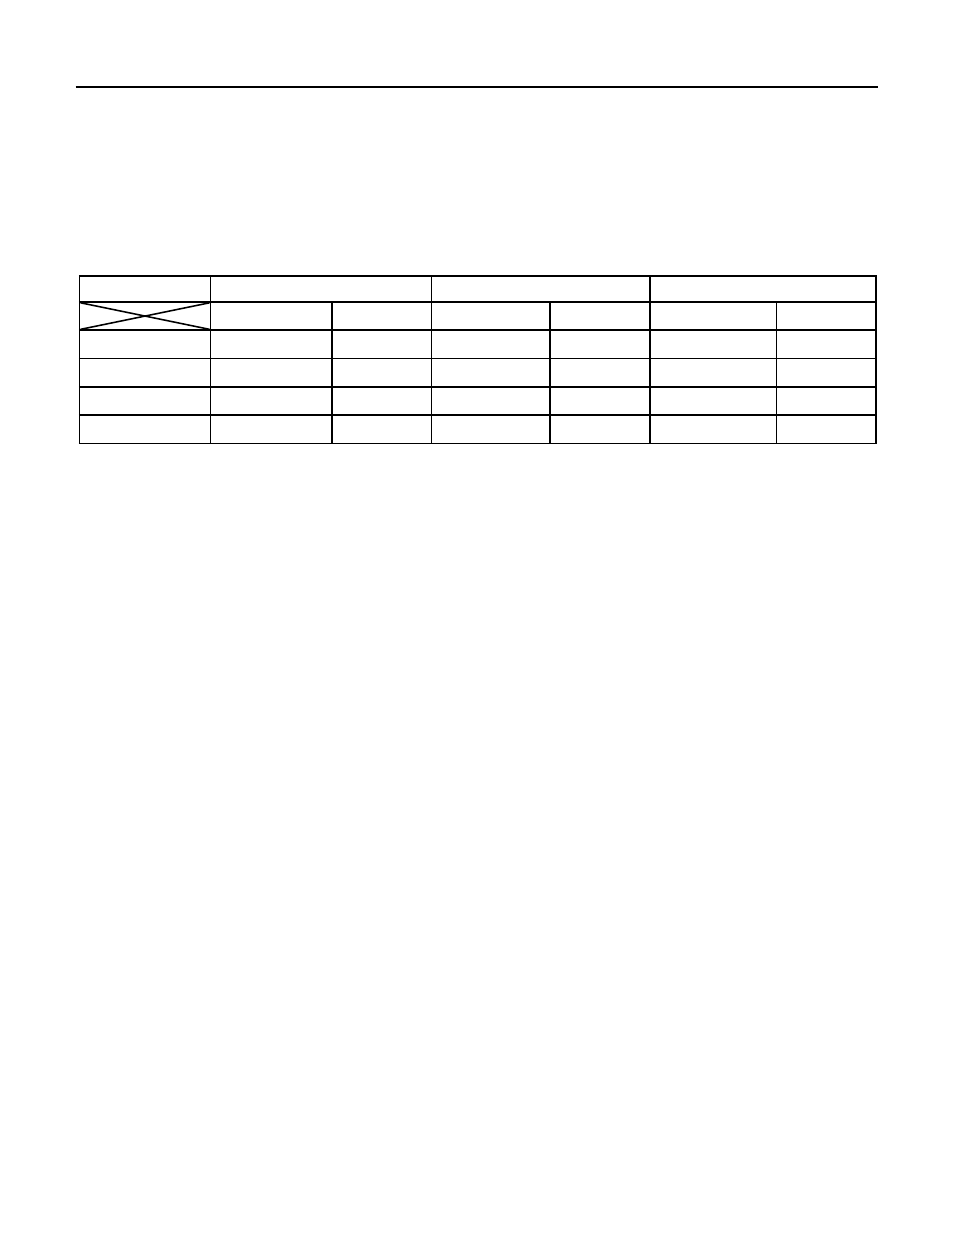
Set your aircraft for 4 different flight modes as follows:
Flight Mode
Aileron
Elevator
Rudder
Throw (deg) Expo
Throw (deg) Expo
Throw (deg)
Expo
1
23
55%
15
35%
45
70%
2
25
60%
10
30%
22-25
35%
3
25
60%
10
30%
45
65%
4
45
75%
45
70%
45
65%
Explanation:
Flight Mode 1: Set this flight mode for takeoff and landings as the precision rate may not have
enough elevator for adverse condition/slow speed landings.
Flight Mode 2: This flight mode is for precision flying including snaps.
Flight Mode 3: This flight mode is also for precision flying but used for stall turns, rolling circle
or maneuvers that require more rudder.
Flight Mode 4: This flight mode is mainly for 3D flying.
Note: Flight mode and expos are listed as reference only. Do not hesitate to adjust to
your preference, e.g, increasing expos for 3D rates or decreasing throws for 3D rates.